Quantcast
Channel: Recipes – Panlasang Pinoy
Viewing all 460 articles
Browse latest View live

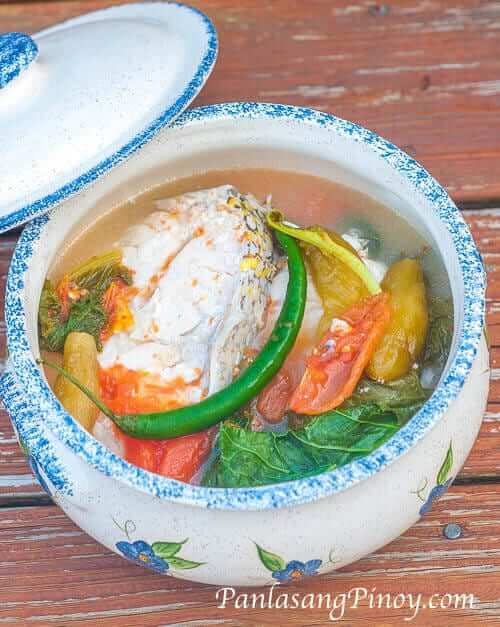
Kinamatisang Isda (Red Snapper with Tomato)

$
0
0

Fish and vegetable dishes are appropriate for most of us this time of the year. Let me share with you my simple version of kinamatisang isda. This is a simple Filipino fish recipe that has a mild flavor. Fish, such as red snapper, is cooked with tomato and onion. The only seasoning that this dish makes use of is fish sauce.

//www.youtube.com/watch?v=VknQ-PgcI4s

Aside from red snapper, you can use any kind of fish that you like when cooking kinamatisang isda. However, I recommend medium to large sized fishes. The tomato and onion are very important for this recipe because the dish derives most of its favor from these ingredients. It is recommended that you maximize your cooking time to extract the most flavors from these.

kinamatisang isda red snapper with tomato

How to Cook Kinamatisang Isda

By watching the video above, you will know that this is a simple and easy fish dish to prepare. Simply boil water and add the tomato and onion. The trick is to simmer the these longer to extract the flavor. You can mash these afterwards to be sure.

Add the fish and let it cook in low to medium heat for a few minutes. Do not attempt to increase the heat because rapid boiling will tear the fish meat apart. It won’t look pretty.

The fish sauce is added towards the end of the cooking process. The amount of fish sauce will depend on your preference. Serve this dish warm with rice.

kinamatisang isda recipe

Try this Kinamatisang Isda Recipe (Red Snapper with Tomatoes). Let me know what you think.

Kinamatisang Isda (Red Snapper with Tomatoes)
 
Prep time
Cook time
Total time
 
Author:
Serves: 3
Ingredients
  • 2 lbs. red snapper, scales and innards removed
  • 4 medium plum tomato, wedged
  • 1 large yellow onion, sliced
  • 5 cups water
  • 2 tablespoons fish sauce
Instructions
  1. Pour water in a cooking pot. Let boil.
  2. Add the tomato and onion. Cover and continue to cook in medium heat for 12 to 15 minutes. You can add more water if needed.
  3. Remove the cover. Mash the tomato and onion to extract the flavor.
  4. Add the fish. Cover and cook in low to medium heat for 15 minutes.
  5. Pour-in the fish sauce. Stir and cook for 3 minutes or until the liquid reduces to your desired amount.
  6. Transfer to a serving bowl. Serve.
  7. Share and enjoy!
Nutrition Information
Serving size: 3
facebooktwittergoogle_pluspinterest

The post Kinamatisang Isda (Red Snapper with Tomato) appeared first on Panlasang Pinoy.


Shrimp Avocado Salad Recipe

$
0
0

Shrimp avocado salad is a tasty meal in itself. The truth is, you can enjoy this chilled as a salad, or wrap it in flour tortilla as fresh shrimp tacos; just add pico de gallo and chile verde. I enjoyed it as a salad and it turned out to be filling too. This was basically a complete dinner meal for me.

shrimp avocado salad

I used fresh shrimp to make shrimp avocado salad. I needed extra time to devein the shrimp and remove its shell. It also requires a few minutes of boiling. You can save time by purchasing precooked medium shrimp. all you need to do is thaw the shrimp and soak it in warm water before tossing it withe the rest of the ingredients; you can even microwave it too if time is limited.

How to Make Shrimp Avocado Salad

Prepare the shrimp by removing the shell and veins. As mentioned above, you can use precooked shrimp to skip this step. Once the shrimp is ready, set it aside and prepare the avocado and sour cream mixture.

Slice the avocado into cubes. This tutorial will give you an idea on how it is done. Combine the sour cream, garlic powder, lime juice, and salt in a bowl. The amount of salt will depend on your preference. Taste the mixture first before adding salt. Add the avocado and then start to fold the ingredients. Add the shrimp last and top with chives.

Give this simple yet tasty Shrimp Avocado Salad Recipe a try. Let me know what you think.

Shrimp Avocado Salad Recipe
 
Prep time
Cook time
Total time
 
Author:
Serves: 3
Ingredients
  • 1 pound shrimp, deveined and shell removed
  • 2 cups water
  • 2 ripe avocado, cubed
  • ¼ teaspoon garlic powder
  • 6 tablespoons sour cream
  • juice from 1 lime
  • salt to taste
  • chives for garnish
Instructions
  1. Boil water in a cooking pot. Add the shrimp and cook for 1 to 2 minutes or until color turns medium orange. Remove the shrimp from the pot and discard the water. Set aside.
  2. Combine sour cream, lime juice, garlic powder, and salt in a large bowl. Mix well.
  3. Add the avocado. Fold until all ingredients are well blended.
  4. Fold-in the boiled shrimp.
  5. Transfer to a serving bowl. Top with chives.
  6. Serve chilled. Share and enjoy!
Nutrition Information
Serving size: 3

shrimp avocado salad recipe facebooktwittergoogle_pluspinterest

The post Shrimp Avocado Salad Recipe appeared first on Panlasang Pinoy.

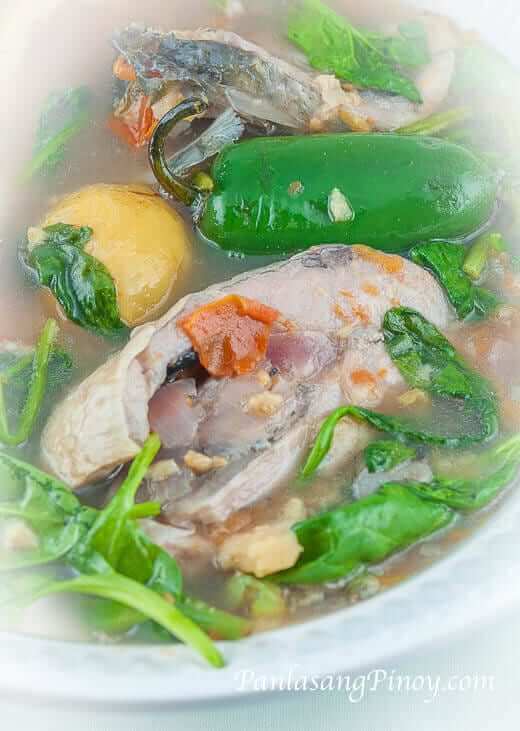
Sinigang na Lapu lapu sa Miso

$
0
0

Sinigang na Lapu lapu sa miso is a Filipino sinigang version that makes use of grouper fish. Just like any other sinigang dishes, this is simple and easy to cook. The outcome is a great tasting dish that will test your self control in terms of having more rice than your usual consumption.

//www.youtube.com/watch?v=Ny3q8eeNaWE

I made this dish using the traditional way of cooking sinigang sa sampaloc. This requires unripe tamarind to be boiled for a long time until all the juices from it are extracted. Manually squeezing the juice out of the boiled tamarind also helps.

We also have a similar dish that makes use of kamias or bilimbi. It is called sinigang na isda sa kamias.

How to cook Sinigang na Lapu lapu sa Miso

As I’ve mentioned, this dish is cooked using the traditional way. Prepare the tamarind by boiling water in a pot. Put the tamarind in boiling water and boil until it becomes soft. This can take between 30 to 50 minutes. Extract all the juices from the tamarind and filter using a sieve.

Boil the liquid in a clean pot and add the onion, tomato, and miso. You will have to cook these until the onion and tomato gets really soft. Add the fish along with the radish, okra, and peppers. Cook until the fish is done. Season with some fish sauce and then add the mustard leaves last.

This is best served hot along with a cup of white rice.

sinigang na lapu lapu sa miso

Try this Sinigang na Lapu lapu sa miso recipe. Let me know what you think.

Sinigang na Lapu lapu sa Miso
 
Prep time
Cook time
Total time
 
Author:
Serves: 4
Ingredients
  • 2 lbs. grouper (lapu lapu), cleaned and sliced
  • a bunch of mustard leaves
  • 10 pieces okra
  • 1 large onion, sliced
  • ¾ cup daikon radish, sliced (optional)
  • 3 large tomato, wedged
  • 4 long green peppers
  • ¼ cup miso paste
  • 12 pieces unripe tamarind
  • 6 cups water
Instructions
  1. Boil water in a cooking pot. Add the tamarind.Cover and continue to boil in medium heat for 40 minutes. Let it cool down.
  2. Using a sieve, strain the boiled tamarind towards a clean cooking pot.
  3. Boil the liquid and then add tomato, onion and miso. Cover and cook for 15 minutes.
  4. Add the fish, daikon radish, okra, and peppers. Cover and cook for 12 to 15 minutes in low to medium heat.
  5. Pour-in the fish sauce. Stir.
  6. Add the mustard leaves.Cover and cook for 3 to 5 minutes.
  7. Transfer to a serving bowl. Serve.
  8. Share and enjoy!
Nutrition Information
Serving size: 4

sinigang na lapu lapu sa miso recipe

The post Sinigang na Lapu lapu sa Miso appeared first on Panlasang Pinoy.

Daing na Bangus Recipe

$
0
0

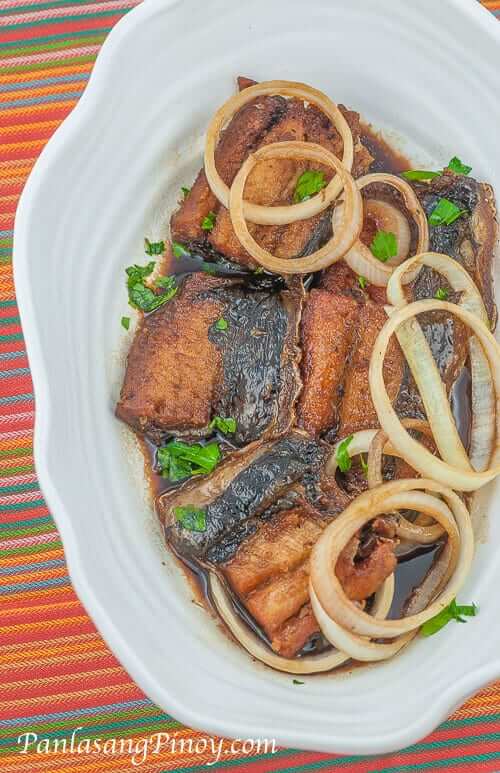
Daing na Bangus refers to milkfish that is marinated in a mixture composed of vinegar, crushed peppercorn, garlic, and salt. Hot pepper such as cayenne pepper powder can be added to make it spicy. It is usually marinated overnight for best results, and then fried until crispy.

daing na bangus recipe - marinated milkfish

Unlike traditional daing wherein the fish is salted and then soaked under the sun for a day or two, this daing na bangus recipe in particular, do not need the heat of the sun. This makes this version more pleasurable because the meat do not get tough ( which often happens to most dried fishes).

Daing na bangus is best for breakfast and lunch. The term BangSiLog ws coined from a meal combination composed of daing na bangus, Sinangag (garlic fried rice), and fried egg. It can also be eaten simply with warm white rice.

The bangus belly (or the tiyan ng bangus) is the best and tastiest part as far as I am concerned. I liked it so much and I had a hard time resisting the call for a quick pinch. The images that I took will show. It was really good.

Try this Daing na Bangus Recipe. Let me know what you think.

Daing na Bangus Recipe
 
Prep time
Cook time
Total time
 
Author:
Serves: 2
Ingredients
  • 1 medium sized milkfish, cleaned and scales removed
  • 10 tablespoons white or cane vinegar
  • 1 teaspoon crushed peppercorn
  • 1 head garlic, crushed
  • ¼ teaspoon cayenne pepper powder (optional)
  • ½ teaspoon coarse sea salt
  • ½ cup cooking oil
Instructions
  1. Combine vinegar, pepper, salt, garlic, and cayenne pepper powder in a bowl. Stir to mix the ingredients. Set aside.
  2. Butterfly the bangus (slice from the top) and the place it inside a large re-sealable plastic bag.
  3. Pour the vinegar mixture in the bag and then let all the air out. Seal the bag and refrigerate overnight.
  4. Remove the fish from the bag and let the liquid drip.
  5. Heat the cooking oil in a pan. Once the oil gets hot, fry the fish in medium heat until one side gets crisp. Turn it over and repeat the process on the other side.
  6. Remove from the pan and place in a serving plate. Serve with bowl of spicy vinegar.
  7. Share and enjoy!
Nutrition Information
Serving size: 2

daing na bangus

The post Daing na Bangus Recipe appeared first on Panlasang Pinoy.

Beef Teriyaki Tapa with Fried Rice and Egg

$
0
0

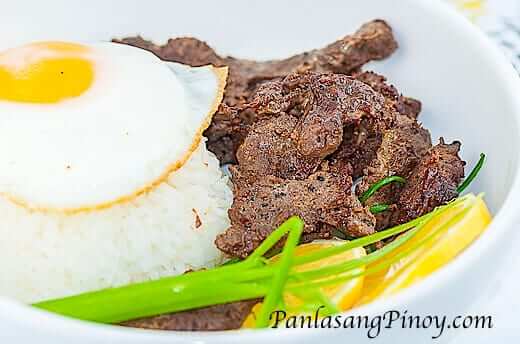
Beef teriyaki tapa with fried egg is another version of tapsilog that I want to share with you. This makes use of beef steak (that was sliced thinly) and our homemade teriyaki sauce. The result is a delicious sweet tapsilog that I always enjoy to have.

beef teriyaki tapa with fried rice and egg recipe

I got the beef steak already prepared. Apparently, the nearby Mexican meat shop has this beef cut ready. It is called beef taco meat. It is intended for beef tacos and burritos, but we can leverage on it to make whatever we like. That is the reason why I used it to make this beef teriyaki tapa.

Chances are that other won’t be as privileged. Don’t worry because you just need to buy a good kind of meat (like rib eye steak) and slice it yourselves, or even ask your butcher to do it for you. I hope that I was as privileged when it comes to the availability of fresh seafood and Asian vegetables. I needed to travel far from where I am at in the suburbs of Chicago for these.

Tips on How to Cook Beef Teriyaki Tapa with Fried Rice and Egg

The beef will need to be marinated in teriyaki sauce. The recipe below will tell you how it can be done and a link is also available for you to see the homemade teriyaki sauce recipe. My only tip about marinating beef (and most meats in general) is that it will absorb most of the flavor when marinated for longer hours.

When cooking the beef, it is normal for liquid to come out of the meat. These are the natural juices and the marinade. Continue to cook the meat in medium heat until the juices completely evaporates. This will help make the meat tender and tastier. The beef will be tenderized by the boiling process, while the evaporation of liquid will make the sauce more saturated which means more flavor.

The garlic fried rice is made using the Filipino way – sinangag. You can refer to the link below on how it’s done or you can also check out this sinangag recipe.

There are more than a hundred ways to cook eggs. I included a link in the recipe that will give you an idea on 10 of the ways to cook eggs. It is up to you to choose.

Try this Beef Teriyaki Tapa with Fried Rice and Egg recipe. Let me know what you think.

Beef Teriyaki Tapa with Fried Rice and Egg
 
Prep time
Cook time
Total time
 
Author:
Serves: 2
Ingredients
Instructions
  1. Arrange the sliced beef in a medium bowl. Pour the teriyaki sauce in the bowl and then mix. Cover and refrigerate for at least 1 hour.
  2. Heat the cooking oil in a pan. Once the oil gets hot, put the beef in the pan including the marinade. Stir fry for 5 to 10 minutes or until the sauce completely evaporates.
  3. Cook the egg depending on your preference. See this post about ways on how to cook eggs.
  4. Arrange a cup of garlic fried rice in a plate along with the egg. Put half of the beef teriyaki tapa on the plate and then serve.
  5. Share and enjoy!
Nutrition Information
Serving size: 2

beef teriyaki tapa with fried rice and egg

The post Beef Teriyaki Tapa with Fried Rice and Egg appeared first on Panlasang Pinoy.

Utan Bisaya (Boiled Vegetables)

$
0
0

Utan bisaya is a simple Filipino vegetable dish that is composed of a variety of veggies. The vegetables are boiled in water and sometimes fish is added. It has a close similarity with other Philippine regional dishes such as dinengdeng or inabraw (Ilocos region), bulanglang (CALABARZON), and laswa ( Western Visayas).

//www.youtube.com/watch?v=_vdeno12FhA

This dish might look plain and simple, but it is packed with vitamins and nutrients that can boost our health (as long as you limit your rice intake). The fish in this recipe along with the long green pepper are optional ingredients. I added these because I want my dish to be tastier and spicy.

utan bisaya

This dish always make me appreciate the natural taste of vegetables. Since it does not contain any seasoning other than salt, I am able to enjoy eating the vegetables in its simplest form.

Try this Utan Bisaya (Boiled Vegetables) recipe. Let me know what you think.

Utan Bisaya
 
Prep time
Cook time
Total time
 
Author:
Serves: 4
Ingredients
  • 1 medium eggplant, sliced
  • 10 pieces okra
  • 2 thumbs ginger, sliced
  • 1 medium tomato, wedged
  • 5 scallions, sliced
  • 1½ cups spinach or alugbati
  • 1½ cup calabaza squash, cubed
  • 1 cup malunggay leaves
  • 2 long green pepper
  • 2 slices baked fish fillet
  • 1 to 2 cups string beans, cut into 2 inch length
  • 1 cup sliced loofah (patola)
  • salt to taste
  • 2 cups water
Instructions
  1. Bring the water to a boil.
  2. Add the ginger and squash. Continue to boil for 8 minutes (covered).
  3. Stir-in the string beans, scallions, okra, and tomato. Let the liquid re-boil and then add the long green pepper and eggplant.
  4. Stir and add the fish. Cover and cook for 10 minutes.
  5. Add the payola and malunggay leaves. Cover and cook for 3 to 5 minutes. Add some salt to taste and spinach.
  6. Transfer to a serving bowl. Serve.
  7. Share and enjoy!
Nutrition Information
Serving size: 4

utan bisaya recipe

The post Utan Bisaya (Boiled Vegetables) appeared first on Panlasang Pinoy.

Tortang Talong with Crab Meat (Eggplant Omelet with Crab)

$
0
0

Tortang talong or eggplant omelet has always been my go to dish when I do not like to eat meat, but want something decent and quick to prepare. I enjoy eating it with rice and banana ketchup. Tortang Talong with Crabmeat is even better because it has the good taste and texture of eggplant omelet plus the crabmeat.

//www.youtube.com/watch?v=dTsN24GAahs

This dish is quite easy to prepare. The video will show you the exact steps that I did, while the recipe below will show you the exact measurements of the ingredients. If you are doing this for the first time, note that the eggplant needs to be broiled or roasted (not boiled) before peeling off the skin. The traditional way to do it is to put the eggplant directly over fire or charcoal.

I used fresh crab meat that I got from the nearby grocery. These came from crab claws according to the details in the package. You can also use frozen crab meat as long as it has been thawed. If you are in the Philippines or any location where crabs are abundant, it is perfect to use the meat of a freshly steamed crab.

This is a nice dish to cook as an alternative for meat. I hope that this recipe, the cooking video, and this tip can help guide you to cook tortang talong with crab meat.

tortang talong with crab meat - eggplant omelet

Try this Tortang Talong with Crabmeat (Eggplant Omelet with Crab) recipe. Let me know what you think.

Tortang Talong with Crabmeat (Eggplant Omelet with Crab)
 
Prep time
Cook time
Total time
 
Author:
Serves: 3
Ingredients
  • 3 medium chinese eggplants (broiled for 12 minutes)
  • 4 eggs
  • 1 cup fresh crabmeat
  • 1 medium yellow onion, chopped
  • ¼ teaspoon salt
  • ¼ teaspoon garlic powder
  • a dash of ground black pepper
  • 8 tablespoons cooking oil
Instructions
  1. Heat a pan and pour-in 3 to 4 tablespoons of oil.
  2. Saute the onion until soft.
  3. Add the crabmeat. Stir fry for 2 to 3 minutes.
  4. Add salt, ground black pepper, and garlic powder.Cook for 1 minute. Transfer to a bowl and then set aside.
  5. Peel the eggplants. Make sure to completely remove the skin.
  6. Lay a piece of eggplant flat in a plate and then flatten it using a fork.
  7. Heat a clean pan and pour-in remaining oil.
  8. Dip the flattened eggplant in beaten egg. Put in the pan with oil to fry. Scoop some of the cooked crabmeat and spread on top of the eggplant. Pour 2 to 3 tablespoons of beaten eggs over the meat.Push or scoop hot oil over the eggplant to partially cook the egg. This will hold the crabmeat and prevent it from falling.
  9. After 3 minutes, turn over the eggplant using a spatula. Cook the other side for 3 to 5 minutes.
  10. Transfer to a serving plate. Serve!
  11. Share and enjoy!
Nutrition Information
Serving size: 3

tortang talong with crab

The post Tortang Talong with Crab Meat (Eggplant Omelet with Crab) appeared first on Panlasang Pinoy.
How to Cook Papaya Atchara

$
0
0

Papaya atchara is the Filipino version of pickled green papaya. This is usually eaten along with fried or grilled foods. I think that chicken inasal is best with some papaya atchara on the side, so does grilled liempo.

//www.youtube.com/watch?v=RNqYAuZttws

This recipe for papaya atchara differs from the first version in terms of the ingredients used. I also shot a new video in HD format to provide you with a better viewing experience.

I used mason jars to store the atchara. These jars are reliable and are made for this purpose. The papaya can sometimes still be not soft enough after following this recipe. This is because it was probably thick or just really tough. If you are experiencing this, you can cook the atchara in the jar — all you have to do is arrange the jars in a deep and flat cooking pot (make sure that the jars are sealed), pour water unitl it reaches half the height of the jars, and boil it for 15 minutes in medium heat. Doing this can also prevent the garlic from turning blue.

Since spring is almost here, maybe you can so some grilled pinoy pork chop outside and have your homemade papaya atchara go with it. I hope that this recipe, tips, and video can be of help to you. If you have questions, let me know.

papaya atchara filipino pickeled papaya

How to Cook Papaya Atchara
 
Prep time
Cook time
Total time
 
Author:
Serves: 4
Ingredients
  • 3 lbs shredded green papaya
  • 1 medium carrot, thinly sliced
  • 1 small red bell pepper, julienne
  • ¾ cups raisins
  • 1 head garlic, sliced
  • 4 thumbs ginger, julienne
  • 2 cups vinegar
  • 1⅓ cups granulated white sugar
  • 1 teaspoon salt
  • ½ teaspoon ground black pepper
Soak tha papaya in
  • 5 cups water
  • 4 tablespoons salt
Instructions
  1. Combine water and 4 tablespoons salt in a mixing bowl. Stir.
  2. Add the shredded papaya. Cover and place inside the refrigerator. Soak for 2 days.
  3. Put the papaya in a cheesecloth in a way that it is trapped in the center. Gently rotate the cheesecloth while tightly holding one end. Continue to rotate until the papaya completely releases liquid. Do this more than once for better results.
  4. Arrange the papaya in a mixing bowl. Add all the vegetables and raisin. Toss and set aside.
  5. Make the syrup by heating the vinegar in a cooking pot. Once it starts to boil, add sugar and 1 teaspoon salt. Mix well and cook for 1 to 3 minutes.
  6. Put the papaya mixture in a mason jar. Do not completely fill the jar, leave a little space for the syrup.
  7. Gently pour the hot syrup in each jar. Quickly close the lid. This will somewhat cook the papaya and veggies and will make it a bit softer.
  8. Let it cool and then refrigerate, or simply store in a shelf in room temperature.
  9. Serve with Lechon Kawali and Crispy Pata.
Nutrition Information
Serving size: 4

papaya atchara recipe pickled papaya filipino

The post How to Cook Papaya Atchara appeared first on Panlasang Pinoy.


Creamy Baked Spaghetti

$
0
0

Creamy baked spaghetti is one of the comfort foods that I regularly prepare to pamper myself. I indulge in its rich creamy sauce and excellent taste. If I do not have this dish in the table when I crave for pasta on my comfort food day, guess what am I having — baked macaroni, of course.

This baked spaghetti recipe might take a while to complete, but the result is worth the time and effort. Always keep your eyes on the price.

creamy baked spaghetti

I prepared this creamy baked spaghetti by first cooking the spaghetti. Simply follow the package instructions, drain, and then set aside. It will be nice if you cover the container so that the spaghetti won’t dry out quickly.

The meat sauce that I had was from another spaghetti meat sauce recipe that I published a few years ago. It is really good. The link is provided in the recipe below. You will need the exact amount of ingredients listed in the meat sauce recipe. For this creamy spaghetti, adding a quarter cup of cream cheese to the meat sauce makes a huge difference.

What makes this really creamy and delightful is the mornay sauce. This is composed of milk, butter, flour and Parmesan cheese. This is spread over the spaghetti with meat sauce after arranging it in a baking pan. Sharp cheddar or quickmelt cheese is sprinkled on top of the mornay sauce before baking it.

creamy baked spaghetti in pan

Try this creamy baked spaghetti recipe. Let me know what you think..

Creamy Baked Spaghetti
 
Prep time
Cook time
Total time
 
Author:
Serves: 4
Ingredients
  • 1 lb spaghetti
  • Spaghetti meat sauce (use this recipe)
  • ¼ cup cream cheese
  • 1½ cup sharp cheddar cheese
mornay sauce
  • 4 tablespoons butter
  • 6 tablespoons all-purpose flour
  • 2 cups fresh milk
  • 3 tablespoons shredded Parmesan cheese
Instructions
  1. Cook the spaghetti according to package instructions. Drain and set aside.
  2. Make the meat sauce by following the link to the recipe above. Use the exact amount of ingredients indicated in the recipe.
  3. Add the cream cheese to the meat sauce and stir until well blended. Turn the heat to off.
  4. Make the mornay sauce by melting butter in a saucepan. Once the butter melts, add the flour. Quickly stir until the flour absorbs the butter (it will look like a big lump, that is fine though). Pour-in the milk and then stir until all the ingredients are well blended. Continue to stir until the milk starts to get thicker. Add Parmesan cheese and stir until the texture gets thick enough (like soft pudding). turn the heat off and set aside.
  5. Pre-heat the oven to 350F.
  6. Meanwhile, combine the cooked spaghetti with the meat sauce in a large mixing bowl. Toss to blend the ingredients. Arrange the mixture in a baking pan. Pour the mornay sauce on top and then spread all over. Sprinkle cheddar cheese on top.
  7. Bake the spaghetti for 18 to 20 minutes.
  8. Serve. Share and enjoy!
Nutrition Information
Serving size: 4

The post Creamy Baked Spaghetti appeared first on Panlasang Pinoy.
Ginisang Gulay (Vegetable Saute)

$
0
0

Ginisang Gulay is a simple sauteed vegetable dish. It is composed of eggplant, squash, okra, amapalaya (bitter gourd), and string beans. The combination of vegetables resembles a Filipino dish called Pinakbet. However, there are notable differences between the two dishes in terms non veggie ingredients.

This simple vegetable dish is fast to make and good for the health. It can be eaten with rice. So, if you want to go healthy all along then have this with brown rice and try to lessen the oil and salt. This is a perfect dish for the holy week since it does not have meat.

//www.youtube.com/watch?v=OnFEfA0TCZY

How to Cook Ginisang Gulay

Star by heating the cooking oil. You can use canola oil for this recipe. Saute the onion and garlic and add the tomato. Use any kind of tomato that you prefer, as long as it is red and ripe. Add the kalabasa (squash) and cook it for a few minutes to help it get softer. You can use acorn squash or butternut squash for this recipe. Add the remaining vegetables and stir fry for a few minutes before adding the vegetable broth. The broth is nice to have. Use water if it is not available. Cover and let it cook for at least 5 minutes. Add salt and pepper to taste. That’s it! Quick and easy.

If you like to have options, pairing this with fried or grilled fish is a good idea. I usually have this with Inihaw na bangus or sometimes with fried tilapia. When I feel like combining dishes, I place the fish on top of the veggies to make it look like dinengdeng.

ginisang gulay recipe

Try this ginisang gulay recipe. Let me know what you think.

Ginisang Gulay
 
Prep time
Cook time
Total time
 
Author:
Serves: 3
Ingredients
  • 1 medium bitter gourd (ampalaya), cored and sliced
  • 6 to 8 pieces okra
  • 1 cup sliced tomatoes
  • 8 pieces string beans sliced in 2 inch pieces
  • 1 medium Chinese eggplant
  • ¾ cups vegetable broth
  • 1 medium yellow onion, sliced
  • 1½ cups cubed calabaza squash
  • 4 cloves garlic, crushed
  • salt and pepper to taste
  • 3 tablespoons cooking oil
Instructions
  1. Heat oil in a pan.
  2. Saute garlic and onion.
  3. Add the tomato when the onion gets soft. Cook for 2 minutes.
  4. Add the calabaza squash. Stir and cook for another 2 minutes.
  5. Put the eggplant, okra, string beans, and bitter gourd in the pan. Stir fry for 3 minutes.
  6. Pour the vegetable broth. Cover and cook for 5 to 7 minutes.
  7. Remove the cover. Add salt and pepper to taste.
  8. Transfer to a serving plate. Serve and enjoy!
Nutrition Information
Serving size: 3

ginisang gulay_

The post Ginisang Gulay (Vegetable Saute) appeared first on Panlasang Pinoy.

Tomato and Onion with Bagoong Isda

$
0
0

Have you had a side dish composed of chopped tomato, onion, and bagoong isda? Actually, this can also be both a side dish and a main dish at the same time, and it is best eaten with steamed white rice, in my opinion. The preparation of this concoction can be different on every region in the Philippines because of the type of fermented fish available.

Tomato onion and bagoong isda

I just had this for good friday lunch along with fried tilapia. It was a simple meal, but it was delicious. I know that I should eat less during these days, but the good taste of the side dish made me have more rice.

Some people might need to develop an acquired taste for them to like this dish. In my case, it was not needed since I grew-up in Manila and was able to taste several similar dishes. To me, this is better than fancy food.

Some of the types of bagoong isda (fermented fish) that can be used to make this dish are bagoong monamon, bagoong terong, guinamos, and bagoong balayan.

Try making this Tomato and Onion with Bagoong Isda side dish and let us know how you like it.

Chopped Tomato and Onion with Bagoong Isda
 
Prep time
Cook time
Total time
 
Author:
Serves: 2
Ingredients
  • 2 medium plum tomatoes, diced
  • 1 small yellow onion, chopped
  • 2 tablespoons chopped scallion (dahon ng sibuyas)
  • 5 tablespoons bagoong isda (fermented fish)
  • 1 piece lemon or 3 pieces calamansi
  • ⅛ teaspoon ground black pepper
Instructions
  1. Combine tomato, onion, and bagoong in a bowl. Mix well.
  2. Add lemon or calamansi and ground black pepper. Continue to mix until well blended.
  3. Top with chopped scallions.
  4. Serve with fried fish or bagnet. Share and enjoy!
Nutrition Information
Serving size: 2


The post Tomato and Onion with Bagoong Isda appeared first on Panlasang Pinoy.

Ground Beef Omelet

$
0
0

Ground Beef Omelet is good for breakfast or brunch. This dish, in particular, can be consumed with either rice or bread. It is simple, delicious, and filling.

I grew-up eating a lot of it because it is something that my mom used to make back then in Las Pinas. I will have it with warm steamed rice along with banana ketchup. There are times when I eat ground beef omelet with sinangag. If I want to eat it with bread, I have it either with tasty bread (loaf bread) or pandesal.

ground beef omelet recipe

Now I am enjoying the same great tasting beef omelet even if I am away from the Philippines. No, I did not cook this myself — I just ate this for brunch. The expert cook who used to make this delightful dish came to visit. I am glad that after a while someone is cooking for me.

My mom keeps herself busy in the kitchen. She already made her Filipino version of lasagna, nilagang litid ng baka, pork and chicken adobo, and pork sinigang. She plans to do more dishes and I get to taste them all. It is like my childhood nostalgia that came true.

Try this ground beef omelet recipe. Happy cooking!

Ground Beef Omelet
 
Prep time
Cook time
Total time
 
Author:
Serves: 3
Ingredients
  • 4 eggs
  • ½ lb. ground beef
  • 1 small yellow onion, chopped
  • 1 small green bell pepper, chopped
  • 2 tablespoons Worcestershire sauce
  • 6 tablespoons cooking oil
  • salt and pepper to taste
Instructions
  1. Prepare the ground beef filing by heating 3 tablespoons of cooking oil in a pan.
  2. Add the onion. Cook until soft.
  3. Add the chopped bell pepper and ground beef. Brown the beef (cook around 3 to 5 minutes).
  4. Sprinkle some salt and pepper (adjust the amount to your preference) and pour-in the Worcestershire sauce. Stir and cook for 4 to 5 minutes. Remove from the pan and set aside.
  5. Start to make the omelet by cracking the eggs in a bowl. Sprinkle a bit of salt. Whisk the eggs until the texture is smooth.
  6. Heat the remaining oil in a pan.
  7. Once the oil starts to heat-up, slowly pour ⅓ of the beaten egg on the pan. Let it cook in low to medium heat until the egg starts to form.
  8. Turn the egg over using a spatula. Scoop ⅓ of the cooked ground beef over one side of the egg. When the other side of the egg forms and starts to solidify, fold the other half to cover the side with ground meat.
  9. Remove the omelet from the pan and transfer to a serving plate. Perform the same steps until all the ingredients are consumed.
  10. Serve with rice or bread. Share and enjoy!
Nutrition Information
Serving size: 3

ground beef omelet_

The post Ground Beef Omelet appeared first on Panlasang Pinoy.

Nilagang Litid ng Baka

$
0
0

Nilagang Litid ng Baka or beef tendon soup is a Filipino soup dish composed of beef tendons, cabbage, and potato. This is a variation of the traditional nilaga (also known to some people as linaga) using very basic ingredient.

Nilagang litid recipe

Nilaga dishes such as this nilagang litid ng baka is eaten while the soup is very hot (just like with bulalo). A saucer with a mixture of fish sauce, chili peppers, and lemon (or calamansi) is commonly seen at the side and acts as a condiment. This dish can be enjoy better when eaten with a cup of white rice

Beef tendons are likely present on the shoulder part of the beef; for this reason, I always get beef shoulder bones whenever I am making nilagang litid ng baka. Tendons are tissues that connect muscles to the bones.

This dish was prepared by my mom on my request.  She came to visit us, and she does most of the cooking at home these days — to which I am very thankful for.

Nilagang Litid ng Baka
 
Prep time
Cook time
Total time
 
Author:
Serves: 4
Ingredients
  • 2 lbs. beef shoulder bones with tendons
  • ½ small cabbage, core removed and quartered
  • ½ tablespoon whole peppercorn
  • 2 large potato, peeled and quartered
  • 1 medium onion, wedged
  • 2 tablespoons fish sauce
  • 6 to 8 cups water
  • 2 cups beef broth (optional)
Instructions
  1. Pour water and beef broth in a soup pot. Let boil
  2. Add the whole peppercorn and onion. Boil for 5 minutes.
  3. Put the beef shoulder bones in the pot. Cover and then let the liquid return to a boil. Adjust the heat between low to medium. Cook for 60 to 120 minutes.
  4. Once the tendons are tender (this has a tendency to slip-off the bones), add the potato and cabbage. Cook for 5 minutes.
  5. Add the fish sauce. Adjust the taste by adding more if needed. Cook for 5 more minutes.
  6. Transfer to a serving bowl. Serve with a saucer of spicy fish sauce with lemon and a cup of rice on the side.
  7. Share and enjoy!
Nutrition Information
Serving size: 4


Nilagang litid ng baka

The post Nilagang Litid ng Baka appeared first on Panlasang Pinoy.

Ginataang Mais at Monggo

$
0
0

Ginataang Mais at Monggo is a combination of ginataang mais and ginataang monggo. I enjoy having both dishes for merienda and today I am craving for both at the same time — so I made a single dish that is somewhat a hybrid.

To be honest, I am not sure how this Ginataang Mais at Monggo idea will turn out. Sure, both dishes taste good when eaten separately, but it does not guarantee that the result will be at least good if both dishes are combined into one. However, the doubt was cleared when I tastes the result; it was good, or should I say even better than having each dish on separate instances . I think that this experiment was a success.
ginataang mais at monggo

To me, there are only two ways to enjoy Ginataang Mais at Monggo: eat it while it is hot, or enjoy it when is chilled. I like it cold as a dessert, while it should be really hot during merienda time.

Let me share with you the steps on how I made the toasted mung beans (tustadong monggo). Here is how I did it: heat an empty frying pan. Once the pan is hot, scoop a cup of fresh hard mung beans and pour it on the pan. Toast the beans over medium heat while trying to move the pan in a forward and backward motion every few seconds. This will help cook the beans evenly. Continue toasting until the mung beans turn brown. Let the mung beans cool down and then crack it using a mortar and pestle tool.

Use either fresh sweet corn, frozen sweet corn, or sweet corn on the can. White corn can also be used, but you will have to add additional sugar to balance the sweetness. If you have questions, let me know by commenting below.

Try this delicious Ginataang Mais at Monggo for dessert or merienda. Let me know what you think.

Ginataang Monggo at Mais
 
Prep time
Cook time
Total time
 
Author:
Serves: 6
Ingredients
  • 6 cups coconut milk
  • ¾ cups sweet rice (malagkit)
  • 1 cup toasted mung beans (cracked)
  • 1 cup sweet corn
  • 1 cup granulated white sugar
  • 1 teaspoon vanilla extract
  • ¼ teaspoon salt (optional)
Instructions
  1. Pour the coconut milk in a cooking pot. Let boil.
  2. Stir-in the sweet rice (also known as glutinous rice). Cook for 5 minutes in medium heat while stirring every minute.
  3. Add the toasted mung beans. Stir and cook for 6 to 8 minutes.
  4. Stir the corn in the pot. Continue to cook while constantly stirring for 8 to 10 minutes.
  5. Add the sugar stir.
  6. Pour-in the vanilla extract. Stir and cook until the mung beans are soft. Add salt, if preferred.
  7. Transfer to a serving bowl. Serve hot.
  8. Share and enjoy!
Nutrition Information
Serving size: 6

ginataang mais at monggo

The post Ginataang Mais at Monggo appeared first on Panlasang Pinoy.

Pinoy Beefsteak

$
0
0

Pinoy beefsteak is a version of bistek tagalog that makes use of beef skirt steak. It has the same delicious taste and it is simple to prepare. I had a couple cups of rice when I had this, so please be forewarned — this can be an obstacle if you are on a low carb diet (unless you can resist having it without rice).

pinoy beefsteak tagalog

The skirt steak are usually sliced thinly before being packaged in the supermarkets. If it is not, you can request your butcher to slice it thinner so that you won’t be doing it later on. It will be ideal of the beef is marinated in soy sauce and lemon (or calamansi) for at least an hour. This will make your pinoy beefsteak tastes better because the meat will be more tasty.

Start by heating the oil in a pan or cooking pot. Pan fry the marinated beef and then add the remaining marinade (this is the mixture of soy sauce and lemon in the bowl where the beef was marinated). Also add the garlic powder. Since we want the beef to be super tender, add a cup of water and let the beef cook for a while. You might need to add more water later on if needed. I am also using beef cube to enhance the flavor of this dish. It is a low cost alternative to beef broth and it works.

I like my beefsteak with lots of onion. This was the reason why I used 2 pieces of medium sized yellow onion for this recipe. You can always adjust the amount of onion depending on your preference. Enjoy!

Try this delicious Pinoy Beefsteak recipe. Let me know what you think.

Pinoy Beefsteak
 
Prep time
Cook time
Total time
 
Author:
Serves: 4
Ingredients
  • 2 lbs. beef skirt steak
  • 6 tablespoons soy sauce
  • 1 lemon
  • 1 teaspoon garlic powder
  • 2 medium yellow onions, sliced crosswise
  • 1 cup water
  • 1 piece beef bouillon
  • 1 teaspoon granulated white sugar
  • 3 tablespoons cooking oil
  • salt and pepper to taste
Instructions
  1. Slice the beef into serving pieces.
  2. Arrange the beef in a bowl. Pour the soy sauce and squeeze the lemon juice. Mix the ingredients and marinate for 1 hour.
  3. Heat the oil in a pan.
  4. Pan fry the marinated beef in medium heat for 1 to 1½ minutes per side.
  5. On the same pan,pour-in the remaining marinade (soy sauce and lemon mixture used to marinate the beef). Add water and garlic powder. Let boil.
  6. Add the beef bouillon (also known as beef cube) and then stir. Cover the pan and cook in low to medium heat for 30 to 45 minutes. Cook longer if needed, but make sure to add more water to ensure that the mixture do not get dry.
  7. Add sugar, onion, salt, and ground black pepper. Stir and cook for 5 to 7 minutes. Note: make sure that there is still some sauce left before serving. If the there is not enough, add a bit of water or beef broth and cook for 5 more minutes before serving.
  8. Transfer to a serving plate. Serve.
  9. Share and enjoy!


The post Pinoy Beefsteak appeared first on Panlasang Pinoy.

Slow Cook Pork Afritada

$
0
0

Slow cooked meat is tender and more flavorful. This is because cooking on low heat for a long period of time breaks down and melts collagen in the meat. This helps bring out the flavor and makes the meat extra tender. Slow Cook Pork Afritada is no exception.

slow cook pork afritada

Slow Cook Pork Afritada is very easy to prepare. Simply sear the pork for a few minutes before adding it in the slow cooker with the rest of the ingredients. Slow cook for 4 hours if in high mode or 8 hours if in low mode.

Searing the pork beforehand will give it a nice caramelized crust. You can skip this step by just adding the raw pork in the slow cooker, but there is a noticeable difference in terms of texture and taste. A few minutes of searing is worth it.

Aside from pork, this recipe can also be used for beef and chicken. The end result is a flavorful afritada dish that you can enjoy anytime. Have it with rice for lunch or soda crackers for dinner. The leftover can be refrigerated and eaten for breakfast the next morning with a slices of tasty bread.

By the way, you can add a small can of liver spread if you want to make this dish be even more tasty. It will be like pork kaldereta then.

Try this Slow Cook Pork Afritada. Let me know what you think.

Slow Cook Pork Afritada
 
Prep time
Cook time
Total time
 
Author:
Serves: 4
Ingredients
  • 2 lbs. pork shoulder, sliced into cubes
  • 1 medium red bell pepper, cut into squares
  • 1 can (14.5 oz.) diced tomato
  • 3 tablespoons tomato paste
  • 1 medium yellow onion, minced
  • 1 teaspoon minced garlic
  • 3 pieces dried bay leaves
  • 1 beef cube
  • ½ cup water
  • 1 large baking potato, cubed
  • 3 tablespoons cooking oil.
  • salt and pepper to taste
Instructions
  1. Heat oil in a pan.
  2. Once the oil gets hot, sear the pork for 2 to 4 minutes until brown.
  3. Arrange the seared pork in a slow cooker and add all the ingredients except for the salt and pepper in a slow cooker. Cover and slow cook in high mode for 4 hours (if you have time, set it to low and slow cook for 8 hours).
  4. Remove the cover. Gently stir the mixture and add salt and ground black pepper as necessary.
  5. Serve with warm rice. Share and enjoy!
Nutrition Information
Serving size: 4

The post Slow Cook Pork Afritada appeared first on Panlasang Pinoy.

Fruit Cocktail Float

$
0
0

Fruit Cocktail Float is a quick and easy dessert dish that you can whip-up anytime. It does not involve baking and it is so easy to make. I recommend this dish for beginners because of its simplicity. You should be able to make this dish without any issues as long as you follow our step by step recipe.

This dessert is similar to peach refrigerator cake, but only better.
fruit cocktail float recipe

Fruit cocktail float won’t be complete without canned fruit cocktail. I have to add Maraschino cherries because I noticed that most brands of canned fruit cocktail do not contain much cherries, contrary to the graphic displayed on the can. Sometimes, I think that it is deceiving to consumers, but this post is all about the recipe, so I will forget about my whining for now.

Note that I am using “heavy” whipping cream for this recipe. You will get better results if you follow the exact ingredients listed below. Regular whipping cream (not heavy) can still be used though, if heavy whipping cream is not available.

Use any brand of Graham crackers. You will need to crush a piece or two of them though and sprinkle on top later on. It is best to refrigerate longer for best results. If you want this to have the texture of ice cream sandwich, I suggest that you place it in the freezer for 2 to 3 hours before serving.

Try this Fruit Cocktail Float recipe. Let me know what you think.

Fruit Cocktail Float
 
Prep time
Cook time
Total time
 
Author:
Serves: 6
Ingredients
  • 16 oz. (473 ml) cold heavy whipping cream
  • 7.6 oz. (225 ml) table cream or all purpose cream
  • 2 (15.25 oz.) cans of fruit cocktail
  • 9 tablespoons condensed milk
  • 12 pieces Graham crackers
  • 8 to 10 pieces Maraschino cherries
  • 3 tablespoons crushed Graham
Instructions
  1. Drain the fruit cocktail by pouring each can in a strainer. Set aside.
  2. Prepare the whipping cream mixture by pouring the heavy whipping cream in a mixing bowl. Whisk in medium speed using an electric mixer. Set to high speed after 2 minutes and continue to whisk until soft peaks form (around 5 more minutes).
  3. Stir-in the table cream, condensed milk, and vanilla extract. Continue to whisk for 1 to 2 minutes.
  4. Arrange a layer of Graham crackers at the bottom of a wide 8x8 baking pan.
  5. Pour-in half of the whipping cream mixture. Spread.
  6. Create another layer by adding half of the fruit cocktail. Spread.
  7. Make another layer of Graham crackers. Top with the remaining heavy cream mixture.
  8. Arrange the remaining fruit cocktail on top and add some cherries.
  9. Sprinkle the crushed Graham on top.
  10. Refrigerate for 3 to 5 hours. Serve.
  11. Share and enjoy!
Nutrition Information
Serving size: 6

fruit cocktail float_

The post Fruit Cocktail Float appeared first on Panlasang Pinoy.

Adobong Baboy with Boiled Eggs

$
0
0

This version of Adobong Baboy with Boiled Eggs has a milder taste compared to the other pork adobo recipes that we have featured. However (and just like all the different adobo versions that we have), this recipe will give you a delicious adobo dish that is worthy to be paired with the warm rice sitting in your rice cooker.
adobong baboy with boiled egg

This pork adobo version requires the meat to be marinated in soy sauce for an hour. It will let the meat absorb the flavor of the soy sauce. Note that I am using light or low sodium soy sauce for this recipe. It might sound ironic for the salt to be still in the ingredient list, but I had it as an optional ingredient. Only use salt if necessary.

On another note, this recipe can be made Paleo diet compliant by removing the sugar and using coconut aminos instead of soy sauce. Coconut oil or lard can be used as a substitute for regular cooking oil — the only drawback will be to not have this with rice.

Try this Adobong Baboy with Boiled Eggs recipe. Let me know what you think.

Adobong Baboy with Boiled Egg
 
Prep time
Cook time
Total time
 
Author:
Serves: 3
Ingredients
  • 1 lb. pork shoulder, cut into cubes
  • 2 pieces medium boiled eggs
  • 3 pieces dried bay leaves
  • 1 teaspoon whole peppercorn
  • ½ cup light soy sauce
  • 2 tablespoons white vinegar
  • 4 cloves garlic, crushed
  • 3 tablespoons cooking oil
  • ¾ cup beef broth
  • ¾ cup water
  • 1 teaspoon granulated white sugar
  • Salt to taste (optional)
Instructions
  1. Combine pork and soy sauce in a bowl. Mix well. Marinate for 1 hour.
  2. Heat oil in a pan. Add the garlic. Cook until gold brown. Remove the garlic and set aside.
  3. Add the marinated pork along with the remaining marinade. Cook until it turns brown (around 3 to 4 minutes).
  4. Pour-in water and beef broth. Let boil.
  5. Add the peppercorn, bay leaves, and garlic. Cover and cook in ow to medium heat for 30 to 40 minutes or until the pork becomes tender. You can add more water if the liquid starts to dry out.
  6. Add the vinegar. Let the liquid boil again. Stir.
  7. Add sugar and boiled eggs. Cook for 3 to 5 minutes. You can add salt, if necessary.
  8. Transfer to a serving bowl. Serve.
  9. Share and enjoy!
Nutrition Information
Serving size: 3


The post Adobong Baboy with Boiled Eggs appeared first on Panlasang Pinoy.

Ginataang Yellow Fin Tuna

$
0
0

Ginataang Yellow Fin Tuna is another version of fish cooked in coconut cream. I used yellow fin tuna fillet for this recipe. I got this fish frozen in a package composed of three large fillets. The thing that I was not expecting is the place where I got this. Nearby supermarkets and Asian stores do not have any yellow fin available during that day. However, I saw this frozen package at Target while shopping for other items.

Ginataang Yellow Fin Tuna Recipe

This yellow fin tuna dish is special because I searched almost everywhere during the day to find this type of fish (regardless of its fresh or frozen as ice) and was able to find it almost at the end of the day. I also thought that using coconut cream made this dish richer and flavorful. The greens that I used were fresh frozen bitter melon leaves. These are known as “dahon ng ampalaya” in the Philippines. I also had some fish sauce and red pepper flakes for that extra kick.

The tuna was partially cooked beforehand by pan frying it for a minute on both sides. This helps the fish maintain its shape while being cooked in coconut cream. I also made sure that the garlic, onions, and ginger were cooked enough to the point that the natural flavors just blends-in easily with any ingredient. This makes it easy for the coconut cream to absorb all its flavors, which makes it very tasty.

If you like ginataang tilapia, you will surely love this dish.

Try this Ginataang Yellow Fin Tuna Recipe. Let me know what you think.

Ginataang Yellow Fin Tuna
 
Prep time
Cook time
Total time
 
Author:
Serves: 3
Ingredients
  • 3 fillets yellow fin tuna, pan fried for 1 minute per side
  • 1 cup ampalaya leaves
  • 2½ cups coconut cream
  • 2 thumbs ginger, julienne
  • 1 medium red onion, diced
  • 5 cloves garlic, crushed and chopped
  • 4 tablespoons cooking oil
  • 2 tablespoons fish sauce
  • ⅛ teaspoon ground black pepper
  • ½ teaspoon chili flakes
Instructions
  1. Heat oil in a pan.
  2. Saute garlic and onion.
  3. Add ginger and continue to cook until the onion gets soft.
  4. Pour-in coconut cream. Stir and let boil.
  5. Add the ground black pepper and fish sauce. Stir and cook for 1 minute.
  6. Put the fried yellow fin tuna fillet in the pan. Scoop some coconut cream on top while cooking. Cover and cook in low to medium heat for 12 minutes.
  7. Add the ampalaya leaves. Stir cover and cook for 3 minutes.
  8. Add red pepper flakes or fresh siling labuyo.
  9. Transfer to a serving plate. Serve.
  10. Share and enjoy!
Nutrition Information
Serving size: 3

Ginataang Yellow Fin Tuna

The post Ginataang Yellow Fin Tuna appeared first on Panlasang Pinoy.

Sinabawang Isda at Gulay

$
0
0

Sinabawang Isda at Gulay is a simple dish composed of mahi-mahi fillets and fresh sweet potato tops (known as talbos ng kamote in Filipino). The name of the dish is translated as fish and vegetable soup. Vegetables such as onion, ginger , and tomato are boiled along with the fish. The sweet potato tops are added towards the end.

sinabawang isda at gulay

This dish is intended for people who loves fish and veggies. It is perfect for health conscious individuals as long as you do not eat rice with eat or at least control your carbohydrate intake.

I know that I just mentioned that this is healthy as long as you eat it as it is. Sometimes, I tend to deviate by adding bagoong isda with calamansi or at least dipping the fish into it. As a result, I eat a cup of rice or more than I should — which is not so good. However, I am always enjoying this dish no matter how simple it may seem.

Try this simple Sinabawang Isda at Gulay Recipe. Send us your feedback.

Sinabawang Isda at Gulay
 
Prep time
Cook time
Total time
 
Author:
Serves: 2
Ingredients
  • 2 (3 oz.) mahi mahi fillets
  • 3 to 4 cups fresh kamote tops
  • 1 knob ginger, sliced into thin pieces
  • 2 medium tomatoes, sliced
  • 1 medium red onion, sliced
  • 2 cups water
  • 1 teaspoon sea salt
Instructions
  1. Pour water in a cooking pan.Let boil.
  2. Add the tomatoes, ginger, and onion. Cover and boil for 5 to 8 minutes.
  3. Add the fresh mahi-mahi. Cover and cook for 8 to 10 minutes in medium heat.
  4. Stir-in the salt and add the kamote tops. Cover and cook for 1 to 2 minutes.
  5. Transfer to a serving bowl. Serve with warm white rice.
  6. Share and enjoy!
Nutrition Information
Serving size: 2


sinabawang isda at gulay recipe

The post Sinabawang Isda at Gulay appeared first on Panlasang Pinoy.

Viewing all 460 articles
Browse latest View live