Quantcast
Channel: Recipes – Panlasang Pinoy
Viewing all 460 articles
Browse latest View live

Oven Roasted BBQ Chicken Recipe

$
0
0

Oven Roasted BBQ Chicken is something that I usually start to prepare on a Friday afternoon so that I can have extra time to marinate it overnight and prepare it for lunch on the weekend. Since I will be roasting the chicken over the weekend, I also have extra time to prepare the sides for this. I typically go for cornbread or potato wedges. If I wanted the meal to be more Filipino, I simply cook white rice and have it with pickled papaya, which is also known as “atcharang papaya“.
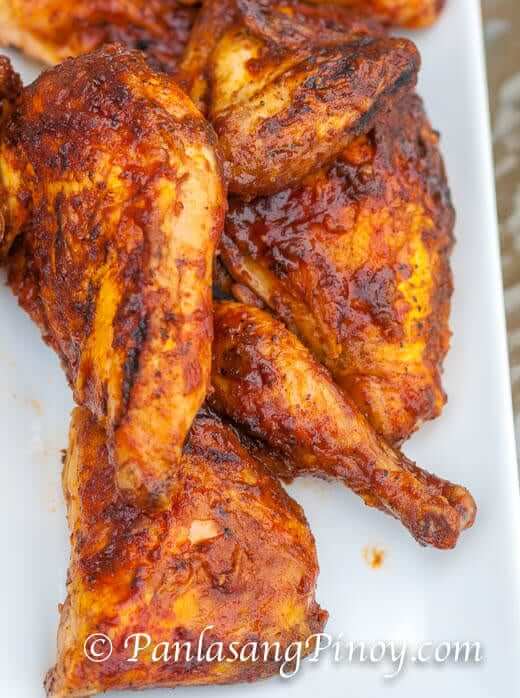
Roasted-Chicken_

I suggest that you marinate the chicken for over 8 hours in order for the bird to absorb most of the flavor from the marinade mixture. You will notice the difference of properly marinated chicken when you enjoy it later on. We also want the chicken to be juicy in the inside and cooked perfectly. This is quite a challenge especially for beginners because we are removing the chicken from the oven twice to baste it, and the temperature vs. time ratio won’t be that dependable in this situation. It will be best if you have a meat thermometer handy. Remember, 165F internal temperature means that the chicken is ready. Do not go beyond this as the chicken can get dry.

It will ideal if you can put a greased aluminum foil over a baking tray or pan. This will help you save some time later because there is less items to clean. Once the chicken is cooked, it’s time for you to enjoy the fruit of your labor. I have some side dish suggestions on the recipe below. Happy cooking!

Try this Oven Roasted BBQ Chicken Recipe. Let me know what you think.

Oven Roasted BBQ Chicken Recipe
 
Author: 
Nutrition Information
  • Serves: 4
  • Serving size: 4
Prep time: 
Cook time: 
Total time: 
Ingredients
  • 1 whole chicken, cut into quarters
  • ¼ cup light soy sauce
  • 1 teaspoon paprika
  • ½ teaspoon ground black pepper
  • 1 teaspoon salt
  • 1 teaspoon garlic powder
  • 2 tablespoons canola oil
  • juice from 1 small lemon
  • 1¼ cups barbecue sauce (use your preferred brand)
Instructions
  1. Prepare the marinade by combine soy sauce, oil, garlic powder. paprika, lemon, salt, and pepper in a bowl. Stir until all the ingredients are well blended.
  2. Arrange the chicken quarters in a resealable bag. Pour-in the marinade. Let the air out of the bag, seal, and marinate the chicken overnight. Place the bag in the fridge and let it stay for 12 to 16 hours. This will let the chicken absorb the flavor.
  3. Preheat your oven to 375F.
  4. Top a baking tray with aluminum foil and geese it with 1 tablespoon of cooking oil or spray with a cooking oil spray. Arrange the chicken on top of the greased foil. Bake in the oven for 18 minutes.
  5. Baste the chicken with half of the barbecue sauce. Continue to bake for 12 minutes.
  6. Baste the chicken with the remaining half of the bbq sauce. Bake for 8 to 10 minutes or until the chicken is completely cooked. You can also use a meat thermometer to ensure that the chicken is done. The internal temperature of the chicken should be at least 165F.
  7. Remove the oven roasted bbq chicken from the oven. Arrange in a serving plate.
  8. Serve with either of the following: cornbread muffins, cornbread, rice, or potato wedges. Share and enjoy!


Roasted-Chicken-Recipe

The post Oven Roasted BBQ Chicken Recipe appeared first on Panlasang Pinoy.
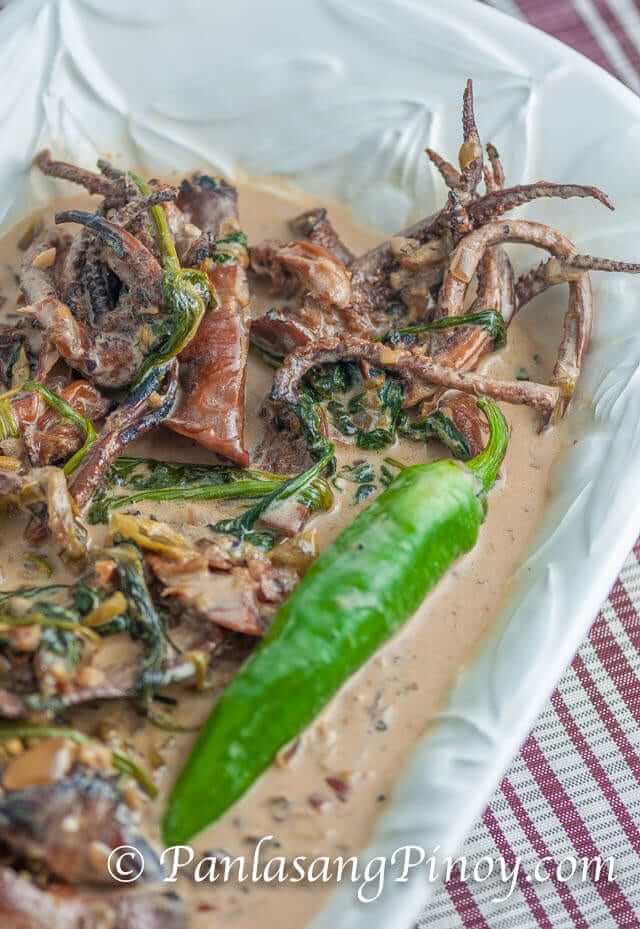

Dried Squid in Coconut Milk

$
0
0

This version of Dried Squid in Coconut Milk Recipe (which is also known as “ginataang pusit”) was discovered by accident. I like to eat squid. However, I prefer fresh over dried or dehydrated squid because it is tender, when cooked properly. As far as dried squid goes, all I knew is that small dried squids can be grilled. The outcome can be a crispy squid that you can easily eat, or it can also turn out to be a bit rubbery; this means that you will need to chew harder.

What I got from the Korean store were large dried squids. My plan was to grill these squids and see if these will turn out crispy, or at least something that I can eat easily afterwards. What I learned from the experiment is straightforward: do not grill dried large squid because it will be very hard for you to eat it. Since I do not want to throw these away that easily, I thought that slow cooking the squid will help.

I grabbed my slow cooker and opened the pantry to check for available ingredients. There was a can of coconut cream sitting in the corner and I also saw some green chillies and fresh ginger root in the fridge. These ingredients led me to decide to make slow cooked ginataang pusit.

Grilling the dried squid before slow cooking helped because it gave the dish a nice smokey flavor. The squid became tender and easy to chew. I can compare it to the texture of pig ears in tokwa’t baboy. I liked the outcome of the dish and I thought that this was even more tastier than the regular ginataang pusit.

If you like to eat squid, I have some recipes just for you. Check out our squid recipes here.

Try this Dried Squid in Coconut Milk Recipe. Let me know what you think.
Dried Squid in coconut Milk - Ginataang Pusit

5.0 from 1 reviews
Dried Squid in Coconut Milk
 
Author: 
Nutrition Information
  • Serves: 3
  • Serving size: 3
Prep time: 
Cook time: 
Total time: 
Ingredients
  • ½ lb. large dried squid
  • 2 cups coconut cream
  • 3 pieces long green chilies, sliced
  • 1 teaspoon minced garlic
  • 1 tablespoon minced ginger
  • 1 medium onion, minced
  • 2 tablespoons fish sauce
  • ¼ teaspoon ground black pepper
  • 1 bunch fresh spinach
Instructions
  1. Heat-up the grill. Once the grill gets hot, grill one side of the squid for 3 minutes. The squid will curl-up, try to straighten the other side (if possible) and grill for 1 to 2 minutes. Set aside.
  2. Arrange the coconut cream, ginger, onion, garlic, green chillies, squid, ground black pepper, and fish sauce in a slow cooker. Set the slow cooker to high, cover and slow cook the squid for 8 hours.
  3. Add the spinach. Cook for 10 to 15 minutes.
  4. Transfer to a serving bowl. Serve. Share and enjoy!


Dried Squid in coconut Milk - Ginataang Pusit Recipe

The post Dried Squid in Coconut Milk appeared first on Panlasang Pinoy.

Egg Sandwich Spread Recipe

$
0
0

I enjoy eating egg sandwich. When I was in elementary school, I remember having this as a “baon” for recess (snack) and this is also the most common snack that adults make during long distance trips or family picnics. Egg sandwich has been a part of my life and this simple Egg Sandwich spread recipe is one of my versions.

Egg Sandwich Spread

This Egg Sandwich Spread recipe is quick and easy to prepare. Once you have all the ingredients ready, all you need is to mash the eggs and add all the ingredients together. I used 6 eggs for this recipe, you can use up to 8 eggs if you want — this will make the texture thicker. The mustard powder is also a good addition, but you can omit this ingredient if it is not available. As for the onion powder, I use this ingredient if I want to keep the sandwich spread longer. I would prefer fresh minced onions, but it tends to spoil faster.

How do you make your egg sandwich spread? We would love to hear from you. It will be great if you can share your recipe or any inputs by sending your comments below.

Try this Egg Sandwich Spread Recipe.

Try this Egg Sandwich Spread Recipe. Let me know what you think.

4.0 from 1 reviews
Egg Sandwich Spread Recipe
 
Author: 
Nutrition Information
  • Serves: 6
  • Serving size: 6
Prep time: 
Cook time: 
Total time: 
Ingredients
  • 6 hard boiled eggs
  • ¼ cup mayonnaise
  • ¼ cup sweet pickle relish
  • 1 teaspoon white sugar
  • ½ teaspoon dry mustard powder
  • ½ teaspoon onion powder
  • ½ teaspoon salt
  • ⅛ teaspoon ground black pepper (optional)
Instructions
  1. Place the eggs in a bowl. Mash using a fork.
  2. Add mayonnaise, sugar, mustard powder, onion powder, salt, and pepper. Fold until all the ingredients are well blended.
  3. Add the sweet pickle relish. Fold once more until the pickles blends with the other ingredients.
  4. Transfer in a container. Refrigerate for 1 hour, or you can use it immediately. Spread over your favorite slice of bread.
  5. Share. Share and enjoy!


Egg Sandwich Spread Recipe

The post Egg Sandwich Spread Recipe appeared first on Panlasang Pinoy.

Pork Giniling Kaldereta Recipe

$
0
0

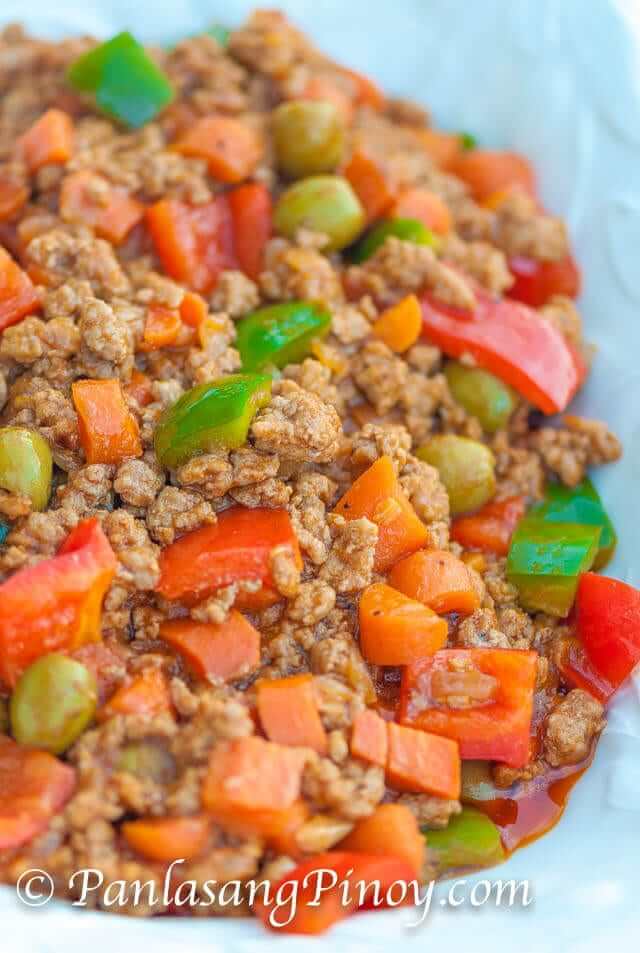
Pork Giniling Kaldereta is a simple dish that you can make for lunch or dinner. If you like pork giniling and if you are a fan of kaldereta at the same time, this recipe is perfect for you. This dish is a crossover of these dishes. It can be eaten with plain white rice or with pandesal.

I just had this dish for dinner tonight and I really enjoyed it. I plan to save the leftovers for tomorrow. I am thinking of making meat rolls and this will be a perfect filling.

Pork Giniling Kaldereta

You will notice that I did not use potato in this recipe. It is a matter of preference on my end. This means that you can add potato if you like. 1 large baking potato (sliced into cubes) is enough. Add it along with the carrots if you decide to have it.

Follow the recipe below and you should be on the right track. By the way, I had a piece of pork cube in the recipe. This helps improve the flavor. Most of you won’t have this ingredient. In this case, use beef cube or beef powder; you can also use beef broth. If using beef broth, add ½ cup of broth and omit the water.

Pork Giniling Kaldereta Recipe

Try this Pork Giniling Kaldereta Recipe. Let me know what you think.

5.0 from 1 reviews
Pork Giniling Kaldereta Recipe
 
Author: 
Nutrition Information
  • Serves: 5
  • Serving size: 5
Prep time: 
Cook time: 
Total time: 
Ingredients
  • 1½ lbs. ground pork
  • 1 (8 oz.) can tomato sauce
  • 1 small red bell pepper, chopped
  • 1 small green bell pepper, chopped
  • ½ cup carrots, cubed
  • ¼ cup liver spread
  • ¼ cup green olives
  • 1 piece pork cube
  • ½ cup water
  • 3 tablespoons cooking oil
  • 1 small yellow onion, chopped
  • 4 cloves garlic, crushed and chopped
  • ½ teaspoon crushed red pepper flakes
  • salt and pepper to taste
Instructions
  1. Heat oil in a pan or cooking pot.
  2. Once the oil turns hot, saute the garlic and onion.
  3. Let the onion get soft then add the ground pork. Cook while stirring once in a while until the pork turns light to medium brown.
  4. Add the pork cube and liver spread. Stir and cook for 5 minutes.
  5. Pour-in the tomato sauce. Stir. Add water and cover. Simmer for 15 to 20 minutes.
  6. Add crushed red peppers, carrots and olives. Cook for 7 minutes.
  7. Stir-in the bell peppers. Cook for 5 minutes.
  8. Add salt and pepper to taste. Stir and continue to cook until the liquid evaporates.
  9. Transfer to a serving bowl. Serve with white rice.
  10. Share and enjoy!

The post Pork Giniling Kaldereta Recipe appeared first on Panlasang Pinoy.

Drunken Mussels Recipe

$
0
0

Drunken Mussels makes a good appetizer. This is best eaten with warm toast bread or with croutons. I tried to make the recipe as simple as possible so that you can follow easily. So, what makes the mussels drunk? It’s white wine.

The mussels are cooked in white wine along with butter and garlic. This can also be made using lager beer. When using beer, try to use lager because this kind of beer is light and not bitter, compared to IPA and the other bolder types. It will also be great if you have lime or lemons to squeeze over the mussels. This will give your drunken mussels a fresh taste.

Drunken Mussels

There are some of you who might be asking about the alcohol content of this dish. There is no alcohol in this dish or it was decreased to a very little amount because alcohol evaporates quickly during the cooking process leaving the flavor of the wine behind.

Cheers to good food! Keep on cooking my friends.

Try this yummy Drunken Mussels Recipe. Send me your feedback.

Drunken Mussels Recipe
 
Author: 
Nutrition Information
  • Serves: 4
  • Serving size: 4
Prep time: 
Cook time: 
Total time: 
Ingredients
  • 2½ lbs. mussels, cleaned
  • 2 cups white wine (Pinot Grigio)
  • 3 teaspoons minced garlic
  • ¼ cup butter
  • ¼ teaspoon salt
  • ¼ cup chopped parsley
  • 1 lime, wedged
Instructions
  1. Melt butter in a pan.
  2. Once the butter melts and starts to get hot, add the garlic. Continue to cook in low to medium heat until the garlic turns light brown. Do not cook in high heat because the butter can get burnt.
  3. Pour-in the white wine. Let boil. Continue to cook and liquid evaporate until it reduces to half.
  4. Add the mussels. Stir. Cover and cook for 10 minutes in medium heat.
  5. Add salt and chopped parsley. Stir. Cook for 2 minutes.
  6. Transfer to a serving plate. Serve with lime wedges.
  7. Share and enjoy.

Drunken Mussel Recipe

The post Drunken Mussels Recipe appeared first on Panlasang Pinoy.

Pinoy Style Fried Chicken

$
0
0

Pinoy Style Fried Chicken is one of our Filipino Fried Chicken versions. Pinoy fried chicken is known for its simplicity and delicious taste. This recipe is no exception; it is simple, delicious, and budget friendly.

I used a medium-sized whole chicken for this recipe. I prepared the chicken by cutting it in serving pieces. The seasonings that we need are salt, pepper, garlic powder, and onion powder. The details of the ingredients can be found in the recipe below this post.

Pinoy Style Fried Chicken_

Simply combine all the seasoning ingredients in a bowl and blend them together using a spoon or by gently shaking the bowl. We will use this as our fried chicken rub. Once the seasoning is combined and blended, we’ll need to rub this all over the chicken pieces. It important that we cover all the chicken pieces with the seasoning so that the chicken will be flavorful.

Pinoy Style Fried Chicken on pan

The chicken slices will need to be placed back in the mixing bowl and refrigerated for over 3 hours; this will let the meat absorb the flavor better. I also used a dry paper towel to dry the chicken before dredging it in flour. We are not trying to cover the chicken with flour. We are using it to absorb excess liquid so that the oil will not splatter when we fry it later on, so less flour will be enough.

Take note that the chicken was flipped twice. This method will cook the chicken well enough without either side being burnt – both sides were fried for 5 minutes (per side), and then the process is repeated and both sides are fried for 4 minutes each.

Pinoy Style Fried Chicken frying

This is best served with warm white rice and banana ketchup.

Try this Pinoy Style Fried Chicken Recipe. Send us your feedback by commenting below.

Pinoy Style Fried Chicken
 
Author: 
Nutrition Information
  • Serves: 4
  • Serving size: 4
Prep time: 
Cook time: 
Total time: 
Ingredients
  • 3 to 4 lbs. chicken, cut into serving pieces
  • 2½ tablespoons coarse sea salt
  • ½ teaspoon ground black pepper
  • 2 teaspoons garlic powder
  • 1 teaspoon onion powder
  • ¾ cup all-purpose flour
  • 1½ cooking oil
Instructions
  1. Combine salt, ground black pepper, garlic powder, and onion powder in a large mixing bowl.
  2. Arrange the chicken slices in the same mixing bowl. Rub the salt mixture all over the chicken ensuring that each piece is well covered. Cover the bowl. Refrigerate for 3 to 5 hours.
  3. Heat the cooking oil in a pan.
  4. Meanwhile, put the flour in a resealable bag. Add 2 to 3 pieces of chicken in the bag. Seal and shake. Make sure that the chicken pieces are covered will flour.
  5. Once the oil gets hot, pan-fry the chicken in medium heat for 5 minutes. Turn the chicken over and fry the other side for 5 minutes.
  6. Turn the chicken over for the second time and fry both sides again for 4 minutes.
  7. Remove the chicken from the pan. Let the excess oil drip, then transfer to a serving plate.
  8. Serve with banana ketchup and white rice.
  9. Share and enjoy!

Pinoy Style Fried Chicken Recipe

The post Pinoy Style Fried Chicken appeared first on Panlasang Pinoy.
Ground Pork Kaldereta Omelet

$
0
0

Ground Pork Kaldereta Omelet is an interesting dish that I made from leftover Pork Giniling Kaldereta. There will be days wherein you will have leftovers. Sometimes eating left overs is not that enjoyable anymore because you just had the same food recently. Making something different out of your leftovers is ideal because you get to enjoy a different presentation of the food that you recently had while not putting anything to waste.

Ground Pork Kaldereta Omelet

I had this for breakfast with my favorite banana ketchup and a couple of toasts. I thought that it was perfect with a cup of black coffee on the side. Since this yummy omelet contains meat, you can also have this for lunch with a cup of steamed white rice. Speaking about white rice – we got lots of suggestions for you if you want to make something out of your leftover white rice. Making Sinangag is a good way to start your day; I also like Tuyo Fried Rice.

Try this Ground Pork Kaldereta Omelet. Let me know what you think.

Ground Pork Kaldereta Omelet
 
Author: 
Nutrition Information
  • Serves: 2
  • Serving size: 2
Prep time: 
Cook time: 
Total time: 
Ingredients
  • 1 ½ cups pork giniling kaldereta
  • 3 eggs
  • ¼ teaspoon salt
  • ½ teaspoon onion powder
  • A dash of ground black pepper
  • 4 tablespoons cooking oil
Instructions
  1. Crack eggs in a bowl. Whisk using a wire whisk of fork.
  2. Add the salt, pepper, and onion powder. Continue to whisk until all the ingredients are well blended.
  3. Add the Pork Giniling Kaldereta. Stir until it is incorporated with the mixture. Set aside
  4. Heat the oil in a frying pan. Once the oil gets hot, scoop half of the mixture and pour it on the pan. Cook in medium heat for 3 minutes.
  5. Using a wide spatula, turn the omelet over. Cook the opposite side for 2 to 3 minutes or until it is done. Do the same steps for the remaining mixture.
  6. Transfer to a serving plate. Serve with Ketchup.
  7. Enjoy with toast for breakfast or with white rice for lunch.

Ground Pork Kaldereta Omelet Recipe

The post Ground Pork Kaldereta Omelet appeared first on Panlasang Pinoy.

Pork BBQ Fried Rice

$
0
0

Pork BBQ Fried Rice-2

Pork BBQ Fried Rice
 
Author: 
Nutrition Information
  • Serves: 4
  • Serving size: 4
Prep time: 
Cook time: 
Total time: 
Ingredients
  • 4 cups leftover white rice (preferably refrigerated)
  • ½ lb. char siu (pork bbq), sliced
  • 2 eggs, beaten
  • 3 tablespoons light soy sauce
  • ¼ teaspoon sesame oil
  • 1 teaspoon sea salt
  • ½ teaspoon garlic powder
  • ½ teaspoon onion powder
  • ½ cup chopped green onions
  • 4 tablespoons cooking oil
Instructions
  1. Put the leftover rice in a large mixing bowl. Make sure that the grains are not sticking to each other.
  2. Add the salt, garlic powder, and onion powder in the mixing bowl. Gently mix all the ingredients using a large spoon until well blended.
  3. Meanwhile, heat half of the cooking oil in a wide pan.
  4. Once the oil gets hot, pour the beaten eggs on the pan. Cook each side for 1 minute. Remove the egg from the pan and place in a plate. Set aside.
  5. Add the remaining cooking oil. Once the oil gets hot, add the sliced char siu (pork bbq) in the pan. Cook for 30 seconds to 1 minute.
  6. Add the rice mixture. Try to fold the rice once in a while using a spatula. Continue to cook for 5 to 8 minutes.
  7. Pour the soy sauce and sesame oil over the rice. Quickly fold the rice to distribute the liquid ingredients evenly. Cook for 3 to 5 minutes.
  8. Put the cooked egg over the rice. Using the tip of a spatula, divide the eggs into multiple pieces by slicing into it. Continue to fold so that the egg gets distributed equally.
  9. Add the green onions. Stir and cook for 2 minutes.
  10. Transfer to a serving plate. Serve!
  11. Share and enjoy!


Pork BBQ Fried Rice

The post Pork BBQ Fried Rice appeared first on Panlasang Pinoy.


Basil Pork Recipe

$
0
0

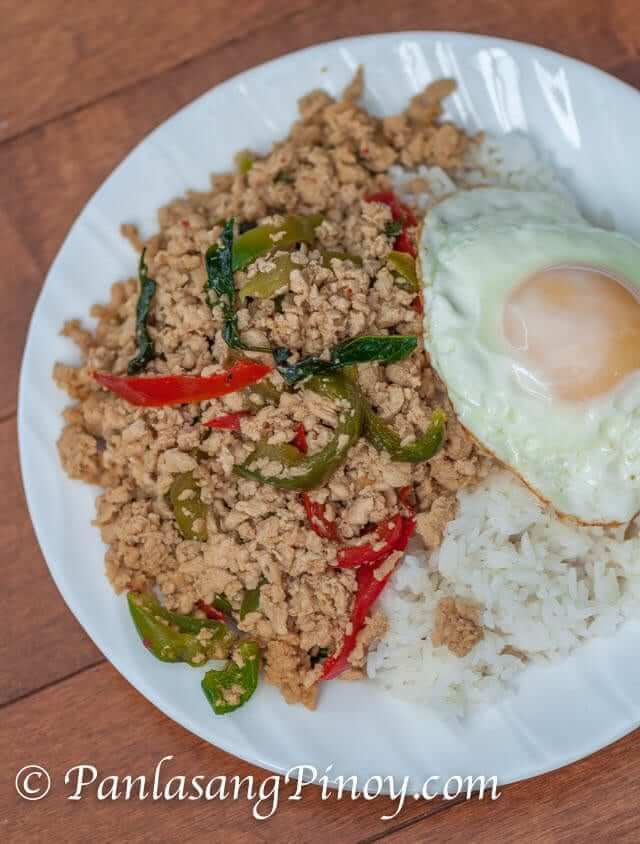
Basil Pork is a simple and delicious Asian dish that I enjoy when I get the chance. Today was one of these chances because I was able to get some fresh holy basil. Although regular fresh basil can be used, I still try to use holy basil to make it taste more authentic.

I love how basil pork taste: it is a bit sweet and there is a little salty flavor from the fish sauce and soy sauce. The basil gives the dish a nice flavor and also helps the dish attain its fresh taste and provides an appetizing aroma.

Basil Pork_

A cup of steamed white rice and a piece of fried egg is all that it takes to make your lunch meal complete — or should I say two cups of rice.

Try this Basil Pork Recipe. Let me know what you think.

Basil Pork Recipe
 
Author: 
Nutrition Information
  • Serves: 4
  • Serving size: 4
Prep time: 
Cook time: 
Total time: 
Ingredients
  • 1 lb. ground pork
  • 3 tablespoons dark soy sauce
  • 1 tablespoon minced garlic
  • 1 tablespoon miced chili peppers (birds eye chili)
  • 1 teaspoon granulated white sugar
  • 1 cup fresh holy basil (leaves removed from the stem)
  • ½ cup sliced red and green bell peppers (combined)
  • 2½ tablespoons fish sauce
  • 3 tablespoons cooking oil
Instructions
  1. Heat the cookinf oil in a wok. Once the oil gets hot, add the garlic and chili.Stir and cook until the garlic turns medium brown.
  2. Add the ground pork. Stir-fry for 2 to 5 minutes or until the pork turns light brown.
  3. Pour-in the soy sauce and fish sauce. Continue to stir-fry.
  4. Add the sugar, holy basil, and bell peppers. Stir-fry for 3 to 6 minutes.
  5. Arrange in a plate with rice and fried egg.
  6. Serve. share and enjoy!

Basil Pork Recipe

The post Basil Pork Recipe appeared first on Panlasang Pinoy.

Easy Sweet and Sour Sauce

$
0
0

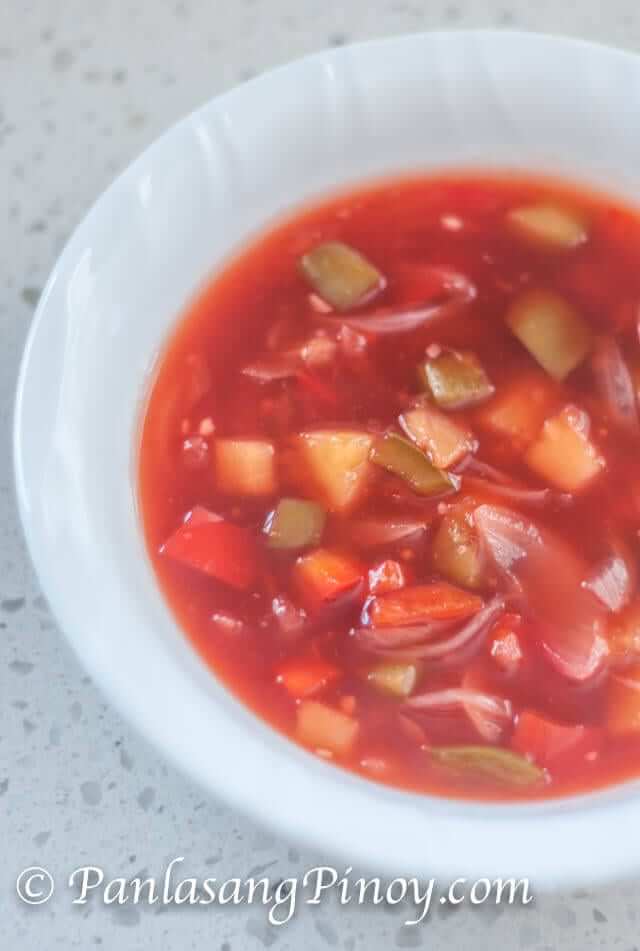
Sweet and Sour Sauce is staple in Asian Cuisine. There are many ways to make this sauce and it also has many uses. This Easy Sweet and Sour Sauce Recipe will give you a basic delicious sauce that you can use to make fried dishes taste better. Moving forward, you will see a lot of recipe posts that makes use of this sauce — that is my way of showing how easy it is to create different dishes using one common ingredient.
Sweet and Sour Sauce_

This recipe was inspired by both our basic sweet and sour sauce recipe and the sauce for our sweet and sour fish. I tried to combine both and added a little tweak to come-up with this recipe. Sure, this is easy and simple. It is also useful especially if you decide to store it in a glass jar with lid (ball jars). You will be able to use this for a couple of weeks or more as long as you store it properly.

I used a saucepan to cook this sauce. You can use a regular cooking pot or whatever works in the kitchen. I just thought that it will be more appropriate to make this sauce in a pan designed to handle sauces. A small ladle was also helpful because I used it as a stirrer while cooking and I was also able to scoop the sauce easily and quickly.

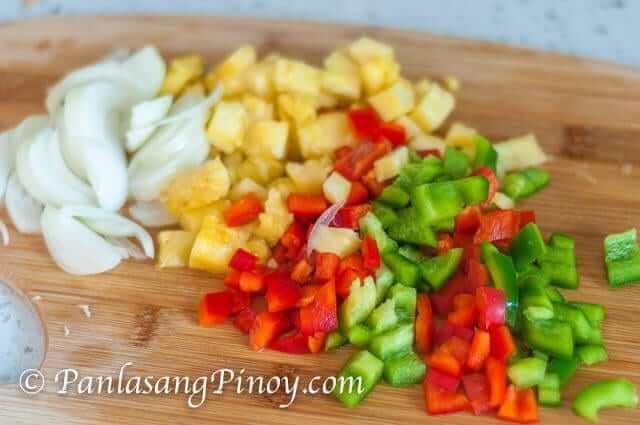
Sweet and Sour Sauce Ingredients

The recipe calls for white vinegar. You can also use rice and cane vinegar for better result. Adding a bit of onion and garlic powder also makes the sauce taste better.

Try this Easy Sweet and Sour Sauce Recipe. Please send me your feedback by commenting.

Easy Sweet and Sour Sauce
 
Prep time
Cook time
Total time
 
Author:
Serves: 6
Ingredients
  • 3 cups water
  • ½ cup brown sugar
  • ½ cup tomato ketchup
  • 1¼ cup chopped fresh pineapple
  • ¼ cup white vinegar
  • 1 small yellow onion, sliced
  • 1 small red bell pepper, chopped
  • 1 small green bell pepper, chopped
  • 1½ tablespoon cornstarch diluted in 2 tablespoons water
Instructions
  1. Pour water in a saucepan. Bring to a boil.
  2. Add sugar, ketchup, and vinegar. Let the mixture boil once more. Stir using a small ladle.
  3. Add the pineapple, onion, and bell peppers. Cover and simmer for 12 to 15 minutes.
  4. Pour-in the cornstarch diluted in water. Stir.
  5. Once the texture gets thick, turn off the heat. Transfer the sauce to a bowl or gravy boat. You can also let it cool down and secure in ball jars. This can be refrigerated or placed in the freezer for future use.
  6. Enjoy!
Nutrition Information
Serving size: 6

Sweet and Sour Sauce Recipe

The post Easy Sweet and Sour Sauce appeared first on Panlasang Pinoy.

Crispy Baked Yukon Gold Potato Wedges

$
0
0

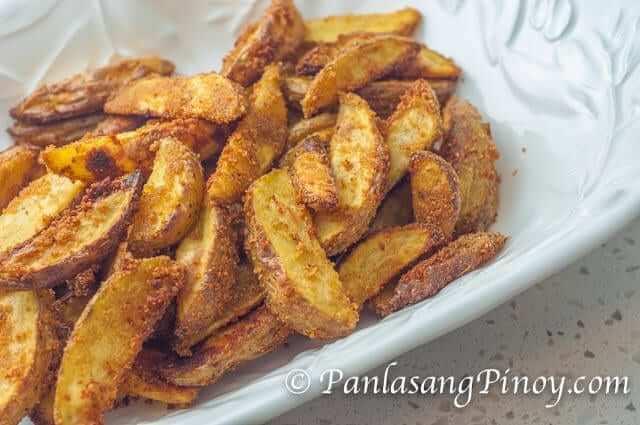
Crispy Baked Yukon Gold Potato Wedges is a quick and simple recipe involving Yukon Gold potato. This potato variety is just making its way to stardom, and I can see that it will be known to everyone in not far from now because it is perfect to use in most common potato dishes.

Crispy Yukon Gold Potato Wedges

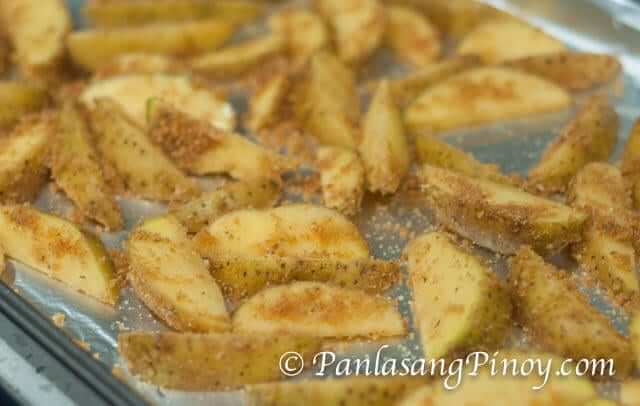
It is important that you wash and scrub the potato before using it. I sliced the potato into thin wedges to be sure that it will be crispy. You see, having thick-cut potato for this recipe might not give you the crisp that you expect. Extending the baking time for thick cut potatoes will only increase the possibility for it to get burnt.

The bread crumbs that I used are the store bought ordinary bread crumbs. You may also use Italian bread crumbs. Paprika, garlic powder, onion powder – and the universal seasoning: salt and pepper – are also necessary. These are just the basic ingredients that you will need to be able to make great tasting potato wedges. I am sure that you will keep on making these after your first try.

Try this Crispy Baked Yukon Gold Potato Wedges Recipe. Send us your feedback.

Crispy Baked Yukon Gold Potato Wedges
 
Prep time
Cook time
Total time
 
Author:
Serves: 5
Ingredients
  • 2 lbs. Yukon Gold potato, sliced into thin wedges
  • 3 tablespoons olive oil
  • ¾ cup regular bread crumbs
  • 1½ teaspoons dried oregano flakes
  • 1 teaspoon garlic powder
  • 1 teaspoon onion powder
  • 1 teaspoon paprika
  • 1 teaspoon sea salt
Instructions
  1. Preheat the oven to 430F.
  2. Arrange the potato wedges in a mixing bowl. Pour the olive oil over the potato. Mix well and ensure that the oil coats every potato wedge.
  3. On a separate bowl, combine bread crumbs, paprika, salt, garlic and onion powder, and oregano. Mix well.
  4. Pour the bread crumb mixture over the potato. Shake the bowl and ensure that the potato are covered with the breadcrumb mixture.
  5. Arrange an aluminum foil over a baking tray. Grease with cooking oil spray. Lay the potato over the foil. Bake for 35 to 40 minutes.
  6. Remove from the oven and let it cool down. transfer to a serving plate.
  7. Serve. Share and enjoy!
Nutrition Information
Serving size: 5

Crispy Yukon Gold Potato Wedges Recipe

The post Crispy Baked Yukon Gold Potato Wedges appeared first on Panlasang Pinoy.

Sweet and Sour Chicken Nuggets

$
0
0

Sweet and Sour Chicken Nuggets is an easy dish that we can make when we try to combine two or more recipes from this blog. In this case, we used our baked chicken nuggets recipe and partnered it with our easy sweet and sour sauce. The result is a delicious dish that I enjoyed much with BBQ fried rice.

Sweet and Sour Chicken Nuggets

The good thing about this recipe is that you can decide to use half of the chicken nuggets for the sweet and sour dish, while leave the other half for another purpose. The sweet and sour sauce will never go to waste because you can always refrigerate it for days or freeze it for weeks for future use.

Try this easy and delicious sweet and sour chicken nuggets recipe. Send us your feedback.

Sweet and Sour Chicken Nuggets
 
Prep time
Cook time
Total time
 
Author:
Serves: 4
Ingredients
Instructions
  1. Make the chicken nuggets by following the recipe on the link in the ingredients section. Set Aside.
  2. Make the sweet and sour sauce by following the sweet and sour sauce recipe link in the ingredients section. Make half amount of what is written in the recipe.
  3. Arrange the chicken nuggets in a serving plate. Pour the sweet and sour sauce over the chicken nuggets. Garnish with chopped parsley.
  4. Serve. Share and enjoy!
Nutrition Information
Serving size: 4

Sweet and Sour Chicken Nuggets Recipe

The post Sweet and Sour Chicken Nuggets appeared first on Panlasang Pinoy.

Oven Baked Crispy Pata Recipe

$
0
0

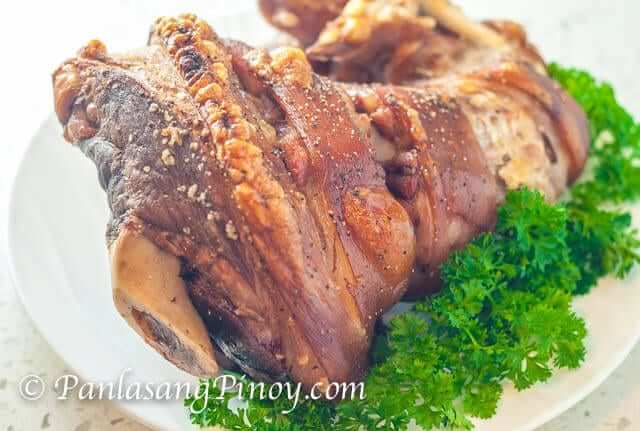
Crispy Pata is a Filipino crispy pig leg dish. It is traditionally cooked by deep frying the leg (click this link to see the traditional recipe). I tried to experiment on other easy ways to make crispy pata for the benefit of our readers. This version do not use too much oil and it is way safer. If you are just starting out in the kitchen, this recipe is for you.

Oven Baked Crispy Pata_

In this crispy pata recipe variation, I cooked the pork leg three (3) times. I first baked the pork in the oven for 30 minutes. Since the leg eventually needs to be boiled, baking it beforehand makes the skin a bit tough. This helps prevent the skin from breaking apart when you boil it. You will still notice that the skin tends to shrink and gets torn apart (especially on the side of the foot) — that is normal. The pork was cooked the second time by boiling. This step is necessary because it makes the meat tender and infuses the seasonings that we added to make the meat flavorful. It also helps make the meat crispy later on when we bake it for the last time. The last step (baking the pork for the last time) is the longest. At this point, we want to make sure that the skin gets crispy.

Once the crispy pata is cooked, you can make your own dipping sauce. I do it by chopping apiece of small yellow onion and adding 3/4 cups vinegar and 3 tablespoons of soy sauce in it. I also add 1/2 teaspoon of garlic powder and 2 teaspoons of white sugar. I mix all the ingredients together and microwave it for 40 seconds.

Try this Oven Baked Crispy Pata Recipe. Send us your feedback.

Oven Baked Crispy Pata
 
Prep time
Cook time
Total time
 
Author:
Serves: 5
Ingredients
  • 1 piece (3 to 4 lbs.) pig leg
  • 1 teaspoon whole cloves
  • 12 pieces dried bay leaves
  • 2 pieces cinnamon sticks
  • 6 cloves garlic, crushed
  • 1 tablespoon onion powder
  • 4 tablespoons cooking oil or cooking oil spray
  • 8 cups water
Instructions
  1. Preheat oven to 350F.
  2. Meanwhile, arrange the pork leg in a baking tray lined with aluminum foil. Coat the leg with cooking oil either by rubbing with cooking oil or using the cooking oil spray such as Pam.
  3. Bake in the oven for 30 minutes.
  4. Remove the pork from the oven. Let it cool down.
  5. Arrange the pork (pig leg) in a wide cooking pot or Dutch oven. Pour-in water. Let boil.
  6. Once the water starts to boil, add the onion powder, garlic, cinnamon stick, and cloves. Cover and simmer for 45 minutes.
  7. Remove the pork from the cooking pot. Let the liquid drip while the meat cools down. Make incisions on the pig leg so that seasonings (such as salt and pepper) can easily penetrate and gets absorbed. It will also help the inner part of the leg cook faster.
  8. Arrange the pig leg on the same baking tray. rub salt and pepper all over the leg. Spray with cooking oil all over.
  9. Bake in the oven at 350F for 150 to 180 minutes.
Nutrition Information
Serving size: 5

Oven Baked Crispy Pata Recipe

The post Oven Baked Crispy Pata Recipe appeared first on Panlasang Pinoy.

Beef and Mushroom Braised Stew

$
0
0

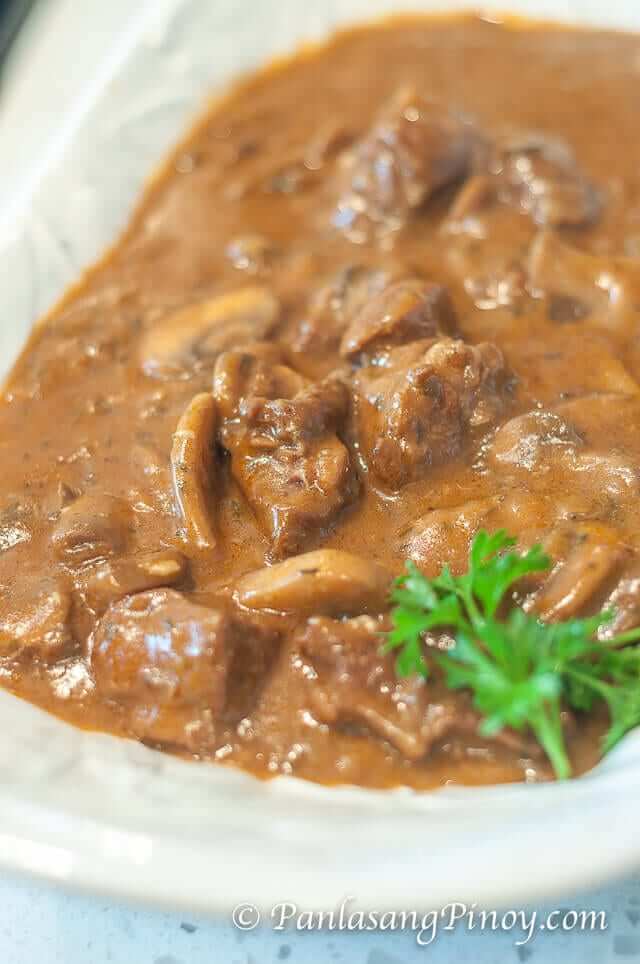
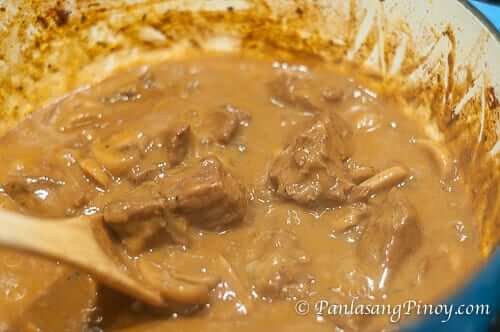
Beef and Mushroom Braised Stew is a rich and flavorful beef stew dish that I enjoy eating with mashed potato. Sometimes, I also eat the leftovers for breakfast with a freshly made hash brown casserole. You should find this recipe easy; it is intended for beginners or for those who do not have much cooking experience yet.

Beef and Mushroom Stew_

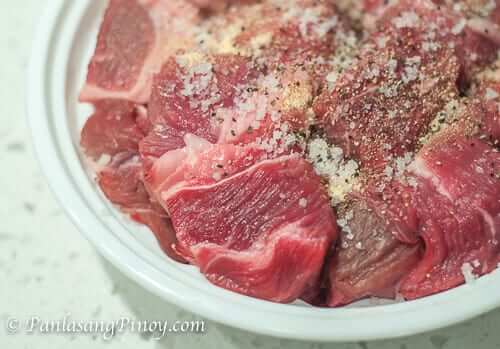
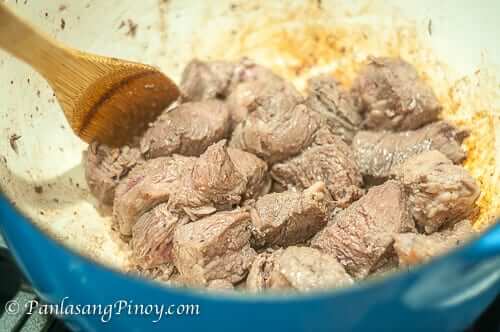
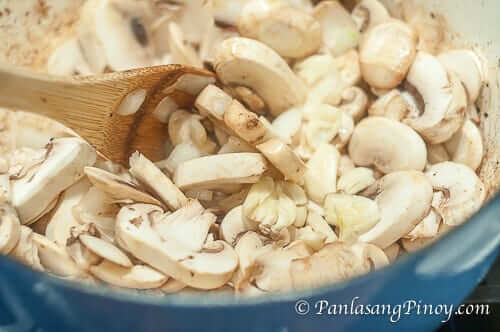
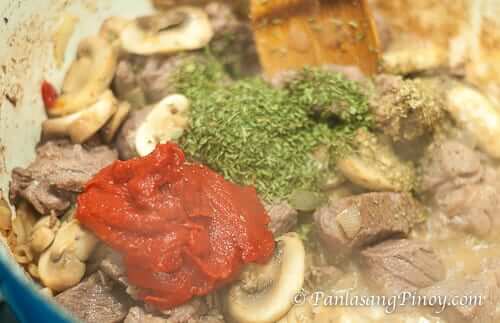
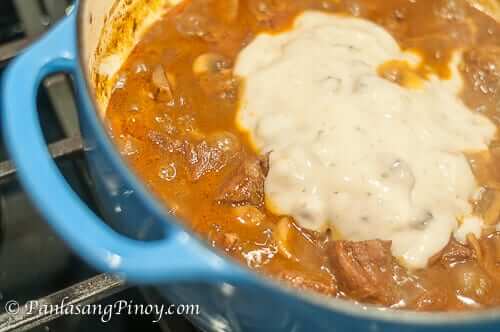
I started out by rubbing salt and pepper all over the beef cubes. This will let the meat absorb the flavor. I then browned the beef using a small amount of butter then sautéed the mushroom with the onion and garlic. I made sure that the mushroom and onions were soft before I added the beef back. Once the beef and mushrooms are combined, you can add the beef broth along with the remaining spices and tomato paste. This will be the time to let the mixture boil and simmer until the meat gets tender. In the process, all the  flavors from the added herbs and seasonings will come out and mix with the stew. You will notice that the dish starts smell real good. The last step is to add the cream of mushroom.

The recipe below along with the pictures will guide you in the process. Aside from mashed potato, you can also enjoy this with rice or dinner rolls.

Try this Beef and Mushroom Braised Stew Recipe. Send us your feedback.

5.0 from 2 reviews
Beef and Mushroom Braised Stew
 
Author: 
Nutrition Information
  • Serves: 5
  • Serving size: 5
Prep time: 
Cook time: 
Total time: 
Ingredients
  • 2 lbs. beef sirloin or chuck, cut into cubes
  • 1½ teaspoons sea salt
  • ¼ teaspoon ground black pepper
  • ¼ cup butter
  • 2 lbs. chopped white mushrooms
  • 1 medium yellow onion, chopped
  • 5 cloves garlic, crushed
  • ¼ cup tomato paste
  • 1 can (10 oz.) cream of mushroom
  • 4 cups beef broth
  • 2 teaspoons dried parsley flakes
  • ½ teaspoon dried oregano
Instructions
  1. Rub salt and ground black pepper on the beef. Let it stay for 10 minutes.
  2. Melt 1 tablespoon butter in a Dutch oven or cooking pot. Put the beef in and cook for 3 to 5 minutes or until the color turns light brown.
  3. Remove the beef. Set Aside. Melt the remaining butter in the same cooking pot.
  4. Once the butter melts, saute the mushrooms, onions, and garlic. Continue to cook until the mushrooms become soft.
  5. Add the beef. Cook for 2 minutes.
  6. Add the tomato paste, parsley, oregano, and beef broth. Stir and let boil. Cover and simmer 60 min.
  7. Add the cream of mushroom. Stir and cook for 2 to 3 minutes.
  8. Turn the heat off. Transfer to a serving plate. Share and enjoy!

Beef and Mushroom Stew Recipe

The post Beef and Mushroom Braised Stew appeared first on Panlasang Pinoy.

Huevos Rancheros

$
0
0

Huevos Rancheros is a simple breakfast dish made from spicy salsa, egg, and flour tortilla. This dish tastes fresh and delicious. It will surely give you the energy that you need for the first half of the day. Since it is spicy, this dish will make sure that you will not feel sleepy too.

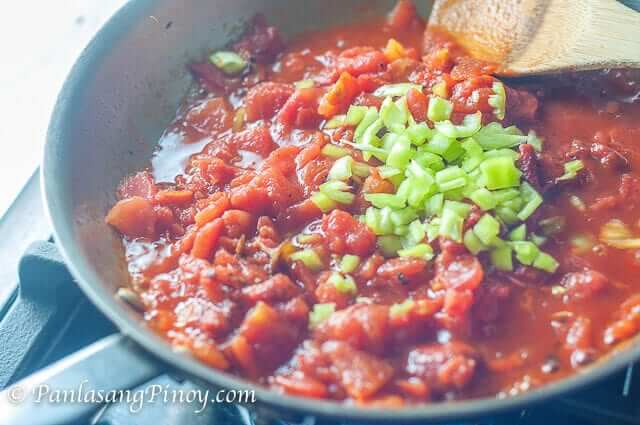
Making huevos rancheros is quick and easy. I used store bought flour tortilla  and canned tomato and pepper to make the process quick. All I needed was to make the salsa and fry the egg.

Huevos Rancheros_

Making the salsa is easy. Simply saute the onion, tomato, chipotle pepper, and banana pepper in a pan –that’s it. Banana peppers are not the traditional green pepper used for this dish, but I used it anyway because i like how it tasted. These is the same variety of pepper that I use when cooking sinigang or dinuguan.

The result of this recipe is a simple and delicious breakfast dish. It is a bit spicy though, but nothing that a glass of fresh milk cannot handle.

Try this delicious breakfast Huevos Rancheros Recipe. Send us your feedback.

Huevos Rancheros
 
Author: 
Nutrition Information
  • Serves: 3
  • Serving size: 3
Prep time: 
Cook time: 
Total time: 
Ingredients
  • 1 can (14.5 oz.) fire roasted tomato
  • ¼ cup Chipotle Pepper in Adobo Sauce, chopped
  • ¼ cup Cilantro
  • 6 small flour tortillas
  • 1 medium Spanish onion, diced
  • 3 eggs
  • 1 banana pepper, chopped
  • Salt and pepper to taste
  • 3 tablespoons cooking oil
Instructions
  1. Prepare the salsa by heating 2 tablespoons of cooking oil in a pan. Saute the onion until it becomes soft. Add the diced tomatoes, add the chipotle pepper, and banana pepper. Cook for 3 to 5 minutes. Add salt and pepper to taste.
  2. Cook the eggs. I prefer either sunny side up or ever easy. Set Aside.
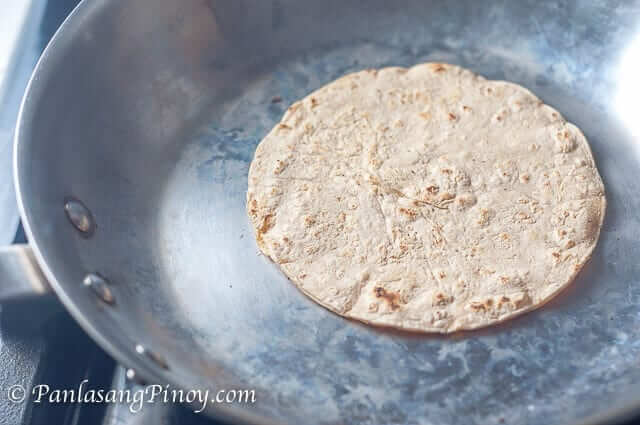
  3. Heat a clean frying pan. Once the pan starts to heat-up, lay a corn tortilla flat over the pan and continue to heat up (using medium heat) for 2 minutes per side.
  4. Arrange the warm tortillas on a serving plate. Top with fried egg and salsa. Garnish with cilantro.
  5. Serve. Share and enjoy!

The post Huevos Rancheros appeared first on Panlasang Pinoy.


Hashbrown Casserole

$
0
0

Hashbrown Casserole makes a perfect breakfast especially if there are a couple of sausage links or even bacon strips. This recipe might not be like what Cracker Barrel has, but it sure is as good as it. What makes it interesting is the idea that you can make one in the comfort of your own kitchen.

Hash Brown Casserole

There were some leftover and I decided to consume it for lunch. I realized that it was perfect with Beef and Mushroom Braised Stew. Both dishes compliment each other and I had a very satisfying meal.

This dish will also be good if you add cooked pork sausage in the mix. It can be a complete breakfast meal in itself. Of course, there is always room for an extra piece of egg on top. I have a post about 10 simple ways to cook an egg, you may get some idea from it.

Try this Hashbrown Casserole Recipe. Enjoy!

Hashbrown Casserole
 
Author: 
Nutrition Information
  • Serves: 6
  • Serving size: 6
Prep time: 
Cook time: 
Total time: 
Ingredients
  • 1 lb. package shredded hashbrown potato
  • 5 oz. (half a can) cream of chicken
  • 1 cup shredded sharp cheddar cheese
  • ¼ cup melted butter
  • 1 tablespoon cooking oil
  • 1½ cup sour cream
  • 1 medium yellow onion, chopped
  • ½ teaspoon salt
  • A dash of ground black pepper
Instructions
  1. Preheat oven to 350F.
  2. Heat the cooking oil in a pan. Once the oil gets hot, add the onion. Continue to cook the onion in medium heat while stirring until caramelized.
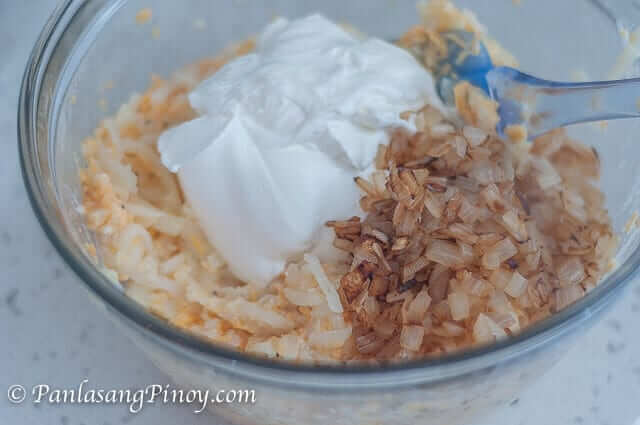
  3. Meanwhile, combine shredded hash brown, cream of chicken, butter, cheese, salt, and pepper.
  4. Add sour cream and caramelized onion.
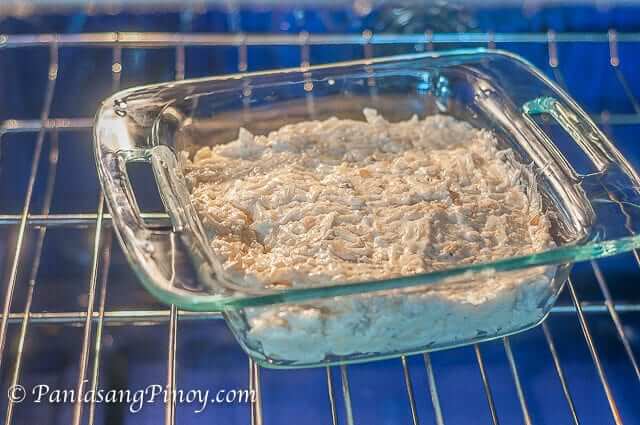
  5. Mix well then arrange in a baking pan.
  6. Bake for 35 minutes.
  7. Remove from the oven and it cool down. Serve. Share and enjoy!

Hash Brown Casserole Recipe

The post Hashbrown Casserole appeared first on Panlasang Pinoy.

Apple Snails in Coconut Milk (Ginataang Kuhol)

$
0
0

Apple Snails in Coconut Milk or Ginataang Kuhol is a dish that can be enjoyed either as a main dish along with warm white rice, or as an appetizer. This dish is rich and flavorful. I added more chili pepper to provide additional spice to the dish. I like dishes in coconut milk to be extra spicy.

The apple snails used in this recipe (apple snails are also called golden mystery snails) were already cleaned and the shells were removed. These came frozen in a 1lb. package. It is a good thing for me because I saved some time cleaning them. However, I missed the thrill of trying to suck the sauce and meat out of the shell — which  usually do when I eat this dish in the Philippines.

Ginataang Kuhol_

I used more spinach for this recipe than I usually do. I cooked this dish for lunch and I like to have more veggies along with the tasty snails. Don’t worry if you add more spinach because these will compress later on and blend with all the other ingredients. If you like this to be more spicy, use hotter varieties of chili pepper. This scoville scale post can help.

Try this Apple Snails in Coconut Milk (Ginataang Kuhol). Please send us your feedback.

Apple Snails in Coconut Milk (Ginataang Kuhol)
 
Author: 
Nutrition Information
  • Serves: 4
  • Serving size: 4
Prep time: 
Cook time: 
Total time: 
Ingredients
  • 1 lb. Apple snails (kohol), shell removed
  • 1 large bunch fresh spinach
  • 2 cups coconut milk
  • 6 pieces red chillies
  • 1 medium onion, sliced
  • 4 cloves garlic, crushed and chopped
  • 2 thumbs ginger sliced
  • ¼ cup shrimp paste
  • ¼ teaspoon ground black pepper
  • 3 tablespoons cooking oil
Instructions
  1. Heat the cooking oil in a cooking pot.
  2. Once the oil gets hot, saute the garlic and onion. Add the ginger and continue to cook for 1 to 2 minutes.
  3. Put the apple snails in the cooking pot. Stir and cook for 2 minutes.
  4. Add the shrimp paste and chillies. Stir.
  5. Pour-in the coconut milk. Let boil. Cover and simmer for 30 minutes.
  6. Add the ground black pepper and spinach. Stir and cook for 5 minutes without covering.
  7. Transfer to a serving bowl. Serve for pulutan or as a main dish with warm white rice. Share and enjoy!


Ginataang Kuhol Recipe

The post Apple Snails in Coconut Milk (Ginataang Kuhol) appeared first on Panlasang Pinoy.

Sweet and Sour Pompano

$
0
0

Sweet and Sour Pompano is a simple fish dish that you can serve for lunch. This recipe involves pompano, a type of fish known for its white meat and delicious taste. This quick and easy recipe has been tried and tested multiple times. I find it convenient to have a cup or two of sweet and sour sauce in the fridge ready, just in case I make an impulsive decision to make dishes such as this (I usually have a weekly meal plan, but that is not followed 100% for many reasons).

Sweet and Sour Pompano

The sweet and sour sauce is a separate recipe that you can view on the recipe section below. There is a a link leading to the recipe. The fish, on the other hand, is a simple fried fish recipe. I just made some incisions on the fish so that it can absorb the salt and cook faster. I think that it also gave the fish a classy look.

This dish is best with warm white rice. You can also have it with fried rice. The good thing about the sweet and sour sauce is the idea that you can use it almost in any fried dishes. You can fry pork or chicken and pour the sauce over to make it taste great. A good example would be our Sweet and Sour Chicken Nuggets.

Sweet and Sour Pompano - Frying

Try this Sweet and Sour Pompano Recipe. Let me know what you think.

Sweet and Sour Pompano
 
Author: 
Nutrition Information
  • Serves: 3
  • Serving size: 3
Prep time: 
Cook time: 
Total time: 
Ingredients
  • 1 large pompano, innards and gills removed
  • 2 tablespoons coarse sea salt
  • 1½ cups cooking oil
  • 1½ to2 cups sweet and sour sauce (use half the amount of this sweet and sour sauce recipe)
Instructions
  1. Wash the fish thoroughly in running water. Let the liquid drip.
  2. Make incisions on both sides of the fish. This will let the fish absorb the seasonings and will help it cook quicker.
  3. Rub the salt all over the fish. You can add more salt to rub in the cavity of the fish. Let it stay for 15 minutes.
  4. Meanwhile, heat the cooking oil in a wide frying pan.
  5. Once the oil gets hot, carefully lay the fish on the frying pan. Watch out for splattering oil. Fry for 8 to 10 minutes in medium heat or until the fish turns golden brown. Turn the fish over to fry the other side. Cook the opposite side for 8 minutes. If you want to prevent the oil from splattering, try this fried pompano recipe.
  6. Remove the fried fish from the frying pan and arrange in a serving plate.
  7. Top the fish with sweet and sour sauce.
  8. Serve with warm rice. Share and enjoy!

Sweet and Sour Pompano Recipe

The post Sweet and Sour Pompano appeared first on Panlasang Pinoy.

Simple Recipe for Chicken Noodle Soup

$
0
0

This Simple Recipe for Chicken Noodle Soup is simple and quick. In fact, it takes less than 30 minutes to prepare. What makes this soup dish convenient to make and very flavorful has something to do with the chicken. I am using rotisserie chicken for this recipe — roasted chicken can also be used.

Chicken Noodle Soup_

Rotisserie and roasted chicken are both cooked and ready to eat. These are also very tasty. The fact that these chicken are already cooked saves us time because we do not need to cook the chicken longer. The flavor of the chicken blends well with all the ingredient and is a key factor in the overall taste of this soup dish.

I am using a wide flat dumpling noodles made only of egg whites. You do not need to use the same ingredient if it is not readily available in your location: any flat noodle or the pasta of your choice is good enough. I recommend the following: macaroni, farfalle, and rotini.

Try this Simple Recipe for Chicken Noodle Soup. Send us your feedback.

Simple Recipe for Chicken Noodle Soup
 
Author: 
Nutrition Information
  • Serves: 4
  • Serving size: 4
Prep time: 
Cook time: 
Total time: 
Ingredients
  • ½ roasted or rotisserie chicken
  • 2 tablespoons chopped parsley
  • 1 small sweet onion, chopped
  • 1 medium carrot, sliced
  • 2 cups egg white dumpling noodles (flat)
  • 4 cups chicken broth
  • 2 cups water
  • salt and pepper to taste
Instructions
  1. Shred the meat from the chicken. Chop into smaller pieces. Set aside.
  2. Combine chicken broth and water in a cooking pot. Bring to a boil.
  3. Once the liquid starts to boil, add carrots, onion, and parsley. Cover and cook for 5 minutes.
  4. Add the chicken. Stir, cover, and cook in low to medium heat for 18 to 20 minutes.
  5. Add the flat dumpling noodles. Stir and cook for 3 minutes.
  6. Add salt and pepper to taste.
  7. Transfer to a serving bowl. Serve.
  8. Share and enjoy!

Chicken Noodle Soup Recipe

The post Simple Recipe for Chicken Noodle Soup appeared first on Panlasang Pinoy.

Crispy Pata Sisig Recipe

$
0
0

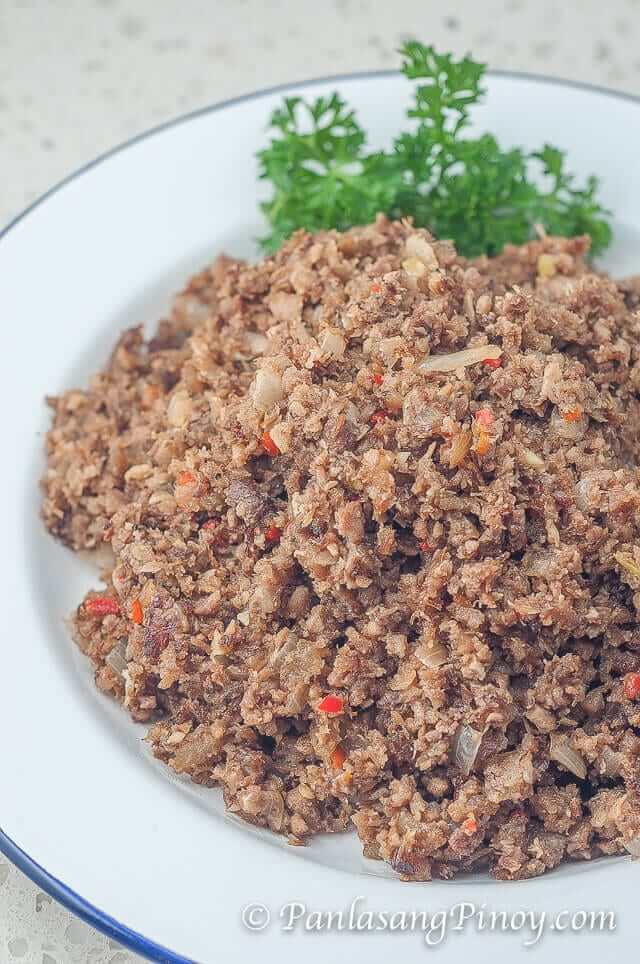
Crispy Pata Sisig is a dish that I came-up with using the leftover crispy pata that we had a day before. Since I will feel guilty if I consume the entire crispy pig leg, I opted to just indulge on a safe portion of it then kept what’s left in the fridge. The crispy pata was really good and the skin was very crispy.

Crispy Pata Sisig

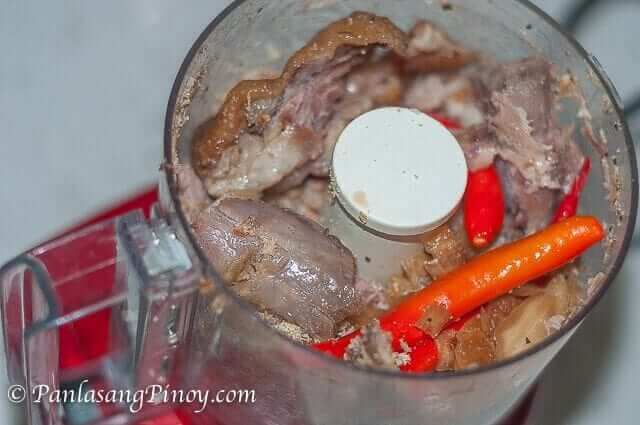
The leftover crispy pata is was not crisp at all since it was in the fridge for quite a while. However, the flavor was still intact. I thought of making something out of the meat and skin and leverage on the flavor that the meat already had — and making a sisig out of what I have seemed to be the easiest. I started out by removing the meat from the bone and chopping it into pieces. I also utilized my handy food processor to mince the pork and chillies. This saved me a lot of time and effort.

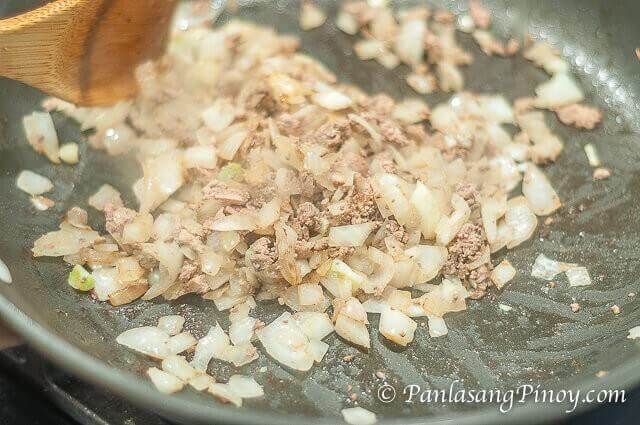
I added chopped chicken liver to the recipe to provide a rich taste to the dish and make this sisig version taste even better. The chicken liver was cooked along with the chopped onion using margarine. I was happy with the outcome of this dish.

Try this spicy and delicious Crispy Pata Sisig Recipe. Send us your feedback.

Crispy Pata Sisig Recipe
 
Author: 
Nutrition Information
  • Serves: 4
  • Serving size: 4
Prep time: 
Cook time: 
Total time: 
Ingredients
  • 1 lb. leftover crispy pata meat, bone removed
  • 8 pieces spicy red chilies
  • 3 tablespoons vinegar
  • ½ teaspoon granulated white sugar
  • 1½ teaspoons onion powder
  • ¼ teaspoon ground black pepper
  • ½ teaspoon salt
  • 1 large sweet onion, chopped
  • ½ cup chopped chicken liver
  • 3 tablespoons margarine or butter
Instructions
  1. Combine the vinegar and sugar. Mix well. Arrange the pork in a bowl then pour the mixture. Let its stay for 30 minutes.
  2. Arrange the pork and chillies (with vinegar) in a food processor. Pulse until the meat and chillies are minced uniformly.
  3. Transfer the minced pork and chillies in a bowl. Set aside.
  4. Meanwhile, melt the butter or margarine in a pan. Saute the onion. Once the onion gets soft, add the chopped chicken liver. Cook for 2 minutes.
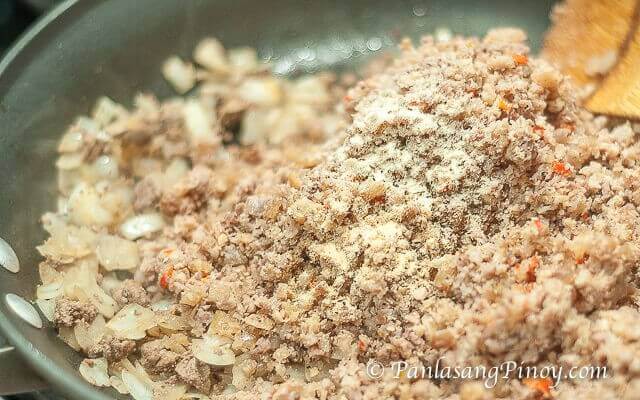
  5. Add the minced pork and chili, onion powder, ground black pepper, and salt. Cook while stirring for 8 to 10 minutes.
  6. Transfer to a serving plate. Serve.
  7. Share and enjoy!

Crispy Pata Sisig Recipe

The post Crispy Pata Sisig Recipe appeared first on Panlasang Pinoy.
Viewing all 460 articles
Browse latest View live