Quantcast
Channel: Recipes – Panlasang Pinoy
Viewing all 460 articles
Browse latest View live

Fried Pompano

$
0
0

Pompano is a type of marine fish; it has tasty white meat. This fried pompano recipe is a simple and easy to follow recipe that anyone can do — especially those who fear splattering oil when frying.

Before cooking any fish, make sure that it is cleaned. This means that the gills, innards, and scales are removed. It is also important to rub the fish with salt. One technique that I do to let the fish absorb the salt is to create incisions on both sides of the fish. This will let the granules penetrate the meat and absorb it.

I understand that there are people who are afraid to fry fish and other meat in general because of splattering oil. While it is normal for oil to splatter when frying, this can be avoided by not letting the water (or the liquid from the meat to be fried) from touching the hot oil directly. Dredging the fish in all-purpose flour before frying is the simple solution. The flour absorbs the liquid outside of the fish which lessens or eliminates the splattering action.

I like it when the fish is sort of crisp in the outside while soft in the inside. This can be achieved by frying in high heat. I enjoy eating Fried pompano with rice and a vegetable side dish.

Try this Fried Pompano recipe. Let me know what you think.

fried pompano

Fried Pompano recipe

Ingredients

  • 1 (2 lbs.) pompano fish, cleaned and innards and gills removed
  • 1 tablespoon sea salt
  • 1 1/2 cups cooking oil
  • 1/2 cup all-purpose flour
  • 1/4 teaspoon ground black pepper
  • 1 piece lemon, wedged

Cooking Procedure

  1. Make diagonal incisions on both sides of the fish using a sharp knife. This will open the fish to absorb the seasonings.
  2. Rub the salt all over the fish and then sprinkle both sides with ground black pepper. Let it stay for 10 to 15 minutes.
  3. Heat the cooking oil in a pan.
  4. Spread the flour in a plate and then dredge both sides of the fish. This helps avoid the oil to splatter because the flour will absorb the liquid.
  5. When the oil becomes hot, fry one side of the fish in medium to high heat for about 8 to minutes or until the color turns golden brown and the texture becomes crisp.
  6. Flip the fish gently to cook the other side. Fry it for about 7 to 8 minutes.
  7. Remove the place from the pan while letting excess oil drip. Place it in a plate lined with paper towels so that the oil will be absorbed.
  8. Serve with lemon wedges along with your favorite vegetable dish as a side.
  9. Share and enjoy!

Number of servings (yield): 4

My rating 5 stars:  ★★★★★ 12 review(s)

>>Download the Free eCookbook here<<


Hoisin Glazed Salmon

$
0
0

Hoisin Glazed Salmon is a type of baked salmon dish that was marinated in a mixture of hoisin sauce, Sriracha sauce, and other seasonings. This salmon recipe is sweet and a bit spicy at the same time. It is ideal for dinner and is best eaten with salad, rice, or couscous.

I enjoy eating Hoising glazed salmon because the flavor is just about right. I love spicy food, but this recipe somewhat milder so that even people with low tolerance on spicy dishes can enjoy it. We can always add more Sriracha sauce if we like it hot.

It is ideal to use salmon filet for this recipe. Make sure to remove the skin from the filet. Aside from salmon, you can also use other types of fish filets like tuna or cream dory perhaps.

Try this Hoisin Glazed Salmon recipe. Let me know what you think.

Hoisin Glazed Salmon

Hoisin Glazed Salmon recipe

Ingredients

  • 4 (6 oz) slices salmon fillet
  • 4 tablespoons hoisin sauce
  • 1 tablespoon lemon juice
  • 1/2 teaspoon Sriracha sauce
  • 2 tablespoons low sodium soy sauce
  • 2 teaspoons grated ginger
  • 1 teaspoon garlic powder
  • 1 tablespoon extra virgin olive oil

Cooking Procedure

  1. Combine Hosin sauce, lemon juice, soy sauce, garlic powder, Sriracha sauce, ginger, and EV olive oil in a bowl. Stir until the mixture is well incorporated.
  2. Arrange the salmon fillets inside a resealable freezer bag. Pour-in the mixture inside the bag. Make sure that the mixture coats the salmon.
  3. Place the bag in a flat surface then gently push the air out of the bag and seal it. Refrigerate for 1 hour.
  4. Preheat the oven to 350 degrees Fahrenheit.
  5. Grease a baking tray by spraying or spreading a small amount of cooking oil. Arrange the marinated salmon on the tray.Scoop the remaining marinade and pour it nover each salmon fillet.
  6. Bake for about 28 to 32 minutes.
  7. Remove from the oven. Let the temperature cool down.
  8. Arrange in a serving plate along with your favorite salad side dish.
  9. Serve. share and enjoy!

Number of servings (yield): 4

My rating 5 stars:  ★★★★★ 15 review(s)

>>Download the Free eCookbook here<<

Basil Beef

$
0
0

Basil beef is a delicious ground beef recipe. It is usually tastes somewhat sweet and spicy. It also has an appetizing aroma brought about by the fresh basil leaves.

I love basil beef as much as basil chicken. The type of meat does not matter to me as long as the the flavors of the ingredients are in harmony. I used to enjoy this dish with plain white rice, but I think that can also be a good pair for brown rice. You see, I have been eating brown rice lately and it already did me wonders.

In terms of the heat, it is up to you to control the amount of chili. It could be mild or very hot depending on your preference. As for the basil leaves, you can use the regular fresh basil leaves or use holy basil. The more basil leaves the better as it adds a nice aroma and flavor to the dish. By the way, I would recommend you to adjust the saltiness according to your taste. Instead of pouring all the fish sauce right away, try doing half of it first. You can add the remaining fish sauce towards the end if you need more.

Try this Basil beef recipe. Let me know what you think.

Basil Beef

Basil Beef Recipe

Ingredients

  • 1 1/2 lbs. ground beef
  • 10 pieces fresh basil leaves (holy basil)
  • 2 1/2 tablespoons fish sauce
  • 2 teaspoons chili flakes
  • 2 tablespoons minced garlic
  • 2 tablespoons brown sugar
  • 3 tablespoons extra virgin olive oil
  • 1/2 teaspoon ground black pepper

Watch the cooking video:

http://www.youtube.com/watch?v=N1E7d69O0p0

Cooking Procedure

  1. Heat a frying pan.
  2. Pour the oil in the frying pan.
  3. When the oil becomes hot, sauté the garlic.
  4. Add the chili flakes and then cook for 15 seconds.
  5. Put-in the ground beef. Stir and brown for about 10 minutes.
  6. Add the fish sauce and brown sugar. Stir. Simmer for 20 minutes while letting the excess liquid evaporate.
  7. Put-in the basil leaves. Cook for 5 minutes.
  8. Sprinkle the ground black pepper. Stir
  9. Turn-off heat. Transfer to a serving plate. Add fried egg on top if desired.
  10. Serve. Share and enjoy!

Number of servings (yield): 4

My rating 5 stars:  ★★★★★ 1 review(s)

>>Download the Free eCookbook here<<

Vegetable Spring Roll

$
0
0

Vegetable spring roll is a fried spring roll variation that makes use of vegetables such as cabbage, carrots, and bean sprouts as ingredients. This dish is quick and easy to prepare. It can be enjoyed  more when dipped in your favorite dipping sauce.

Vegetable spring roll can be enjoyed as an appetizer, a snack, and a side dish. I personally like dip it in my favorite Asian dipping sauce — sometimes spicy vinegar such as sinamak or pinakurat does the trick.

Try this Vegetable Spring Roll recipe. Let me know what you think.

vegetable spring roll

Vegetable Spring Roll recipe

Ingredients

  • 2 1/2 cups shredded cabbage
  • 3/4 cups carrots, julienned
  • 3 cups bean sprouts, cleaned
  • 2 tablespoons chopped green onions
  • 2 teaspoons minced garlic
  • 1 teaspoon minced ginger
  • 1 teaspoon sesame oil
  • 1 1/2 tablespoon soy sauce
  • 1/3 teaspoon ground black pepper
  • spring roll wrappers
  • 1 egg, beaten
  • 3 cups Cooking oil

Cooking Procedure

  1. Heat a pan and then scoop about 1 to 1 1/2 tablespoons of cooking oil.
  2. When the oil becomes hot, saute the garlic and ginger.
  3. Add the green onion, cabbage, and carrots. Cook for 3 to 4 minutes.
  4. Put-in the bean sprouts, soy sauce, and sesame oil. Mix well and then cook for 1 to 2 minutes.
  5. Turn off the heat and then transfer the vegetables to a colander to drain the liquid. Let it cool down.
  6. Lay a piece of spring roll wrapper in a clean flat surface. Scoop about 2 tablespoons of vegetable mixture. Wrap the mixture by folding the opposite ends of the wrapper inward and then rolling the other side until a cylindrical shape is formed. Seal the edge by brushing the beaten egg mixture in the end of the wrapper. Repeat this step until the veggie mixture is consumed.
  7. Meanwhile, heat the cooking oil in a deep cooking pot.
  8. When the oil becomes hot, put-in the spring rolls gently one at a time until the maximum capacity of the cooking pot is reached. For better results, try to limit the rolls by cooking around 5 to 6 pieces at a time.
  9. Deep fry for 3 to 5 minutes or until the wrapper turns light to medium brown.
  10. Remove the fried spring rolls from the pot and place in a plate lined with paper towel.
  11. Serve with your favorite spring roll dipping sauce.
  12. Share and enjoy!

Number of servings (yield): 5

My rating 5 stars:  ★★★★★ 15 review(s)

>>Download the Free eCookbook here<<

Pork Tinola

$
0
0

Pork Tinola is a delicious Filipino soup dish. Cubed pork butt or pork belly are cooked and tenderized in a stock composed of ginger, beef broth, and rice washing. This is best eaten with steamed white rice and dipped in fish sauce with crushed chili pepper.

Aside from pork, Tinola can also be made with any kind of meat. In fact, chicken tinola is the most common and popular tinola version. If you love seafood fish tinola is also a good idea.

I enjoy eating tinola during rainy or cold days.  It makes me feel warm and relaxed.

As I’ve mentioned, some of the vegetables that I used are alternatives to the original vegetable ingredients. For example, spinach is the best substitute for malunggay leaves and hot pepper leaves, while chayote can be used as a replacement for green papaya. This should let us realize that we can always prepare our favorite Filipino dishes wherever we are in the world.

Try this Pork Tinola recipe. Let me know what you think.

Pork Tinola

Pork Tinola Recipe

Ingredients

  • 2 lbs. pork butt, cubed
  • 1 bunch fresh spinach, cleaned
  • 2 medium chayote, wedged
  • 2 thumbs ginger, julienned
  • 1 medium yellow onion, sliced
  • 5 cloves garlic, crushed
  • 2 tablespoons fish sauce
  • 32 oz. beef broth
  • 4 cups rice washing
  • 1/2 teaspoon ground black pepper
  • 2 tablespoons cooking oil

Watch the cooking video:

http://www.youtube.com/watch?v=8TASwTS5ewg

Cooking Procedure

  1. Heat the cooking oil in a deep cooking pot.
  2. When the oil is hot, saute the garlic, ginger, and onion. Cook until the onion is soft.
  3. Put-in the pork and then cook for 5 minutes or until it browns.
  4. Add-in the ground black pepper. Stir.
  5. Pour-in the beef broth. Let boil.
  6. Pour 1 cup of rice washing. Allow the liquid to reboil. Cover and simmer for 45 to 60 minutes or until the pork becomes tender.
  7. Add the chayote wedges. Cook for 5 minutes.
  8. Pour the fish sauce and stir.
  9. Add the spinach. Cover the cooking pot and then turn the heat-off. Let the residual heat cook the spinach.
  10. Transfer to a serving bowl. Serve with white rice.
  11. Share and enjoy!

Number of servings (yield): 6

My rating 5 stars:  ★★★★★ 1 review(s)

>>Download the Free eCookbook here<<

Tangy Shrimp Tacos

$
0
0

Tangy Shrimp Tacos is a quick and easy shrimp tacos recipe that you will surely love. This baby is nice because it has both rich and spicy. Of course, adding more hot sauce will make it more interesting.

Tangy shrimp tacos is an ideal food for lunch. This can also be considered as a bar food and is best when washed with a glass of your favorite cold drink.

I used flour tortillas in this recipe — corn tortilla should work too. As for the guacamole, I have a good guacamole recipe that you can try. If you are looking for a shortcut for a quick guacamole, try combining 1 avocado with 1 teaspoon of lemon juice and 2 teaspoons of mayonnaise. This is not as authentic as it sounds but it should do the trick.

Try this Tangy Shrimp Tacos recipe. Let me know what you think.


Tangy Shrimp Tacos

Tangy Shrimp Tacos recipe

Ingredients

  • 1 lb large shrimp, cleaned and shelled
  • 2 teaspoons ground cumin
  • 1/2 teaspoon garlic powder
  • 1 teaspoon chili powder
  • 2 tablespoons lemon juice
  • 1/2 teaspoon ground black pepper
  • 1/2 teaspoon salt
  • 1 cup guacamole
  • 1 cup chopped cilantro
  • 1 1/2 cups sour cream
  • 1 cup diced fresh roma tomatoes
  • Hot sauce (optional)
  • 10 to 12 pieces flour tortilla
  • 1 tablespoon cooking oil or cooking oil spray

Cooking Procedure

  1. Pour the lemon juice over the shrimp. Let it stay for 10 minutes.
  2. In a bowl, combine the cumin, chili powder, ground black pepper, garlic powder, and salt. Mix well.
  3. Combine the spice mixture and shrimp. Gently toss to coat and then let it stay for 30 minutes.
  4. Heat a non stick frying pan. Apply a little cooking oil spray.
  5. Once the pan is hot, put enough shrimp in the pan and then cook each side in medium to high heat for 3 to 4 minutes. Note: do not overcook the shrimp.
  6. Remove the shrimp and place in a clean plate.
  7. Meanwhile, heat a grill pan. Warm the flour tortillas by placing it on the grill pan for 40 seconds.
  8. Place the warm tortilla in a plate and then start to assemble the shrimp tacos. You can start by arranging the cubed tomatoes and chopped cilantro followed by the shrimp. Add some guacamole and top with sour cream. you can even add hot sauce if you want.

Number of servings (yield): 4

My rating 5 stars:  ★★★★★ 15 review(s)

>>Download the Free eCookbook here<<

Squid Ball Chop Suey

$
0
0

Squid Ball Chop Suey is a Chop Suey variation that makes use of squid balls instead of the usual meat ingredients. This recipe is simple, delicious, and easy to follow. Once you have all the ingredients, let me help and guide you to prepare the dish by watching the cooking video and following the detailed written procedure.

As you might have noticed, there are many ways to cook chop suey. It all depends on your preference and imagination. I consider myself a chop suey fan and I was able to make more than 12 variations, if my memory serves me right. All it I did was to master a base recipe and use it to experiment using other ingredients.

Try this Squid Ball Chop Suey recipe. Let me know what you think.

Squid Ball Chop suey

Squid Ball Chop Suey

Ingredients

  • 1 medium head cabbage, chopped
  • 12 to 15 pieces squid balls
  • 2 cups snow peas
  • 2 tablespoons oyster sauce
  • 1 large carrot, sliced crosswise
  • 1 red bell pepper, sliced
  • 1 yellow bell pepper sliced
  • 2 cups cauliflower
  • 1/4 lb chicken liver
  • 10 pieces boiled quail eggs
  • 1 cup chicken broth
  • 1 teaspoon mined garlic
  • 1 medium yellow onion, sliced
  • salt and ground black pepper to taste
  • 2 tablespoons cooking oil

Watch the cooking video:

http://www.youtube.com/watch?v=DR3w4FNiVac

Cooking Procedure

  1. Heat the oil in a pan.
  2. Once the oil is hot, saute the garlic and onion.
  3. Add the chicken liver. Cook for 3 to 5 minutes.
  4. Add the oyster sauce and chicken broth. Stir and let boil.
  5. Put-in the squid balls. Cover and simmer for 10 to 12 minutes.
  6. Increase the heat to medium. Sprinkle some ground black pepper. Stir.
  7. Add the carrots and cauliflower. Cook for 3 minutes.
  8. Add the snow peas and bell peppers. Toss.
  9. Put-in the cabbage. Cover and steam the vegetables for 3 to 5 minutes.
  10. Remove the cover. Gently stir the ingredients and add the quail eggs.
  11. Add salt to taste.
  12. Transfer to a serving plate. Serve.
  13. Share and enjoy!

Number of servings (yield): 6

My rating 5 stars:  ★★★★★ 12 review(s)

>>Download the Free eCookbook here<<

Honey and Balsamic Glazed Mahi-mahi

$
0
0

Honey and Balsamic Glazed Mahi-mahi is a healthy and delicious choice for lunch. This will even be better if paired with the good stuff such as brown rice and steamed asparagus.

Preparing Honey and Balsamic Glazed Mahi-mahi is simple and quick. All you need is a grill or a grilling pan and some easy to find ingredients — you will enjoy your delicious dish sooner than you imagine. 

Do you know that the name “Mahi-mahi” is of Hawaiian origin. If I am not mistaken, this fish is called Dorado in some parts of the world, including the Philippines.

Try this Honey and Balsamic Glazed Mahi-mahi recipe. Let me know what you think.


Honey glazed mahi-mahi

Honey and Balsamic Glazed Mahi-mahi

Ingredients

  • 4 (5 oz.) mahi-mahi fillets
  • 1/2 cup honey
  • 1/4 cup balsamic vinegar
  • 1/2 teaspoon mustard powder
  • 1/2 teaspoon ground black pepper
  • 1/2 tablespoon sea salt
  • Melted butter, for brushing salmon

Cooking Procedure

  1. Combine the mustard powder, salt, and ground black pepper in a bowl. Mix well and set aside.
  2. Microwave the honey for 15 to 20 seconds and then mix with balsamic vinager. Stir to mix.
  3. Rub the salt, pepper, and mustard mixture all over each mahi-mahi fillet.
  4. Brush the top with the honey and balsamic vinager mixture.
  5. Heat the grill and then grill each side of the fish in medium heat for 5 to 6 minutes while basting with the honey mixture.
  6. Tranfer to a serving plate.
  7. Serve with brown rice and steamed asparagus.
  8. Share and enjoy!

Number of servings (yield): 4

My rating 5 stars: ★★★★★ 8 review(s)

>>Download the Free eCookbook here<<


Kilawing Puso ng Saging

$
0
0

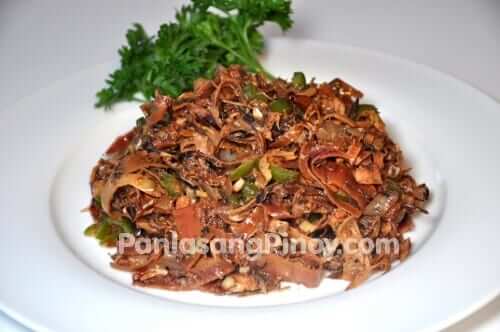
Kilawing Puso ng Saging is a Filipino recipe involving banana blossoms. This is considered as a vegetable dish wherein the blossoms are sauteed with garlic and onion and cooked in vinegar.

We can consider Kilawing Puso ng Saging as a simple recipe that can be cooked during regular days. This is also budget friendly because banana blossoms are not expensive at all. I remember the days when I was growing up in the Philippines. I used to harvest the banana blossoms from the banana plants in a vacant lot near our house.

Before you proceed in the cooking process, make sure that you prepare the blossoms accordingly. It is important that the sap is removed before you cook. Refer to the cooking video for more guidance.

Try this Kilawing Puso ng Saging recipe. Let me know what you think.

Kilawing Puso ng Saging

Kilawing Puso ng Saging

Ingredients

  • 2 to 3 cups chopped banana blossoms
  • 1 tablespoon minced garlic
  • 1 medium yellow onion, sliced
  • 6 tablespoons cane vinegar
  • 3 pieces long green chili pepper, sliced
  • 2 tablespoons fish sauce
  • 1/4 teaspoon ground black pepper
  • 3/4 cup vegetable broth
  • Brine: 6 cups of water combined with 5 tablespoons salt
  • 2 tablespoons cooking oil

Watch the cooking video:

http://www.youtube.com/watch?v=5Y6UZ6bv3R8

Cooking Procedure

  1. Soak the chopped banana blossoms in the bowl with brine for 15 to 20 minutes. After soaking, squeeze tightly to release the sap from the banana blossoms. Place in a colander to drain the water. Set aside.
  2. Heat the cooking oil in a pan.
  3. Saute the garlic and onion.
  4. Add the banana blossoms. Cook for 5 minutes.
  5. Pour-in the fish sauce and vegetable broth, Stir and let boil.
  6. Pour-in the vinegar. Allow to re-boil, cover, and simmer for 10 to 15 minutes.
  7. Add the green chili and ground black pepper.Stir and continue to cook for 5 minutes.
  8. Turn-off the heat and transfer to a serving plate.
  9. Serve. Share and enjoy!

Number of servings (yield): 3

My rating 5 stars: ★★★★★ 7 review(s)

>>Download the Free eCookbook here<<

Pork Kaldereta

$
0
0

Pork Kaldereta is a Filipino tomato based stew dish. It is composed of cubed pork ham or belly, potato, carrots, tomato sauce, liver spread and other vegetables.

The secret in preparing a good pork kaldereta is all in the meat. Make sure to use high quality meat because this can make or break the outcome of your dish. I also recommend the use of liver spread because it will make your kaldereta stand out. Remember that a true kaldereta dish should have liver spread or liver paste as one of its ingredients.

Green olives, on the other hand, will give your dish a nice sour flavor that will compliment well with the other ingredients. You can do without it, but it is better to cook with green olives at least once when making kaldereta so that you will understand what I’m talking about.

Try this Pork Kaldereta recipe. Let me know what you think.

Pork Kaldereta

Pork Kaldereta Recipe

Ingredients

  • 2 lbs. Pork, cubd
  • 1 (15 oz.) can tomato sauce
  • ¾ cup green olives
  • 1 medium red bell pepper, sliced
  • 1 medium green bell pepper, sliced
  • 2 medium baking potatoes, cut into large cubes
  • 1 medium yellow onion, sliced
  • 2 teaspoons minced garlic
  • 32 oz. beef broth
  • ½ cup liver spread
  • 3 tablespoons cooking oil
  • Salt and pepper to taste

Watch the cooking video:

http://www.youtube.com/watch?v=wcCkzvApxkA

Cooking Procedure

  1. Heat the oil in a cooking pot.
  2. Once the oil is hot, saute the garlic and onion.
  3. Add the pork. Stir and cook for for 5 minutes or until the color turns light to medium brown.
  4. Pour-in the tomato sauce and beef broth. Let boil. Cover and simmer for 60 minutes.
  5. Add the liver spread. Stir and cook for 3 minutes.
  6. Put-in the carrots and potatoes. Cover and cook for 8 to 10 minutes.
  7. Add the olives and bell peppers. Cook covered for 8 minutes.
  8. Add salt and pepper to taste.
  9. Turn-off the heat. Transfer to a serving plate.
  10. Serve. Share and enjoy!

Number of servings (yield): 5

My rating 5 stars:  ★★★★★ 27 review(s)

>>Download the Free eCookbook here<<

Asian Grilled Chicken and Corn

$
0
0

Asian Grilled Chicken and Corn is another grilled chicken recipe that is full of Asian flavors. This dish is easy to prepare and best served for lunch.

You can use any type of grill when preparing this dish except for grill pans. Since chicken leg quarters are thick, it will need enough heat and the proper grill to cook properly. I also suggest that you marinate it for at least 6 hours or longer so that the chicken will absorb the flavor.

Aside from corn, Asian Grilled Chicken can also be enjoyed with steamed white rice. I encourage you to use a meat thermometer whenever you grill poultry so that you can be sure that the meat is cooked well. This will eliminate the risk of gastrointestinal distress or related issues.

Try this Asian Grilled Chicken and Corn recipe. Let me know what you think.

Asian Grilled Chicken and Corn

Asian Grilled Chicken and Corn

Ingredients

  • 4 chicken leg quarters
  • 1/2 cup soy sauce
  • 1 tablespoon sesame oil
  • 1 teaspoon grated fresh ginger
  • 1 teaspoon brown sugar
  • 1/2 teaspoon ground black pepper
  • 1/2 teaspoon salt
  • Rind of 1 lemon
  • 4 pieces sweet corn
  • 1/4 cup butter, melted

Cooking Procedure

  1. Combine the soy sauce, sesame oil, grated ginger, lemon rind, sugar, ground black pepper, and salt in a bowl. Mix well.
  2. Arrange the chicken leg quarters in a resealable plastic bag. Pour-in the soy sauce mixture. Let the air out of the bag and seal. Marinate for at least 6 hours.
  3. Heat-up the grill. Grill one side in low heat for 15 minutes. Flip the chicken. Baste using the leftover marinade. Continue to grill the other side for another 15 minutes. You can also grill the corn at this time and brush it with butter.
  4. Increase the heat to medium. Flip the chicken once more and then grill each side for 5 to 8 minutes while basting. Use a meat thermometer to ensure that the chicken is cooked. You know that its done if the internal temp reaches 165F.
  5. Remove the chicken and corn from the grill. Transfer to a serving plate.
  6. Serve. Share and enjoy!

Number of servings (yield): 4

My rating 5 stars:  ★★★★★ 12 review(s)

>>Download the Free eCookbook here<<

Bok Choy Adobo

$
0
0

Bok Choy Adobo is a quick and simple way to cook bok choy. This is one of the easy bok choy recipes out there that you should try. The local bok choy variety in the Philippines is called “Pechay”; this dish is also known as adobong pechay or inadobong pechay.

I enjoy eating bok choy adobo along with fried fish and white rice. I think that I got the idea in a childrens educational show during my childhood days. The show was encouraging children to eat healthy food — like “IsKaGu” which is short for Isda (fish), kanin (rice), at gulay (vegetables). Of course, some might question the health benefits of white rice. Let’s hang the discussion about it for now. You can always eat brown rice with fish and veggies as a healthier alternative.

Try this Bok Choy Adobo Recipe. Let me know what you think!


bok choy adobo

Bok Choy Adobo Recipe

Ingredients

  • 1 lb. bok choy, chopped
  • 1 head garlic, crushed
  • 3 tablespoons soy sauce
  • 2 tablespoons white vinegar
  • 1/2 teaspoon granulated white sugar
  • 3 pieces dried bay leaves
  • salt and pepper to taste
  • 2 tablespoons cooking oil

Cooking Procedure

  1. Heat the cooking oil in a frying pan.
  2. Once the oil becomes hot, put-in the crushed garlic and dried bay leaves. Cook until the garlic turns light to medium brown.
  3. Remove half of the garlic and then set them aside.
  4. Add the chopped bok choy. Stir and cook for 3 minutes.
  5. Pour-in the soy sauce and vinagar. Let boil. Stir, cover, and simmer for 5 to 8 minutes.
  6. Add salt (if needed), pepper, and sugar.Stir and then cook for another minute more.
  7. Tranfer to a serving plate. Top with fried garlic.
  8. Serve. Share and enjoy!

Number of servings (yield): 3

My rating 5 stars:  ★★★★★ 8 review(s)

>>Download the Free eCookbook here<<

Braised Collard Greens

$
0
0

Braised Collard Greens is a delicious and tasty vegetable dish that you can enjoy for dinner. This involves Collard greens, which is a type of green vegetable with loose leaves. It has a tough texture and requires longer cooking time to be tender.

This Braised Collard Greens recipe is a perfect way to tenderize the vegetable and make it appealing to the palate. The turkey bacon and other ingredients work hand-in-hand to improve the flavor and make this vegetable dish stand-out.

I like to eat this dish along with fried or baked dishes such as oven baked chicken or fried pork chops. The taste of Braise Collard Greens compliments any roast or baked main dish that you serve with it.

Try this Braised Collard Greens recipe. Let me know what you think.

Braised Collard Greens

Braised Collard Greens Recipe

Ingredients

  • 3 lbs fresh collard greens, stems removed and chopped
  • ½ lb. Turkey bacon. Chopped
  • 1 medium yellow onion, sliced
  • 2 teaspoons minced garlic
  • 2 tablespoons molasses
  • 4 tablespoons cane or white vinegar
  • 2 cups chicken broth
  • 1 1/2 cups water
  • 1 1/4 teaspoon salt
  • 1/2 teaspoon ground back pepper
  • 2 tablespoons cooking oil

Cooking Procedure

  1. Heat the oil in a wide casserole.
  2. When the oil is hot, add the turkey bacon. Cook for 1 minute.
  3. Put-in the garlic and onion. Continue to cook until the onion becomes soft.
  4. Pour-in the chicken broth and water. Let boil.
  5. Add the molasses, vinegar, salt, and ground black pepper. Stir.
  6. Gradually add the collard greens while pushing down with a spoon. Cover and simmer for 80 minutes or until the greens are tender. Make sure to stir every 15 minutes. Note: add water as necessary.
  7. Remove the cover to let the excess liquid evaporate.
  8. Transfer to a serving plate.
  9. Serve. Share and enjoy!

Number of servings (yield): 6

My rating 5 stars:  ★★★★★ 15 review(s)

>>Download the Free eCookbook here<<

Tuna and Zucchini Omelet

$
0
0

Breakfast can be more fun when you are having Tuna and Zucchini Omelet. This breakfast omelet looks so appealing and it tastes really good too. Before you get intimidated let tell you that this recipe is so simple and easy to follow. You can make one even if you have not tried to cook omelets before.

The key in this recipe is the equipment that you will need to use. You need a conventional oven and an oven safe skillet or frying pan. because the procedure requires the omelet in the pan to be broiled later on. If you still insist to cook this dish without the necessary equipment — you can, but you need to keep the omelet intact after you turn it over. This can easily done by dividing the recipe into smaller batches.

Tuna and Zucchini Omelet can be enjoyed with either sinangag (fried rice) or pandesal. You can also eat this with steamed white rice. Sometimes I like to eat this with my favorite condiment — banana ketchup.

Try this Tuna and Zucchini Omelet Recipe. Let me know what you think.

Tuna and Zucchini Omelet

Tuna and Zucchini Omelet Recipe

Ingredients

  • 2 (5 oz.) cans tuna, drained
  • 1 medium zucchini, sliced
  • 1 medium red onion, sliced
  • 5 eggs, beaten
  • 1/4 teaspoon salt
  • 1/4 teaspoon ground black pepper
  • 2 tablespoons cooking oil

Cooking Procedure

  1. Preheat the oven to broil (510F).
  2. Combine salt, pepper, and beaten eggs in a bowl. Mix well and then set aside.
  3. Heat an oven-safe frying pan or skillet in a stove top. Pour-in the cooking oil.
  4. Once the oil becomes hot, saute the onion and zucchini for 2 to 3 minutes.
  5. Add the tuna. Cook for 2 minutes.
  6. Pour-in the beaten eggs. Gradually stir to distribute the ingredients. Cook in low to medium heat for 4 to 6 minutes.
  7. Turn off heat from the stove top and then place the pan inside the oven. Broil for 5 to 7 minutes or until the top part of the omelet is done.
  8. Serve for breakfast.
  9. Share and enjoy!

Number of servings (yield): 4

My rating 5 stars:  ★★★★★ 27 review(s)

>>Download the Free eCookbook here<<

Asian Chicken Vermicelli Soup

$
0
0

Asian Chicken Vermicelli Soup is similar to chicken sotanghon soup, but this recipe has some features that makes it unique. This can be served as a soup appetizer, a main dish (there are times when I eat noodle soup with rice), and meryenda (snack). Soups, rice porridge, and rice cakes (kakanin) are common  Filipino meryenda food.

You will like this chicken vermicelli soup better if you add more toasted garlic in it. There is something with toasted garlic that enhances the flavor of every dish. I also try to eat this with a dip of fish sauce and crushed extra hot chili. This soup will make you feel warm during the cold days of fall and winter.

Try this Asian Chicken Vermicelli Soup recipe. Let me know what you think.

Asian Chicken Vermicelli Soup

Asian Chicken Vermicelli Soup

Ingredients

  • 3 oz. Vermicelli noodles
  • 1 lb. Ground chicken
  • 1 small yellow onion, minced
  • 1 teaspoon minced garlic
  • 1/2 cup chopped scallions
  • 4 cups chicken broth
  • 3/4 cups water
  • 2 tablespoons toasted garlic
  • 2 tablespoons cooking oil
  • Salt and pepper to taste

Cooking Procedure

  1. Heat the cooking oil in a casserole or soup pot.
  2. Once the oil is hot, saute the garlic and onion until the onion is soft.
  3. Add the ground chicken. Cook for 5 minutes while stirring once in a while.
  4. Pour-in the chicken broth and water. Let boil and simmer for 45 minutes.
  5. Add the vermicelli noodles. Stir and cook for 5minutes.
  6. Add salt and pepper. Stir.
  7. Pit-in the chopped scallions. Turn the heat off and then cover the pot for 3 minutes.
  8. Transfer the soup to a serving bowl. Top with toasted garlic.
  9. Serve. Share and enjoy!

Number of servings (yield): 4

My rating 5 stars:  ★★★★★ 15 review(s)
 

>>Download the Free eCookbook here<<


Jollibee Style Spaghetti

$
0
0

Jollibee Style Spaghetti is our version of the yummy Jollibee Spaghetti that everyone loves. The outcome of this recipe is a sweet delicious spaghetti that both kids and kids-at-heart will like.

This Jollibee Style Spaghetti recipe does not use any fancy ingredients. Just like any other spaghetti, this makes use of ground meat (pork), and a tomato based sauce (sweet Filipino style). The red juicy hotdogs and minced ham are important because it gives this dish a distinct flavor and appeal. The quickmelt cheese on top also helps to make the spaghetti have a richer flavor.

The secret in making a tasty spaghetti such as this is to simmer the sauce for a longer period. By doing this, all the flavor from the meat are extracted; it also releases lycopene from the tomato sauce. This is an anti-oxidant compound present in tomatoes.

Try this Jollibee Style Spaghetti Recipe. Let me know what you think.

Jollibee Spaghetti Recipe

Jollibee Style Spaghetti Recipe

Ingredients

  • 2 lbs. Spaghetti pasta
  • 3 (15 oz.) can tomato sauce
  • 1/2 cup tomato paste
  • 1 lb. minced ham
  • 1 1/2 lbs. ground pork
  • 6 to 8 pieces red hotdogs, sliced diagonally
  • 1/2 cup granulated white sugar
  • 1 medium yellow onion, minced
  • 2 teaspoons minced garlic
  • 2 cups beef broth
  • 1 cup shredded Velveeta cheese
  • 2 tablespoons cooking oil
  • Salt and pepper to taste

Watch the cooking video:

http://www.youtube.com/watch?v=XcJ96kgt9xI

Cooking Procedure

  1. Cook the spaghetti pasta according to the package instructions. Drain and set aside.
  2. Heat the oil in a cooking pot.
  3. Saute the garlic and onion.
  4. Add the ham. Cook for 3 minutes.
  5. Put-in the ground pork. Cook for 3 to 5 minutes.
  6. Pour-in the tomato sauce and beef broth. Stir and let boil. Simmer for 60 minutes.
  7. Add the hotdogs and tomato paste. Stir and cook for 10 minutes or until the sauce thickens.
  8. Put-in the sugar, salt, and pepper. Stir until the ingredients are well incorporated.
  9. Arrange the spaghetti pasta in an individual plate. Pour the meat sauce over the pasta and top with cheese.
  10. Serve. Share and enjoy!

Number of servings (yield): 8

My rating 5 stars:  ★★★★★ 31 review(s)

>>Download the Free eCookbook here<<

Fried Battered Whiting

$
0
0

Fried Battered Whiting is a fried fish fillet recipe that requires the fish to be dipped in a simple batter before being deep fried. Whiting is a type of fish that is common in the Atlantic. Aside from whiting, this recipe can be used for haddock, pollock, tilapia, and other types of medium to large sized fish.

There are many ways to enjoy fried whiting or any batter fried fish. This can be eaten with a side of fries or potato chips. I personally like to eat this with rice and ketchup. This also goes well with veggies such as braised collard greens.

Sometimes it is nice to get out of your comfort zone and try to eat your usual food differently. For example, fried battered whiting can make a good fish taco. It can even eaten for lunch as a fish sandwich.

Try this Fried Battered Whiting Recipe. Let me know what you think.


Fried Breaded Whiting

Fried Battered Whiting Recipe

Ingredients

  • 2 lbs. whiting fillet, thawed
  • 1 cup all-purpose flour
  • 1 teaspoon garlic powder
  • 8 tablespoons fresh or evaporated milk
  • 1/2 cup water
  • 1 teaspoon salt
  • 1/4 teaspoon ground black pepper
  • 2 cups cooking oil

Cooking Procedure

  1. Prepare the batter by combining the flour, garlic powder, milk, water, salt, and ground black pepper in a bowl. Whisk until well incorporated.
  2. Heat the cooking oil in a deep pan or cooking pot.
  3. Dip the fish fillets in the batter. Make sure that the entire fillet is coated.
  4. Deep fry in medium heat until the color turns golden brown (about 5 to 7 minutes).
  5. Remove the fish from the fryer. Transfer to a serving plate.
  6. Serve with Braised Collard Greens.
  7. Share and enjoy!

Number of servings (yield): 4

My rating 5 stars:  ★★★★★ 7 review(s)

>>Download the Free eCookbook here<<

Sauteed Tuna Flakes

$
0
0

Sauteed Tuna Flakes is a quick and easy recipe that involves canned tuna. I’m sure that many of you have your own version in preparing “Ginisang Tuna”. This is one of the versions that I really enjoyed eating because it has both the taste and texture that I always wanted in a tuna dish.

There is nothing fancy about this tuna recipe. I used the regular canned tuna that you can easily get in the grocery. It does not matter if you get the ones that are soaked in water or the ones in oil, as long as you buy the plain ones. Spicy tuna will do, if you like your dish spicy. However, make sure that you don’t get the one’s labeled adobo, afritada, etc.

French’s fried onion is a brand of fried onion product that can be purchased in the grocery. Note that I do not get anything from including the actual product brand in the ingredient list. The reason why I am inckludingthe brand is because I believe that this is the best brand that you can use for this recipe. It will give your dish a good crisp texture and it also helps enhance the taste of the dish.

You can eat Sauteed tuna flakes with fried garlic rice, steamed white rice, with bread, or soda crackers.

Try this Sauteed Tuna Flakes Recipe. Let me know what you think.


Sauteed Tuna Flakes

Sauteed Tuna Flakes Recipe

Ingredients

  • 2 (5 oz. cans) Tuna, drained
  • 1 medium red onion, sliced
  • 1/2 cup French’s fried onion
  • 1/2 teaspoon dried parsley flakes
  • 1 teaspoon lemon juice
  • Salt and pepper to taste
  • 1 tablespoon cooking oil

Cooking Procedure

  1. Heat the oil in a pan.
  2. Saute the onion until it becomes soft.
  3. Put-in the tuna. Cook for 3 minutes in medium heat.
  4. Add the lemon juice, salt, and pepper. Cook for an additional 3 to 5 minutes.
  5. Transfer to a serving plate. top with French fried onions and dried parsley flakes.
  6. Serve. Share and enjoy!

Number of servings (yield): 3

My rating 5 stars:  ★★★★★ 11 review(s)

>>Download the Free eCookbook here<<

Bean Sprout Chicken

$
0
0

Bean Sprout Chicken is a quick and easy Asian chicken dish that goes well with a bowl of rice. This recipe is easy to follow and the outcome is a good dish full of Asian flavor.

I like Bean Sprout chicken because it is low in fat and cholesterol and it has a mild delicous taste that pampers my taste buds. The dish always satisfies my tummy everytime I have this for lunch.

Before I forget, note that it is important to not overcook the bean sprouts. Feel free to adjust the amount of heat and cooking time depending on the condition of your bean sprouts.

Adding some cooking wine will help improve the taste of this dish. I am using Shaoxing wine everytime I prepared this dish.

Try this Bean Sprout Chicken Recipe. Let me know what you think.


Bean Sprout Chicken

Bean Sprout Chicken Recipe

Ingredients

  • 1 lb. boneless chicken breast, sliced into thin pieces
  • 3 cups mung bean sprouts, washed
  • 3/4 cups scallions, cut in 1 inch length
  • 1 small yellow onion, sliced
  • 1 teaspoon minced garlic
  • 1/2 teaspoon minced ginger
  • 1 teaspoon sesame oil
  • 3 tablespoons cooking wine
  • 1 teaspoon toasted sesame seeds
  • 3 tablespoons light soy sauce
  • 1/2 teaspoon granulated white sugar
  • Salt and pepper to taste
  • 2 tablespoons cooking oil

Cooking Procedure

  1. Heat the cooking oil in a pan.
  2. Saute the garlic, ginger, and onion.
  3. Add the sliced chicken breast. Cook for 5 minutes in medium heat.
  4. Add the soy sauce, cooking wine, and sesame oil. Stir. Cook for 2 minutes.
  5. Put-in the mung bean sprouts. Cook for 3 to 5 minutes.
  6. Add the scallions, sugar, salt, and ground black pepper.Stir and continue to cook for 2 to 3 minutes.
  7. Transfer to a serving plate. Top with toasted sesame seeds.
  8. Serve.Share and enjoy!

Number of servings (yield): 4

My rating 5 stars:  ★★★★★ 18 review(s)

>>Download the Free eCookbook here<<

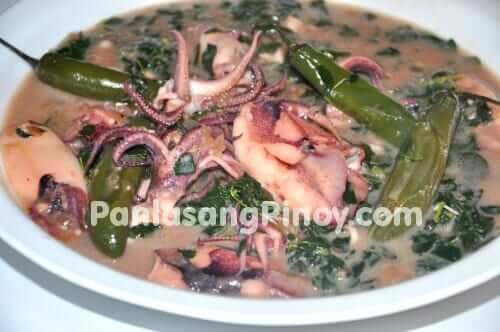
Ginataang Pusit

$
0
0

Ginataang Pusit or Squid cooked in coconut milk is a quick, easy, and delicious Filipino dish that I love to eat with warm rice. As I’ve d mentioned, this is quick and easy because it takes less than 30 minutes to prepare and the steps are simple and straightforward. Many people like this dish spicy (that includes myself); this is the reason why I have 4 pieces of Serrano peppers in the recipe. You can use Jalapeno pepper to make it spicier or you can also opt to not use any pepper or chili if you cannot handle the heat.

Small to medium sized squids are perfect for this recipe. Make sure that you wash the squid thoroughly and remove the ink sac so that the dish won’t turn black. If you insist to use large squid, try to slice it into pieces and cook it a bit longer.

Aside from fish sauce (patis), you can also use bagoong alamang for this recipe. I also like to use malunggay whether fresh or fresh frozen, but I understand that malunggay might not be available to everyone. If that is the case, you can use fresh spinach a substitute for malunggay.

Try this Ginataang Pusit Recipe. Let me know what you think.

Ginataang Pusit

Ginataang Pusit Recipe

Ingredients

  • 1 1/2 lbs. small to medium squid, cleaned
  • 2 cups coconut milk
  • 1 1/2 cups malunggay leaves
  • 4 pieces long green chili pepper
  • 1 medium yellow onion, diced
  • 1 teaspoon minced garlic
  • 2 tablespoons fish sauce
  • 1/4 teaspoon ground black pepper
  • 2 tablespoons cooking oil

Watch the cooking video:

http://www.youtube.com/watch?v=0DdiO5OMsCY

Cooking Procedure

  1. Heat the cooking oil in a cooking pan.
  2. Saute the garlic and onion until the onion becomes soft.
  3. Put-in the squid. Cook for 1 minute. Remove the squid, place in a clean plate, and set aside.
  4. Pour-in the coconut milk. Let boil.
  5. Add the fish sauce and green chili pepper. Simmer uncovered for 12 to 18 minutes or until the coconut milk becomes thick.
  6. Put the squid back in the pan. Add the malunggay leaves. Stir and cook for 5 minutes.
  7. Add the ground black pepper. Stir.
  8. Transfer to a serving plate.
  9. Serve with rice. Share and enjoy!

Number of servings (yield): 4

My rating 5 stars:  ★★★★★ 37 review(s)

>>Download the Free eCookbook here<<

Viewing all 460 articles
Browse latest View live