Quantcast
Channel: Recipes – Panlasang Pinoy
Viewing all 460 articles
Browse latest View live

Kalabasa Soup with Ampalaya Leaves

$
0
0

It is the time of year wherein pumpkin gets a lot of attention. This time, we will not make the traditional pumpkin soup. Instead, I will show you how to cook a very simple soup using butternut squash with a Filipino twist — I call this Kalabasa Soup with Ampalaya Leaves.

Kalabasa Soup

You can easily guess what’s in this soup that we are making by its name. I chose butternut squash because it has a mild sweet taste. It will work well to balance the flavor of the soup especially when the bitter melon leaves are added. The bitter melon (ampalaya) leaves has a purpose in this recipe. It actually makes the soup taste better and it provides additional nutrients.

Kalabasa Soup pairs well with fried fish and rice. I think that it is best eaten on a rainy day to make your meal more enjoyable and appetizing. I am not sure if its just me, but do you also think or crave for warm soup or porridge and fried fish on a rainy day? I sometimes crave for Champorado and tuyo when it starts to rain.

Try this Kalabasa Soup with Ampalaya Leaves recipe.

Kalabasa Soup with Ampalaya Leaves
 
Author: 
Nutrition Information
  • Serves: 5
  • Serving size: 5
Prep time: 
Cook time: 
Total time: 
Ingredients
  • ½ medium butternut squash; peeled, seeds removed, and cubed
  • 3 cups chicken broth
  • 3 cups water
  • A bunch of Ampalaya (bitter melon) leaves
  • 1 medium yellow onion, sliced
  • ½ teaspoon garlic powder
  • Salt to taste
Instructions
  1. Combine chicken broth and water in a cooking pot. Bring to a boil.
  2. Add the onion and butternut squash. Boil for 20 minutes.
  3. Put-in the garlic powder. Stir
  4. Put-in the ampalaya leaves. Cook for 5 minutes.
  5. Add salt to taste. Serve.
  6. Share and enjoy!


Panlasang Pinoy Cookbook

Download the Free Panlasang Pinoy eCookbook


The post Kalabasa Soup with Ampalaya Leaves appeared first on Panlasang Pinoy.


Grilled Pompano

$
0
0

Grilled Pompano is a delicious dish that anyone can prepare. Aside from tasting fresh and delicious, I like grilled pompano because it does not require a lot of ingredients and it is simple to prepare.

Inihaw na Pompano

I used black pompano for this recipe. Since pompano is quite fatty, it is a good candidate for grilling. I made a few incisions on both sides of the fish so that it will absorb the salt and cook faster. It also helps me determine if the fish is already cooked through.

I love to eat grilled pompano with rice. It will be better if the fish and rice are served in banana leaves – just like what we used to do in the Philippines. Sometimes it is possible if I am able to grab hold of frozen banana leaves. Yes, even banana leaves are bought frozen here in Chicago. At this time, I do not need any banana leaves. The grilled pompano itself is more than enough.

Try this Grilled Pompano Recipe.


Grilled Pompano
 
Author: 
Nutrition Information
  • Serves: 4
  • Serving size: 4
Prep time: 
Cook time: 
Total time: 
Ingredients
  • 1 large pompano (2 to 3 lbs.), cleaned
  • Cooking oil spray
  • 1 tablespoon coarse sea salt
Instructions
  1. Rub the sea salt all over the pompano. Let is stay for 30 minutes.
  2. Heat-up the grill. Spray the cooking oil all over the pompano.
  3. Grill each side for 7 to 9 minutes.
  4. Transfer to a serving plate. Serve with toyomansi.
  5. Share and enjoy!


Panlasang Pinoy Cookbook

Download the Free Panlasang Pinoy eCookbook


The post Grilled Pompano appeared first on Panlasang Pinoy.

Sauteed Bok Choy with Shrimp

$
0
0

Sauteed Bok Choy with Shrimp is a simple recipe that involves baby bok choy. This vegetable is somewhat similar to a vegetable known as pechay in the Philippines – thus this dish can be considered as a variation of ginisang pechay.

Sauteed Bok Choy with Shrimp

Sauteed Bok Choy with Shrimp is quick to make. This is one of the reasons why I always make it when the ingredients are available in my fridge. I think that the sherry or cooking wine helps the dis taste better.

A few notes before you start cooking Sauteed Bok Choy with Shrimp; make sure that the bok choy leaves are separated from each other. Do this by slicing the lower end of the bok choy crosswise. This will set the leaves apart. Also, use medium shrimp for this recipe. It might be more convenient if you buy frozen packaged shrimp from the grocery. It will save you time cleaning and removing the shell from the shrimp.

Try this Sauteed Bok Choy with Shrimp recipe. Enjoy!

Sauteed Bok Choy with Shrimp
 
Author: 
Nutrition Information
  • Serves: 4
  • Serving size: 4
Prep time: 
Cook time: 
Total time: 
Ingredients
  • 20 pieces medium shrimp, deveined
  • 5 bunches baby bok choy
  • 1 medium plum tomato, diced
  • 1 teaspoon minced garlic
  • 1 medium yellow onion, sliced
  • 3 tablespoons, sherry or cooking wine
  • Salt and pepper to taste
  • 2 tablespoons cooking oil
Instructions
  1. Heat the oil in a pan.
  2. Saute the garlic and onions.Continue to cook until the onions are caramelized.
  3. Add the tomato. Cook until soft.
  4. Put-in the shrimp and cooking wine. Cook for 5 minutes.
  5. Add the bok choy. Stir. Cover and cook for 3 to 5 minutes.
  6. Add salt and pepper to taste.
  7. Transfer to a serving plate.
  8. Serve. Share and enjoy!


Panlasang Pinoy Cookbook

Download the Free Panlasang Pinoy eCookbook


The post Sauteed Bok Choy with Shrimp appeared first on Panlasang Pinoy.

Pork Kilawin

$
0
0

Pork Kilawin or Kilawing baboy is a dish that you can make with grilled pork belly. Unlike the similar kilawin seafood dishes, meat such as pork needs to be cooked first before being prepared this way because it does not get cooked completely when soaked in vinegar.

Pork Kilawin

This pork kilawin recipe is fresh and very tasty. It goes well when eaten with white rice. This can also be an appetizer and a perfect pulutan. I like my pork kilawin spicy, so I added some chopped red chilies so that spice will kick-in. If you don’t want spicy dishes, you can still enjoy pork kilawin without the spice.

Cane vinegar is my first choice, but you can always opt for white vinegar. Make sure to always have sugar to balance the taste. Have you made your own pork kilawin before? Was your method the same as what we have here? If not, we’ll be happy to know how you made yours.

Try this pork kilawin recipe. Enjoy!


Pork Kilawin
 
Author: 
Nutrition Information
  • Serves: 4
  • Serving size: 4
Prep time: 
Cook time: 
Total time: 
Ingredients
  • 2 lbs. grilled pork belly
  • 1 cup cane vinegar
  • 1 medium cucumber, diced
  • ½ teaspoon salt
  • ½ teaspoon granulated white sugar
  • Red chilies
  • 1 medium yellow onion, minced
  • ⅛ teaspoon ground black pepper
Instructions
  1. Chop the pork belly into serving pieces. Set aside.
  2. Meanwhile, combine vinegar, salt, ground black pepper, chili, and sugar. Mix well
  3. Arrange the pork, cucumber, and onion in a large bowl.
  4. Add the vinegar mixture. Stir. Let it stay for 30 minutes.
  5. Transfer to a serving plate. Serve.
  6. Share and enjoy!


Panlasang Pinoy Cookbook

Download the Free Panlasang Pinoy eCookbook


The post Pork Kilawin appeared first on Panlasang Pinoy.

Chili Garlic Shrimp Stir Fry

$
0
0

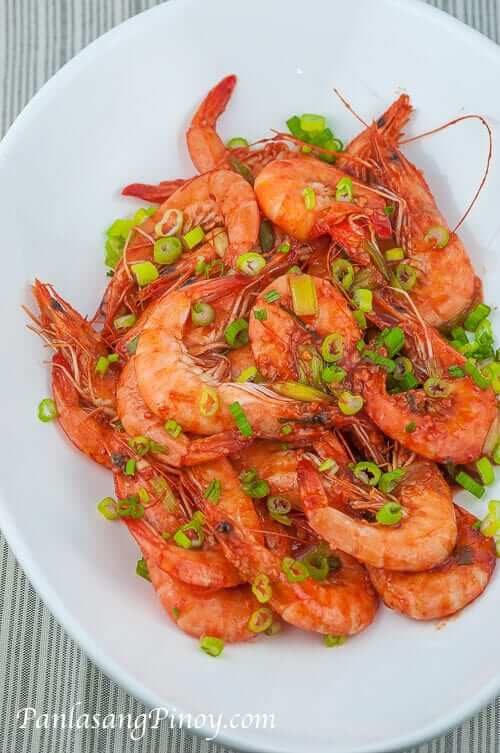
Chili Garlic Shrimp Stir Fry is a quick and easy shrimp recipe that you can make at home. This dish can be compared to the chili shrimp that they serve in Dampa — the only difference is that you are the one who prepared it.

I used shrimp with heads and shell because this is how I remembered this dish to be. I find shrimp more tasty if its prepared this way because the seasonings are kept within the head and shell; it blends well with the natural flavor of the shrimp. I thought that it really was a perfect combination. To support this statement, I had almost 3 cups of rice with only a few pieces of shrimp. It was really that good.

Aside from shrimp, you can also use prawns for this recipe. It does not matter if you use salted or unsalted butter — as long as its butter, not margarine or artificial butter. As for the banana ketchup, feel free to use your favorite brand as long as it is banana ketchup. Jufran is my first choice, but I sometimes use other brands when it is not available in  the nearby Filipino store. The sherry cooking wine helps improve the overall flavor of the dish, so it is recommended.

Try this Chili Garlic Shrimp Recipe. Enjoy!

Chili Garlic Shrimp Stir Fry


Chili Garlic Shrimp Stir Fry
 
Author: 
Nutrition Information
  • Serves: 4
  • Serving size: 4
Prep time: 
Cook time: 
Total time: 
Ingredients
  • 2 lbs. shrimp, cleaned
  • 2 tablespoons minced garlic
  • ½ cup banana ketchup
  • 1 tablespoon Sriracha sauce
  • 3 tablespoons butter
  • 3 tablespoon sherry cooking wine
  • Salt and ground black pepper to taste
  • ¼ cup chopped green onions
Instructions
  1. Melt butter in a pan.
  2. Once the butter melts, continue to heat until hot.
  3. Add the garlic. Cook for 1 to 2 minutes or until light brown.
  4. Put-in the shrimp. Cook for 2 minutes.
  5. Pour-in the sherry. Continue to cook until the liquid completely evaporates.
  6. Add ketchup and Sriracha sauce. Continue to stir fry for 1 minute.
  7. Put-in the green onions. Add salt and pepper to taste.
  8. Transfer to a serving plate. Serve.
  9. Share and enjoy!


Panlasang Pinoy Cookbook

Download the Free Panlasang Pinoy eCookbook


The post Chili Garlic Shrimp Stir Fry appeared first on Panlasang Pinoy.

Buttered Puto

$
0
0

Buttered Puto is a variation of the famous steamed rice cake, Puto. This steamed mini cakes are usually eaten as dessert but most prefer to have them during breakfast (with hot coffee or chocolate) or mid-afternoon snack (usually eaten with dinuguan or blood stew). If you are looking for an easy puto recipe that you can follow, this is the one for you.

Puto

This Puto recipe uses ordinary flour, instead of rice flour or ground rice. This makes this recipe easier to prepare. In addition, the other ingredients used in this recipe are so common that you could find them in any grocery store.

You will notice that I was using colorful plastic molds in the video. I got them from the Philippines — in the flea market. These molds are hard to find outside of the Philippines, but I tried to experiment on similar products and the best that I found were the Silicone Mini Pinch Bowls. Actually, these are even better because these are made of silicon which means that it can withstand high amount of heat.

Try this delicious Buttered Puto Recipe.

Buttered Puto
 
Author: 
Nutrition Information
  • Serves: 8
  • Serving size: 8
Prep time: 
Cook time: 
Total time: 
Ingredients
  • 4 cups flour, sifted
  • 2 cups sugar, sifted
  • 2½ tbsp baking powder
  • 1 cup evaporated milk
  • 2½ cups water
  • ⅛ teaspoon Pandan essence
  • ½ cup butter, melted
  • 1 piece egg, raw
  • small slices of cheese
  • 4 cups water (for steaming)
Instructions
  1. In a mixing bowl, combine the dry ingredients starting from the flour, sugar,and baking powder then mix well.
  2. Add the butter, evaporated milk, egg, water and pandan essence (dissolve the pandan essence in water) then mix all the ingredients thoroughly.
  3. Pour the mixture in individual molds
  4. If you are using non - quick melt Filipino brand cheese, You may put the cheese on top of the mixture otherwise put the cheese on top after steaming (step 6)
  5. Pour the water in the steamer.
  6. Arrange the molds in the steamer then steam for about 20 minutes
  7. If you are using quick melt cheese,remove the cover of the steamer and top each puto with quick melt cheese then continue steaming (with the cover on) for 2 to 5 minutes
  8. Remove from the mold and arrange in a serving plate
  9. Serve either hot or cold. This goes well with dinuguan ;) Share and Enjoy!


Watch the cooking video:

//www.youtube.com/watch?v=e4L_nyVdDL8

Panlasang Pinoy Cookbook

Download the Free Panlasang Pinoy eCookbook


The post Buttered Puto appeared first on Panlasang Pinoy.

Sisig Pizza

$
0
0

Sisig Pizza is not a new dish. In fact, there has been a similar product included in the menu of a fast food Pizza chain in the Philippines some years back. To be honest, Sisig Pizza is something that will be appreciated by sisig lovers –- this is simply sisig presented differently.

I thought of making this Sisig Pizza because I prepared too much sisig that we can consume the other day. I thought of making something out of the left over sisig so that it won’t go to waste. At first, I was thinking about sisig omelet – but I cannot bear the idea, so I opted to make sisig pizza instead.

Just like any other pizza, Sisig pizza requires a pie crust. You can either make one from scratch or buy a pizza crust from the supermarket. Guess what, I did the later. I saw a whole grain thin crust pizza crust in my local grocery store and I grabbed it. I thought that it will save me time and effort, and it really did.

Pizza will not be compete without cheese in it – but what kind of cheese will blend well with sisig? I was thinking mozzarella, or cheddar, or even Monterrey jack – since I also needed a base for the sisig pizza, I thought that Alfredo sauce was a good choice because it can hold the ingredients on top while still having that cheese flavor (by the way, Parmesan cheese is used to make Alfredo sauce). To my surprise, every ingredient that I used blended in harmony with each other.

This was my first try in making Sisig Pizza and I thought that it went well.

Try this Sisig Pizza Recipe. Enjoy!

Sisig Pizza

Sisig Pizza
 
Author: 
Nutrition Information
  • Serves: 6
  • Serving size: 6
Prep time: 
Cook time: 
Total time: 
Ingredients
  • ¾ lb. cooked sisig
  • 1 large pizza dough
  • 1 cup Alfredo sauce
  • 1 medium yellow onion, sliced crosswise into rings
  • 4 pieces finger chili, sliced diagonally
  • 1 teaspoon chili flakes
Instructions
  1. Preheat the oven to 400.
  2. Meanwhile, place the pizza though in a flat surface. Pour the Alfredo sauce over the pizza though and spread it all throughout equally.
  3. Arrange the sisig over the Alfredo sauce. This is best done using your hands (it will be better if you wear plastic gloves during the process).
  4. Arrange the onion and sliced finger chili on top. Sprinkle chili flakes all over the pizza.
  5. Put the pizza in the oven. Bake for 20 minutes.
  6. Remove from the oven. Slice.
  7. Serve. Share and enjoy!


Panlasang Pinoy Cookbook

Download the Free Panlasang Pinoy eCookbook


The post Sisig Pizza appeared first on Panlasang Pinoy.

Beef in Oyster Sauce with Snow Peas

$
0
0

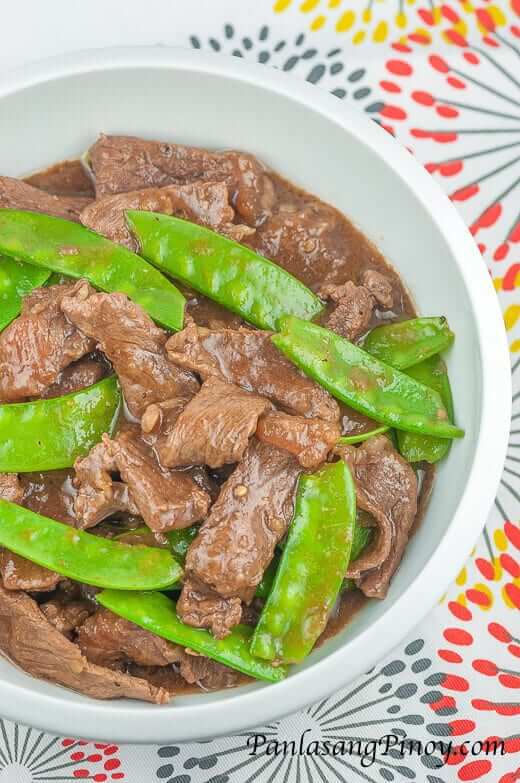
Beef in Oyster Sauce with Snow Peas is a perfect dish for dinner. It can go well with rice or with sauteed vegetables on the side. I love to have this dish with a glass of Merlot.

Beef in Oyster Sauce with Snow Peas

In order for you to have a tender beef, make sure that you purchase tender beef cuts such as sirloin. However, if you will be using beef cuts that are not tender then I suggest that you slice the beef as thin as possible. It will also help if you use a meat tenderizer tool. This tool looks like a hammer wherein one side is flat and the other is kinda spiky.

Do not get intimidated with the look of the dish.Yes, beef in oyster sauce looks irresistibly good, and you can make this exact dish with ease; all you have to do is follow the recipe below.

Before I forget, Snow peas might not be available in some supermarkets. You can use snap pea as a substitute.

Try this Beef in Oyster Sauce with Snow Peas Recipe. Enjoy!


Beef in Oyster Sauce with Snow Peas
 
Author: 
Nutrition Information
  • Serves: 6
  • Serving size: 6
Prep time: 
Cook time: 
Total time: 
Ingredients
  • 2 lbs. Sirloin, thinly sliced
  • 4 tablespoons oyster sauce
  • 1 tablespoon light soy sauce
  • ½ lb. snow peas, cleaned
  • 1 cup water
  • 1 tablespoon, minced garlic
  • 1 medium onion, minced
  • 2 teaspoons cornstarch diluted in 3 tablespoons of water
  • 3 tablespoons canola oil
  • Salt and ground black pepper to taste
Instructions
  1. Heat the oil in a pan.
  2. Sauté the garlic and onion.
  3. Add the sirloin. Continue to sauté until the beef turns medium brown.
  4. Add the oyster sauce, soy sauce, and water. Stir. Let boil.
  5. Cover and cook in low to medium heat for 30 to 45 minutes. You can add water if needed.
  6. Add salt and pepper to adjust the flavor. Stir.
  7. Put the snow peas in. Cook for 3 minutes.
  8. Pour-in the water with cornstarch. Stir and cook until the sauce thickens.
  9. Transfer to a serving bowl. Serve.
  10. Share and enjoy!


Panlasang Pinoy Cookbook

Download the Free Panlasang Pinoy eCookbook


The post Beef in Oyster Sauce with Snow Peas appeared first on Panlasang Pinoy.


Crab with Misua and Patola

$
0
0

Crab with Misua and Patola is a simple yet flavorful Filipino soup dish. This can be prepared using any type of edible crab, some Chinese vermicelli noodles (also called misua or miswa), and young loofah (or patola). The crab and fish sauce gives this dish its distinct taste.

Crab with Misua and Patola

I am using blue crabs for this recipe. If you will watch the video below, you will see that the crabs were already orange. I had them steamed right away when these were still fresh, so that I can freeze them and use them later on. It is still better to use fresh crabs for this recipe – I just did the steaming procedure because I purchased too many crabs and don’t want them to go to waste.

Aside from crab, you can also try using either of the following: meatballs, shrimp, or prawns. If using meatballs, I suggest that you add some beef or chicken broth to enhance the flavor of the dish; the recipe is the same if you decide to use shrimp or prawn.

Try this Crab with Misua and Patola recipe. Cheers!


Crab with Misua and Patola
 
Author: 
Nutrition Information
  • Serves: 4
  • Serving size: 4
Prep time: 
Cook time: 
Total time: 
Ingredients
  • 4 pieces crabs (alimasag)
  • 1 medium patola (loofah), peeled and sliced crosswise
  • 4 ounces misua noodles
  • 1 bunch green onions, chopped
  • 4 to 5 cups water
  • 1 medium onion, minced
  • 5 cloves garlic, crushed and chopped
  • 1 teaspoon ginger, minced
  • 2 tablespoons fish sauce
  • ground black pepper to taste
  • 2 tablespoons cooking oil
Instructions
  1. Heat the cooking oil in a cooking pot.
  2. Saute the garlic and ginger.
  3. Add the onion. Cook until the onion becomes soft.
  4. Add-in the crabs. Pour-in the fish sauce and add water . Let it boil.
  5. Cover and simmer for 15 minutes.
  6. Sprinkle some ground black pepper and add the patola. Let the water reboil. Cook for 1 minute.
  7. Put-in the misua noodles. Stir and cook for 1 minute.
  8. Add the green onions. Cook for 1 to 2 minutes more.
  9. Transfer to a serving bowl. Serve.
  10. Share and enjoy!

//www.youtube.com/watch?v=RTbWdCi1iUA

Panlasang Pinoy Cookbook

Download the Free Panlasang Pinoy eCookbook


The post Crab with Misua and Patola appeared first on Panlasang Pinoy.

Tuna Macaroni Pasta

$
0
0

Tuna Macaroni Pasta is an easy tuna pasta recipe that you can make fast. It does not require much of your time to prepare and it tastes good too. I make this for dinner most of the time – on days when I am tired or when I need to have extra time to do other things.

You will spend around 12 minutes to cook the macaroni and a few more minutes to make the Alfredo sauce. Once all is done, it will take around 30 minutes to assemble and bake your Tuna Macaroni Pasta. This means that you have a good 30 minutes to do other stuff while waiting for it. I save extra time by cooking extra macaroni pasta beforehand. I just store it inside the freezer for future consumption. If you want to save more time, you can also buy ready-made Alfredo sauce from the supermarket.

The good thing about making Tuna Macaroni Pasta for dinner is that you can always have the left over for breakfast; or you can also bring it to school or at work for lunch. By doing this, we can save both time and money.

Try this Tuna Macaroni Pasta Recipe. Cheers!

Tuna Macaroni Pasta

Tuna Macaroni Pasta
 
Author: 
Nutrition Information
  • Serves: 4
  • Serving size: 4
Prep time: 
Cook time: 
Total time: 
Ingredients
  • 1 (6.5 oz.) can tuna in water
  • ½ lb macaroni pasta
  • 1 cup frozen green peas
  • 2 cups Alfredo Sauce
  • ¼ cup Parmesan Cheese
  • ¾ cup sharp cheddar cheese
Instructions
  1. Cook the macaroni according to package instructions. Drain and set aside.
  2. Preheat oven to 350F.
  3. In a large mixing bowl, combine tuna (water drained), green peas, parmesan cheese, and alfredo sauce. Stir until well blended.
  4. Add the macaroni. Toss until the macaroni are coated with the mixture.
  5. Transfer everything to a baking dish. Top with sharp cheddar cheese.
  6. Bake for 20 to 25 minutes.
  7. Remove from the oven. Serve.
  8. Share and enjoy!

Panlasang Pinoy Cookbook

Download the Free Panlasang Pinoy eCookbook

The post Tuna Macaroni Pasta appeared first on Panlasang Pinoy.

Chicken Tinola Recipe

$
0
0

Tinola is a ginger and onion based soup with chicken as the usual main ingredient. Chicken tinola is an authentic Filipino main dish and best complimented with green papaya wedges (an alternative is chayote) and chili pepper leaves. As a traditional dish, the chicken is usually cooked in low heat for quite some time to bring out the natural flavor. This dish is best served during cold and rainy weather because of the warming effect of the soup.

Chicken Tinola

The secret in making a good chicken tinola is to simmer the chicken for longer periods of time. This will let all the flavor of the chicken come out and it also makes the chicken tender. You can also use malunggay leaves instead of pepper leaves (or even both) to maximize the health benefits.

Try this Chicken Tinola Recipe and let me know what you think.

Chicken Tinola Recipe
 
Author: 
Nutrition Information
  • Serves: 6
  • Serving size: 6
Cuisine: Filipino Recipe
Prep time: 
Cook time: 
Total time: 
Ingredients
  • 1 whole chicken, cut into serving pieces
  • 36 ounces rice washing
  • ½ pc small green papaya, cut into wedges
  • 1 tbsp garlic, minced
  • 1 medium sized onion, chopped
  • 1 thumb ginger, cut into strips
  • 2 tbsp fish sauce
  • Hot pepper leaves
Instructions
  1. Sauté the garlic, onion, and ginger
  2. Put-in the chicken and cook until color turns light brown
  3. Add the fish sauce and mix well
  4. Pour-in the rice washing and put to a boil. Simmer for 45 minutes.
  5. Add the green papaya wedges and simmer for 5 minutes
  6. Add the hot pepper leaves
  7. Add salt and pepper to taste
  8. Serve hot. Share and enjoy!


Watch the cooking video:

//www.youtube.com/watch?v=diNpn9Fsbhk

Panlasang Pinoy Cookbook

Download the Free Panlasang Pinoy eCookbook

The post Chicken Tinola Recipe appeared first on Panlasang Pinoy.

Ginisang Papaya

$
0
0

Ginisang Papaya is a delicious and easy to prepare dish that you can make for lunch or dinner. This dish is similar to ginisang upo or ginisang sayote – although the meat used might vary.

Ginisang Papaya

I like the taste of cooked papaya, be it cooked with coconut milk (ginataang papaya), sautéed (ginisa), or cooked with chicken and ginger broth (tinola). Of course, nothing beats atcharang papaya as an appetizer as far as I am concerned.

As I mentioned in the video, you can use salt as an alternative to fish sauce. I understand that not all people like fish sauce, so please try to substitute ingredients as you please. If you want to use pork, chicken or beef instead of shrimp, try adding it before the papaya and give it at least 8 minutes to cook.

Try this Ginisang Papaya recipe. Enjoy!

Ginisang Papaya
 
Author: 
Nutrition Information
  • Serves: 4
  • Serving size: 4
Prep time: 
Cook time: 
Total time: 
Ingredients
  • 1 small unripe papaya, sliced
  • 1 cup malunggay leaves
  • 4 ounces shrimp, shell and head removed
  • 2 tablespoons chopped parsley
  • 1 small white onion, sliced
  • 4 cloves garlic, crushed and chopped
  • 2 tablespoons fish sauce
  • ⅛ teaspoon ground black pepper
  • 3 tablespoons cooking oil
Instructions
  1. Heat the cooking oil in a pan.
  2. Saute the garlic and onion.
  3. Once the onion becomes soft, add the parsley and papaya. Continue to sauté for 3 minutes. Cover and cook in medium heat for another 3 to 5 minutes.
  4. Remove the cover. Add the shrimp. Stir. Cook for 1 to 2 minutes.
  5. Add the malunggay leaves. Stir and cook for 3 minutes.
  6. Pour-in the fish sauce and add the ground black pepper. Stir.
  7. Transfer to a serving plate. Serve.
  8. Share and enjoy!


Watch the cooking video:

//www.youtube.com/watch?v=F59-oSp06z8

Panlasang Pinoy Cookbook

Download the Free Panlasang Pinoy eCookbook

The post Ginisang Papaya appeared first on Panlasang Pinoy.

Steamed Shrimp

$
0
0

Aside from Halabos na Hipon, Steamed Shrimp is probably one of the easiest and quickest shrimp dishes that you can make. Can you believe that it only takes less than 10 minutes to prepare this dish? You might want to consider this recipe if you love shrimp and are looking for quick and easy ways to prepare it.

Steamed Shrimp

I love my steamed shrimp with dipped in spiced vinegar. Most of the people that I know like to eat this with rice, but I prefer to have it just by itself. This simple dish is very enjoyable to eat because the taste is mild and delightful. Since you are about to taste the natural flavor of shrimp, make sure to get the freshest shrimp that you can find.

Try this Steamed Shrimp Recipe. Enjoy!

Steamed Shrimp
 
Author: 
Nutrition Information
  • Serves: 4
  • Serving size: 4
Prep time: 
Cook time: 
Total time: 
Ingredients
  • 2 lbs. medium shrimp
  • 1½ tablespoons coarse sea salt
  • ¼ teaspoon ground black pepper
  • ½ teaspoon garlic powder
Instructions
  1. Sprinkle salt, garlic powder, and ground black pepper all over the shrimp. Toss so that the seasoning will coat the shrimp. Let it stay for 5 minutes.
  2. Arrange the shrimp in a steamer. Pour around 2 cups of water in the steamer and turn on the heat. Steam the shrimp for 3 minutes. If you are using large shrimp or prawn, you can steam for up to 5 minutes. Do not overcook the shrimp.
  3. Remove the shrimp from the steamer and arrange in a serving plate.
  4. Serve with spiced vinegar.
  5. Share and enjoy


Panlasang Pinoy Cookbook

Download the Free Panlasang Pinoy eCookbook

The post Steamed Shrimp appeared first on Panlasang Pinoy.

Easy Kalderetang Kambing (Goat Stew)

$
0
0

Kalderetang Kambing is the Filipino version of Goat Stew. This delicious dish is prepared using chevon (goat meat), tomato sauce, some vegetables, and liver spread. The use of liver spread makes kaldereta different from other tomato based stews.

Simple Kalderetang Kambing Recipe

Have you tried eating goat before? I cannot blame you if you have no reaction or if this recipe sounds uncommon. I understand that not everyone has tried goat meat, and to those who did – they might have an unpleasant experience. It all boils down to the way the meat is handled to ensure that the gamey flavor and odor is taken care of;it is important to neutralize the odor of the goat meat before or during the cooking process, and this is usually done in may ways:some boil the meat and discard the water before cooking, while others cook the meat with a lot of ginger and vinegar to remove the gamey taste and odor. While these methods are proven and effective, I learned of an easier way to solve the problem and it only requires you to soak the meat in buttermilk overnight. Not only does it take care of the unwanted odor, it also makes the meat tender – just like what we did with buttermilk fried chicken.

Simple Kalderetang Kambing

Kalderetang Kambing is popular in the provinces and is usually served during town fiestas and special occasions. Lucky for me, I was able to grab a decent amount of goat meat from the Filipino store here in the Northern suburbs of Chicago (I think that the goat came from Wisconsin, which is just a few miles from the North). So I made another Kalderetang combing video and I plan to shoot more cooking videos involving goat meat in the future. I am also looking forward to make kilawing kambing and/or sampayne soon.

You will need a bit of patience when you cook Kalderetang kambing using an ordinary cooking pot, but it is worth the wait. You can use a pressure cooker to speed-up the process. I used an electric pressure cooker in the cooking video and it really did a good job in cooking the dish from start to finish.

Try this Kalderetang Kambing Recipe. Kampai!


Kalderetang Kambing (Goat Stew)
 
Author: 
Nutrition Information
  • Serves: 6
  • Serving size: 6
Prep time: 
Cook time: 
Total time: 
Ingredients
  • 3 lbs. goat meat (chevon), chopped
  • 2 cups buttermilk
  • 2 large baking potatoes, cubed
  • 1 small can (8 oz.) tomato sauce
  • 1 large carrot, cubed
  • 1 small red bell pepper, diced
  • 1 small green bell pepper, diced
  • ¼ cup liver spread or liver pate
  • 1 large yellow onion, chopped
  • 4 cloves garlic, crushed and chopped
  • 3 tablespoons cooking oil
  • 1½ cup water
  • 1½ teaspoons beef powder or 1 beef cube
  • Salt and pepper to taste
Instructions
  1. Soak the goat meat in buttermilk overnight. Wash the goat meat thoroughly with running water before cooking. Make to drain all the liquid.
  2. Heat the cooking oil in a pan or pressure cooker.
  3. Saute the onion and garlic.
  4. Add the goat meat. Cook until the color turns light brown.
  5. Add the tomato sauce, beef powder, liver spread, and water. Stir and let boil.
  6. If you are using a pressure cooker, cover and pressure cook for 20 to 25 minutes. Otherwise, cover and simmer for 1 to 1½ hours.
  7. Add the bell pepper, potato, and carrot. Stir and cook for 10 minutes.
  8. Sprinkle some salt and pepper to taste.
  9. Transfer to a serving bowl. Serve.
  10. Share and enjoy!


Watch the cooking video:

//www.youtube.com/watch?v=GMzN5ebeMbM

Panlasang Pinoy Cookbook

Download the Free Panlasang Pinoy eCookbook

The post Easy Kalderetang Kambing (Goat Stew) appeared first on Panlasang Pinoy.

Corned Beef Omelet

$
0
0

I consider Corned Beef Omelet or Tortang Corned Beef as a power breakfast food; it is a complete meal by itself. The fact that it is more than enough to give me energy and keep me full until lunchtime is a good thing. What makes this dish better is that it tastes really good too and can be best eaten with your favorite sides or with rice and bread.

Tortang Corned Beef Recipe

Preparing your own Corned Beef Omelet is easy. All you need is to make Corned Beef and Potato Casserole first then the rest of the steps should be a breeze. Just to clarify, we are using canned corned beef for this recipe, not Irish corned beef (which tastes great with cabbage).

Once you are done in making the Corned Beef and Potato Casserole, all you have to do is beat the eggs and add the salt, pepper, and onion powder. Let the corned beef cool down before you mix it with the beaten eggs. Everything is smooth sailing from here – I use a measuring cup to scoop the mixture and pour it in the frying pan. Simply wait a few minutes for the bottom side of the omelet to completely cook, and then flip the omelet using a spatula to cook the opposite side.

I like to have my corned beef omelet as it is with tomato ketchup as a condiment. You can also make a corned beef omelet sandwich if you prefer.

Try this Corned Beef Omelet Recipe. Enjoy!

Corned Beef Omelet
 
Author: 
Nutrition Information
  • Serves: 8
  • Serving size: 8
    Prep time: 
    Cook time: 
    Total time: 
    Ingredients
    • 1 serving Corned Beef and Potato Casserole
    • 6 large eggs
    • ¼ teaspoon onion powder
    • ⅛ teaspoon ground black pepper
    • ¼ teaspoon sea salt
    • Cooking oil or cooking oil spray
    Instructions
    1. Prepare the corned beef by following the Corned Beef and Potato Casserole recipe. The link is provided in the ingredients section. 1 serving is equal to the exact amount of ingredients provided in the recipe.
    2. Crack the eggs and place in a large mixing bowl. Add the salt, pepper, and onion powder. Beat the egg well until all the ingredients are well incorporated.
    3. Pour the Corned beef and potato casserole that you just made to the mixing bowl with the egg mixture. Stir to mix the ingredients. Make sure that the corned beef has cooled down before you execute this step.
    4. Heat a frying pan. Add 1 tablespoon cooking oil or use a cooking oil spray and spray oil on the pan.
    5. Scoop around ½ to ¾ cups of the corned beef and egg mixture and pour in the pan. Cook for 3 minutes on medium heat.
    6. Use a spatula to flip the omelet and cook the other side for 2 to 3 minutes.
    7. Transfer to a serving plate. Serve.
    8. Share and enjoy!


    Panlasang Pinoy Cookbook

    Download the Free Panlasang Pinoy eCookbook

    The post Corned Beef Omelet appeared first on Panlasang Pinoy.


    Chicken Guisantes Recipe

    $
    0
    0

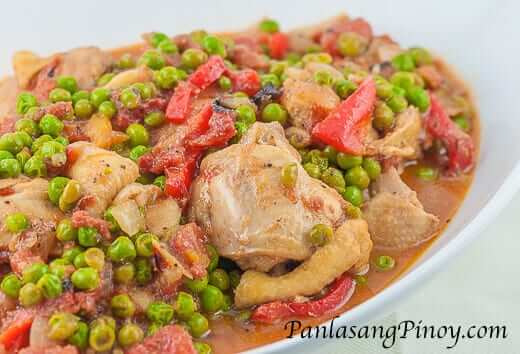
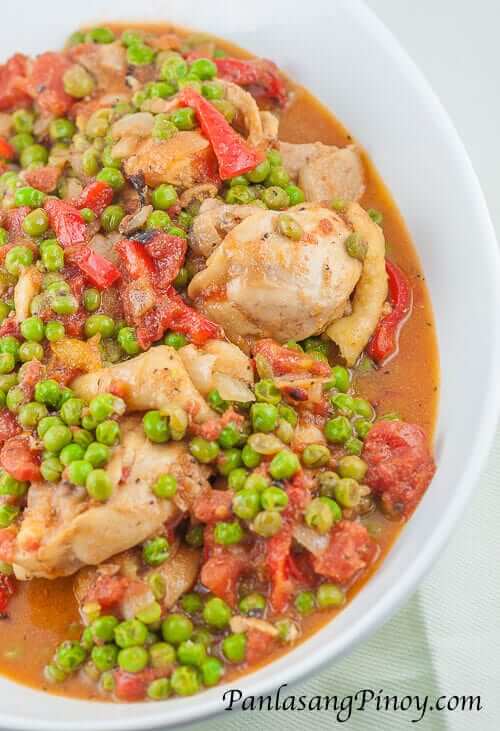
    Chicken Guisantes or Chicken and Green Peas Stew is my go to dish when I want to eat something simple yet satisfying for dinner. I like chicken guisantes because its taste is not overpowering and it is also easy to prepare.

    Chicken Guisantes-2

    I used chicken thigh for this recipe. I got these pre packaged from the supermarket. Aside from thighs, you can also use chicken breast, chicken drumsticks, or cut-up a whole chicken instead.The green peas that I used were frozen. If you are using the same, there is no need to thaw the peas before cooking. You can also use green peas in can (this is what I often use when I was in the Philippines), just make sure to drain the liquid before adding the peas. Roasted capsicum or bell pepper helps improve the overall taste of Chicken Guisantes. However, you can still use fresh bell pepper if you prefer.

    Chicken Guisantes

    Chicken Guisantes is best served with rice: be it white or brown. Oh, one more thing — I know that most of you are religiously following our recipes exactly as they are written. Sometimes it will be better if you deviate by trying to add other ingredients or by using substitute ingredients. For example, you can add potatoes and carrots when making this dish, or perhaps use other types of meat. You will learn a lot from this experience.

    Try this Chicken Guisantes Recipe. enjoy!

    4.0 from 1 reviews
    Chicken Guisantes Recipe
     
    Author: 
    Nutrition Information
    • Serves: 6
    • Serving size: 6
      Prep time: 
      Cook time: 
      Total time: 
      Ingredients
      • 2 lbs. chicken thigh, cut into serving pieces
      • 1½ cup frozen green peas
      • 1 (14 oz.) can diced tomatoes
      • 1½ cup chicken stock or broth
      • 1 medium roasted red bell pepper (capsicum), sliced
      • 1 medium yellow onion, diced
      • 4 cloves garlic, crushed
      • 3 tablespoons cooking oil
      • Salt and pepper to taste
      Instructions
      1. Heat the cooking oil in a cooking pot.
      2. Saute the garlic and onion.
      3. Once the onion becomes soft, add the chicken slices. Cook each side of the chicken until it turns light brown (around 2 minutes). Make sure to turn the chicken over to cook the other side.
      4. Add the diced tomatoes and chicken broth. Stir and let boil. Cover and simmer for 30 to 40 minutes.
      5. Add the green peas. Stir and cook for 3 minutes.
      6. Put-in the red bell pepper. Stir and cook for another 3 minutes.
      7. Add salt and pepper to taste.
      8. Serve. Share and enjoy!


      Watch the cooking video:

      //www.youtube.com/watch?v=NXLlpYuBAGQ

      Panlasang Pinoy Cookbook

      Download the Free Panlasang Pinoy eCookbook

      The post Chicken Guisantes Recipe appeared first on Panlasang Pinoy.

      Smoked Salmon Pasta

      $
      0
      0

      Smoked Salmon Pasta is one of the tastiest pasta dishes that I ever had. It is because of its white sauce, which is composed of Alfredo sauce and chopped smoked salmon. It is heavenly!

      Smoked Salmon Spaghetti

      The thing that I like most about Smoked Salmon Pasta is its flavor – I know that its quite obvious. The other thing that made me love this dish more is its ease in preparation. The spaghetti can easily be cooked by following the instructions in the package, while the sauce can be made using our easy Alfredo sauce recipe; you can also purchase bottled Alfredo sauce from the supermarket if you want it done quickly.As for the salmon, I think that it will be easier if you purchase smoked salmon instead of making one. It will save you a lot of time. I got my smoked salmon online and I really liked it.

      Adding more Parmesan cheese and a bit of red chili flakes makes this Smoked Salmon Pasta a perfect dish, as far as I am concerned. Oh, and I did have this with garlic bread, which I think is awesome.

      Try this Smoked Salmon Pasta Recipe. Enjoy!

      Smoked Salmon Pasta
      Nutrition Information
      • Serves: 4
      • Serving size: 4
        Prep time: 
        Cook time: 
        Total time: 
        Ingredients
        • 1 lb. spaghetti noodles
        • 2 ½ cups Alfredo sauce
        • 10 oz. smoked salmon
        • ¼ cup grated Parmesan cheese
        • ¼ teaspoon red pepper flakes (optional)
        Instructions
        1. Cook the spaghetti noodles according to package instruction. Set aside.
        2. Prepare the Alfredo sauce by following the recipe on the link above. You will need 2 servings of Alfredo sauce for this Smoked Salmon Pasta Recipe.
        3. Chop the smoked salmon into small pieces. Add the chopped salmon in the cooking pot with the Alfredo sauce. Stir and continue to cook for 2 minutes.
        4. Arrange the spaghetti noodles in a serving plate. Pour the smoked salmon Alfredo sauce over the noodles and top with Parmesan cheese and red pepper flakes.
        5. Serve. Share and enjoy!


        Panlasang Pinoy Cookbook

        Download the Free Panlasang Pinoy eCookbook

        The post Smoked Salmon Pasta appeared first on Panlasang Pinoy.

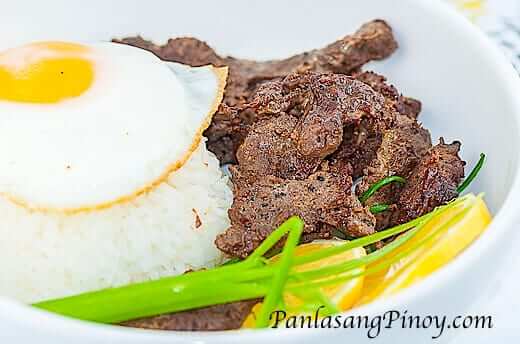
        Tapsilog Recipe

        $
        0
        0

        Tapsilog is a meal composed of Filipino beef jerky, garlic fried rice, and fried egg. The name was derived from the ingredients. The beef jerky is known as “Tapa”, garlic fried rice is called “Sinangag”, and the Filipino term for egg is “Itlog” – thus TapSiLog.

        Tapsilog Recipe

        Tapsilog is a popular meal in the Philippines. The meal is commonly consumed during breakfast. However, it can be consumed anytime of the day or night. due to the existence of several eateries (these are known as Tapsihan or Tapsi House) and/or restaurants serving this food. There are even 24-hour eateries that serve Tapsilog along with other delicious dishes such as Tosilog, Arroz Caldo, and Goto.

        This Tapsilog recipe is a combination of our homemade beef tapa recipe and sinangag recipe. I think that most of you does an awesome job in frying eggs, so I did not cover the “How to fry an egg” part.

        Tapsilog

        I am a big fan of Tapsilog; I think that I mentioned this before in one of my post here. The best Tapsilog – as far as I am concerned – is the one with tapang kabayo (horse meat).

        Try this Tapsilog Recipe. Enjoy!


        Tapsilog Recipe
        Nutrition Information
        • Serves: 4
        • Serving size: 4
          Prep time: 
          Cook time: 
          Total time: 
          Ingredients
          Instructions
          1. Arrange 1 cup sinangag, a quarter of the beef tapa, and piece of fried egg in a plate.
          2. Serve with spiced vinegar and ketchup.
          3. Share and enjoy!


          Panlasang Pinoy Cookbook

          Download the Free Panlasang Pinoy eCookbook

          The post Tapsilog Recipe appeared first on Panlasang Pinoy.

          Pork Dinuguan

          $
          0
          0

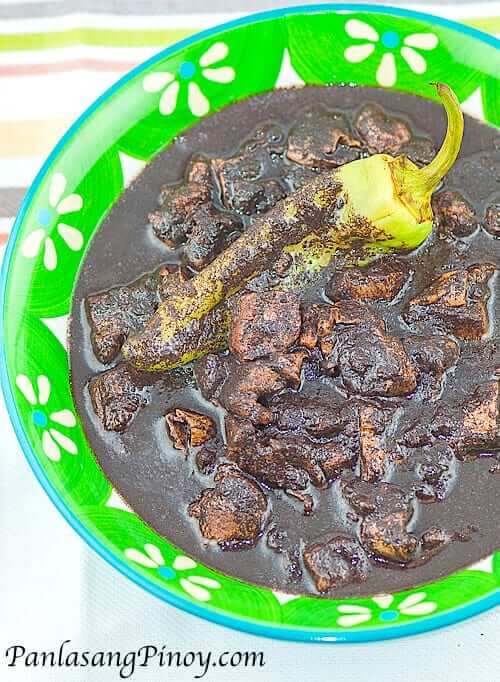
          Pork Dinuguan is a type of stew made from Pork and Pig blood. This Filipino dish might not be for everyone, but those who developed an acquired taste for this dish will agree that they enjoy eating it; some would even recommend to eat dinuguan with Puto — a type of Filipino rice cake which is known as the best pairing for dinuguan.

          Pork Dinuguan

          This Pork Dinuguan recipe is another variation that we have for the same dish. I am using pork and pig large intestines for this recipe. Intestines are known as bituka or isaw in the Philippines. This is an ingredient that needs proper handling and care. Preparing the intestines for consumption is a long and tiring process, but it can be rewarding in the end (if you are a fan of it).

          I usually prepare the intestines by making sure that the inner tubes are all emptied. This is quite a nasty thing to do. As much as possible, try to purchase cleaned intestines. I am priveleged to be within 50 miles from a store that sells clean intestines (yes, I am willing to travel the distance rather than do the cleaning). Since the intestines that I am using are already cleaned, I make sure to boil it with salt, ginger, bay leaves, and whole peppercorn to remove the pungent odor. I usually do this twice to be sure and this also helps tenderize it.

          The steps below should guide you on how to make your own pork dinuguan regardless of your expertise in cooking. If you are just new to cooking, there is a video demonstration at the bottom of this page to visually guide you in every step of the way. Stick with the recipe and video and enjoy the outcome soon.

          Try this Pork Dinuguan Recipe. Cheers!

          Pork Dinuguan
           
          Author: 
          Nutrition Information
          • Serves: 6
          • Serving size: 6
          Prep time: 
          Cook time: 
          Total time: 
          Ingredients
          • 2 lbs. pork shoulder, cubed
          • 1 lb. pork large intestine, cleaned thoroughly (optional)
          • 1 to 1½ cups pig blood
          • 2 to 3 pieces banana pepper
          • 2 thumbs ginger, minced
          • 1 medium yellow onion, diced
          • 6 cloves garlic, crushed and chopped
          • 2 cups water
          • ¾ cup cane or white vinegar
          • 1 piece pork cube (optional)
          • 3 tablespoons cooking oil
          • Salt and ground black pepper to taste
          Instructions
          1. Heat the oil in a cooking pot.
          2. Saute the garlic, onion, and ginger.
          3. Add the intestine. Saute for 3 minutes.
          4. Add the pork. Cook until light brown.
          5. Pour the water in and add the pork cube. Let it boil. Simmer until the pork becomes tender.
          6. Pour the vinegar in the cooking pot. Let it re-boil.
          7. Add the banana peppers. Cook for 3 minutes.
          8. Stir-in the pig blood and make sure to continuously stir during the first minute to avoid the blood from forming. Cook in low to medium heat for 15 to 20 minutes.
          9. Add salt and pepper to taste.
          10. Serve with puto. Share and enjoy!


          Watch the cooking video:

          //www.youtube.com/watch?v=6o0lJvp_dgU

          Panlasang Pinoy Cookbook

          Download the Free Panlasang Pinoy eCookbook

          The post Pork Dinuguan appeared first on Panlasang Pinoy.

          Spinach Lasagne

          $
          0
          0

          Spinach Lasagne is a delicious pasta dish that I enjoy. I mean, who wouldn’t enjoy a rich and tasty pasta dish that is served warm with melted cheeses and white sauce? Every bite will surely put a smile in your face.

          Spinach Lasagna

          This spinach lasagne recipe is simple to prepare. If this is just your first time to try making lasagne (or lasagna), you should not be intimidated. Think of this as a 3 step process: 1 – make the meat sauce, 2 – make the white sauce (also called mornay sauce), 3 – assemble the lasagne and bake. This is very simple and straightforward. If you still have some questions of hesitations, the comment box is below this post. Post a question and I will do my best to reply on a timely manner.

          Just so you know, the meat sauce for this dish is nothing fancy. It can also be used if you want to make spaghetti or macaroni dishes. The mornay sauce, on the other hand, was derived from our yummy baked macaroni recipe. If you have done that before, I am sure that it will look familiar to you.

          I used canned spinach for this recipe. However, you can also use fresh spinach (or baby spinach) – use as many spinach as you want.

          Try this Spinach Lasagne Recipe. Enjoy!


          Spinach Lasagne
           
          Author: 
          Nutrition Information
          • Serves: 6
          • Serving size: 6
          Prep time: 
          Cook time: 
          Total time: 
          Ingredients
          • 1 (9 oz.) box, oven ready lasagne
          • 1½ lb. ground beef
          • 3 oz. (1/2 can) tomato paste
          • 1 medium yellow onion, minced
          • 1 (14 oz) can, chopped spinach
          • ¼ cup unsalted butter
          • 3 tablespoons all-purpose flour
          • 1½ to 2 cups fresh milk
          • ¼ cup grated Parmesan cheese
          • ¾ cup shredded sharp cheddar cheese
          • 3 tablespoons cooking oil
          • Salt and pepper to taste
          Instructions
          1. Prepare the meat sauce by heating the oil in a pan.
          2. Once the oil is hot, saute the onion until it turns soft.
          3. Add the ground beef and cook until it browns.
          4. Pour-in the diced tomatoes. Let boil and simmer for 10 minutes.
          5. Add the tomato paste. Stir and cook until the sauce thickens.
          6. Add salt and pepper to taste. set the meat sauce aside.
          7. Meanwhile, prepare the mornay sauce by melting the butter in a saucepan.
          8. Once the butter melts, gradually add the flour. Stir and cook in low to medium heat until the flour absorbs the butter (around 2 minutes).
          9. Pour the milk in the sauce pan. Stir to dilute the flour and butter.
          10. Add Parmesan cheese. Stir and cook until the sauce thickens. Set aside.
          11. Preheat oven to 350F.
          12. At this point, we have the meat sauce and mornay sauce ready. Assemble the lasagne by arranging the lasagne pieces in a baking pan. Line the oven-ready lasagne at the bottom of the pan. Top the first layer with ⅓ of the meat sauce. Top the meat sauce with spinach. Pour a quarter (1/4) of the mornay sauce over the spinach and spread until the entire pan is covered. Do this step 2 times more so that you will have 3 layers in the pan.
          13. Top the last layer with lasagne pieces then pour and spread the remaining mornay sauce on top. Sprinkle sharp cheddar cheese on top.
          14. Place in the oven and bake for 40 minutes.
          15. Remove from the oven. Serve.
          16. Share and enjoy!


          Panlasang Pinoy Cookbook

          Download the Free Panlasang Pinoy eCookbook

          The post Spinach Lasagne appeared first on Panlasang Pinoy.

          Viewing all 460 articles
          Browse latest View live